




















KP2671KATRW KitchenAid Mixer - Instructions
Keep searches simple. Use keywords, e.g. "leaking", "pump", "broken" or "fit".
missing thumb screw on my kitchen aide mixer
Dear Customer Service,
I just would like to express my gratitude for your wonderful service. I received my part for my Kitchen aide mixer on time as promised. The part fit perfectly. Thanks you PartSelect for being there.
What a Great Site!
A Happy Customer!
I just would like to express my gratitude for your wonderful service. I received my part for my Kitchen aide mixer on time as promised. The part fit perfectly. Thanks you PartSelect for being there.
What a Great Site!
A Happy Customer!
Parts Used:

-
Mary Ann from Gilbertsville, PA
-
Difficulty Level:Really Easy
-
Total Repair Time:Less than 15 mins
2 of 6 people
found this instruction helpful.
Was this instruction helpful to you?
Thank you for voting!
thumb screw broke
-
Ethel from Crystal River, FL
-
Difficulty Level:Really Easy
-
Total Repair Time:Less than 15 mins
0 of 1 people
found this instruction helpful.
Was this instruction helpful to you?
Thank you for voting!
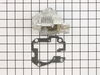
Plastic gear cover broken
Removed plastic cover, removed grease and put in new mixer and put new cover back on.
Parts Used:
-
CHRISTINA from NEW GLOUCESTER, ME
-
Difficulty Level:Easy
-
Total Repair Time:15 - 30 mins
-
Tools:Nutdriver, Screw drivers
0 of 1 people
found this instruction helpful.
Was this instruction helpful to you?
Thank you for voting!
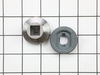
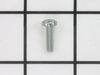
Gears ground when roller attachment applied.
Took screw off band. This revealed 4 screws to upper housing. Removed 4 screws and lifted upper housing off . To my surprise I found no screws holding gear housing cover in place. You could tell they were there at one time. Should be 4. I removed cover disasembled what was left of gears. Cleaned old grease ordered parts. Thought since there was only 1 screw on diagram it would ship 4. No big deal. After recieving parts further inspection revealed no screws holding motor in place. This blows me away. Anyway off to local hardware store for more screws. Got home slapped it togethere in 10 minutes. Ordered this off TV about 6 years ago. They must have had it in for repair and forgot to put it back together. All that aside it runs better than ever. Thanks much Michael
Parts Used:
-
Michael from Tomahawk, WI
-
Difficulty Level:Really Easy
-
Total Repair Time:15 - 30 mins
-
Tools:Pliers, Screw drivers, Wrench (Adjustable)
0 of 2 people
found this instruction helpful.
Was this instruction helpful to you?
Thank you for voting!
Gears had stripped due to housing crack and movement
-
Judith from Turtle Lake, WI
-
Difficulty Level:Really Easy
-
Total Repair Time:15 - 30 mins
-
Tools:Screw drivers, Wrench (Adjustable)
0 of 1 people
found this instruction helpful.
Was this instruction helpful to you?
Thank you for voting!
attachment driver will not work
Remove screw at back of mixer,remove metal sleve and remove three more screws (front and sides. remove screws and plastic cap of gear box then remove holding ring in post and remove damaged ring installation is opposed of removal.
Parts Used:
-
jose from denver, CO
-
Difficulty Level:Really Easy
-
Total Repair Time:15 - 30 mins
-
Tools:Pliers, Screw drivers
0 of 1 people
found this instruction helpful.
Was this instruction helpful to you?
Thank you for voting!
Replacement of digital window in oven unit
I did not do the repair myself, however, I contacted a suggested service company which in turn was a company I had used before when I had problems with my JenAir microwave. Excellent service, prompt and very professional. Thank you JenAir for your assistance in providing promptly the parts needed to complete this job.
Parts Used:
-
Bedalia from Rialto, CA
-
Difficulty Level:Really Easy
-
Total Repair Time:30 - 60 mins
-
Tools:Screw drivers, Wrench (Adjustable)
0 of 1 people
found this instruction helpful.
Was this instruction helpful to you?
Thank you for voting!
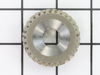
mixer beater quite
disassembled unit gear head and replaced broken part, then reassembled
Parts Used:
-
Kenneth from Brookings, OR
-
Difficulty Level:Really Easy
-
Total Repair Time:1- 2 hours
-
Tools:Screw drivers
0 of 3 people
found this instruction helpful.
Was this instruction helpful to you?
Thank you for voting!
Stripped worm follower gear.
Watched the video. Ordered the parts. Watched the video again. Replaced the worm follower gear and bearings on the worm gear. Added grease. Installed new gear housing. Put it all back together and tested. Works like new. Now I get cakes and goodies again and have a happy wife who thinks I'm super handyman. Thanks
Parts Used:
-
Johnna from Childress, TX
-
Difficulty Level:Really Easy
-
Total Repair Time:1- 2 hours
-
Tools:Screw drivers
Was this instruction helpful to you?
Thank you for voting!
Stripped worm gear and broken lower gear housing
Worm gear strips usually after the lower gear housing breaks. Tore down cleaned grease and shrapnel out, replace stripped worm gear and lower housing. It's convenient that the lower housing plate comes assembled with new bushing and gear. This is now the third one of these expensive mixers I have repaired, word got out that I fix them, and this is a very common problem. Repairs have been for friends and Church, so I don't charge any labor, it's kind of fun, messy, but fun. Note to Kitchen Aid: Please strengthen lower gear case.
Parts Used:
-
Andrew from Odessa, FL
-
Difficulty Level:Easy
-
Total Repair Time:1- 2 hours
-
Tools:Nutdriver, Pliers, Screw drivers, Socket set, Wrench set
Was this instruction helpful to you?
Thank you for voting!
Worm Gear teeth was stripped
Removed top cover, remove snap-ring on shaft, slide top gear and worm gear off. Clean all the grease out and clean parts. Installed new worm gear and parts. Repacked with new grease, careful not to much, leaving room for expansion.
Parts Used:

-
Ronny from Clearwater, KS
-
Difficulty Level:Easy
-
Total Repair Time:1- 2 hours
-
Tools:Screw drivers
Was this instruction helpful to you?
Thank you for voting!
broken bevel gear
After removing the single philips screw from the back of the unit, the metal band will come off. Under the band you will find 4 phillips screws. Remove them to get the cover off of the unit. Once open, access the gear box in front by removing the four philips screws holding the gear box cover down. Remove any old grease from the unit as there may be pieces of broken gear in the grease that will damage the new gears. I used a small plastic scraper, some paper towel, rubber gloves and q-tips to get all of the grease out. Try to make a note of how much grease you removed and from where, so that you can replace about that amount later and in the correct spots. To remove the bevel gear remove the split ring holding the bevel gear down on the vertical drive shaft. Once the ring is removed it will be easier to move the bevel gear, but I found that it was somewhat press fitted on the shaft and I needed to use some channel locks to gently rock it back and forth to get it moving up the shaft. I then, also, (since I was in there) replaced the worm gear underneath the bevel gear by tapping the retaining pin out of the hole above the worm gear and then tapping down on the vertical drive shaft with a hammer to push the planetary gear down and out of the unit. Once free, I then regreased the planetary and reinserted it in the holder taking care to align the gears on the shaft and the panetary housing. Then I tapped the worm gear all the way down to the base taking care to keep the recessed notch on the top of the worm gear parallel to the pin hole above it. Then I replace then pin and tapped the bevel gear down onto the top of the worm gear and replaced the split ring. Realigned all of the horizontal and vertical gears and then repacked the grease. Closed up the gear box and test ran the unit on low. THen closed up the rest of the unit in reverse of opening.
Parts Used:
-
Jeffrey from Highland, IN
-
Difficulty Level:A Bit Difficult
-
Total Repair Time:1- 2 hours
-
Tools:Pliers, Screw drivers
Was this instruction helpful to you?
Thank you for voting!
The motor was running but the mixer wasn't turning
After trying to make a batch of heavy frosting, my KitchenAid mixer final stopped turning. After watching a video of how to change the grease in a similar model on PartsSelect and seeing it wasn't that hard to take apart, I decided to give it a try myself. Removing the cover exposed a completely worn gear drive. Luckily, it was easy to determine which parts needed replacing and PartSelect sent them in no time. Once I put everything back together, it sounded terrible which was pretty tough to take. As it turned out, the problem was flecks of metal from the gear were still in the grease and were getting caught in the mechanism. Once I thoroughly cleaned all the grease out and gave it some fresh grease the machine worked great. Much better than before. I only wish I had swapped the grease out at the same time. Thank you PartsSelect for saving me hundreds of dollars on a new machine!
Parts Used:

-
Steve from Cornwall, VT
-
Difficulty Level:A Bit Difficult
-
Total Repair Time:1- 2 hours
-
Tools:Pliers, Screw drivers
Was this instruction helpful to you?
Thank you for voting!
Gears were slipping
Noticed worm gear was worn out, ordered the parts, it came very next day. On YouTube instructions were very easy to follow. Important point to remember,I washed the parts in water with chlorine in it. Retaking ring was tough to take out, as I did not have parrot beak plier, could not find it at Home Depot or Lows. Putting the retaining ring I used circular nut driver, to press it on the shaft to slide down by hammering it. While assembling follow the instruction step by step from the you tube. Machine works smoothly. Performing well. Thanks to part select, excellent web page, efficient delivery. I would recommend them to all.
Parts Used:

-
fatema from dublin, CA
-
Difficulty Level:Really Easy
-
Total Repair Time:1- 2 hours
-
Tools:Pliers, Screw drivers
Was this instruction helpful to you?
Thank you for voting!
Stripped worm gear
Used the meat grinder attachment, with the retaining ring too tight for the motor to turn the augur, so a gear stripped and the mixer would not run. I opened the mixer top, removed the transmission cover, removed enough grease to diagnose the problem (6 teeth stripped off the steel worm gear). I ordered a replacement steel worm gear and, while I was at it, a new retaining ring, bevel gear, retaining pin and the large planetary gear, as I could not tell the condition of these until I disassembled the whole gear train. I then removed the gear train components (needed a snap ring pliers to remove the retaining ring -- I don't recommend trying to remove it with an y other tool), washed them in acetone, cleaned out the transmission case and went over it with a magnet to get stray gear tooth remnants, replaced the worm and bevel gears and reassembled, using the original planetary gear, retaining pin and retaining ring. Filled the bottom of the transmission with planetary grease first, then, once the gear train had been replaced, slathered a big pile of grease over it, replaced the transmission cover. The machine then ran perfectly, so I replaced the mixer's top cover and decorative band and was back in business mixing with it about 30 minutes after cleaning the last of the grease off my hands. I should mention, I used a LOT of paper towels for this job. This was a fun job and I was sorry that it was so easy to do, as I enjoy working with gears and grease.
Parts Used:

-
OLIVER from ANCHORAGE, AK
-
Difficulty Level:Really Easy
-
Total Repair Time:30 - 60 mins
-
Tools:Screw drivers
Was this instruction helpful to you?
Thank you for voting!