




















KN15E1XTC0 KitchenAid Mixer - Instructions
Keep searches simple. Use keywords, e.g. "leaking", "pump", "broken" or "fit".
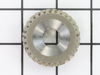
Worn gear
Remover screws from top. Used snap ring pliers to remove snap ring replaced gear and reassemblied.
Parts Used:

-
Mike from DEFIANCE, OH
-
Difficulty Level:Really Easy
-
Total Repair Time:15 - 30 mins
-
Tools:Screw drivers
1 person
found this instruction helpful.
Was this instruction helpful to you?
Thank you for voting!
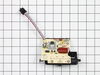
Speed control panel was replaced
Just followed the video.amazing!!got my kitchen aid back.
Parts Used:
-
Madeleine from NEW YORK, NY
-
Difficulty Level:Really Easy
-
Total Repair Time:15 - 30 mins
-
Tools:Nutdriver
1 person
found this instruction helpful.
Was this instruction helpful to you?
Thank you for voting!
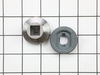
Broken gears
-
walter from SOUTH ELGIN, IL
-
Difficulty Level:Very Easy
-
Total Repair Time:15 - 30 mins
-
Tools:Screw drivers
1 person
found this instruction helpful.
Was this instruction helpful to you?
Thank you for voting!
Motor knob
Watched utube
video how to repair and ordered part, easy
video how to repair and ordered part, easy
Parts Used:
-
Susan from KIRBYVILLE, TX
-
Difficulty Level:Very Easy
-
Total Repair Time:Less than 15 mins
-
Tools:Screw drivers
1 person
found this instruction helpful.
Was this instruction helpful to you?
Thank you for voting!
The white enamel coating was breaking off the mixer beater. There was a scrapimg noise when the beater was in motion.
I simply inserted the new beater into the mixer to see if it scraped the sides of the bowl. It fit perfectly and didn't scrape the bowl like the old one did.
Parts Used:

-
Carolyn from LEXINGTON, SC
-
Difficulty Level:Very Easy
-
Total Repair Time:Less than 15 mins
1 person
found this instruction helpful.
Was this instruction helpful to you?
Thank you for voting!
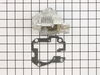
Gear housing cracked, gear had nic in it
Removed old housing, pulled spring clip, slide on new gear and replaced clip. Put on new gasket and housing. Replaced outer cover. Done.
Parts Used:
-
Bob from ELIZABETHTOWN, KY
-
Difficulty Level:Very Easy
-
Total Repair Time:Less than 15 mins
-
Tools:Pliers
1 person
found this instruction helpful.
Was this instruction helpful to you?
Thank you for voting!
Splash from K45 KitchenAid Mixer Bowl
The shield works sufficiently. Note that the shield is not a continuous circle as shown in the picture. This actually can be an asset because it can be installed or disassembled without stopping the mixer of having to lift the head while running.
Parts Used:

-
Mark from LEXINGTON, SC
-
Difficulty Level:Very Easy
-
Total Repair Time:Less than 15 mins
1 person
found this instruction helpful.
Was this instruction helpful to you?
Thank you for voting!
motor would surge after a few moments of running then die.
so easy to remove the switch. I first marked the wires, 1-2-3-4 and then removed them from the old switch. removed the old switch and replaced with the new one and plugged in the wires as per markings. tried it out before replacing the top and it works perfectly. no longer timid about effecting repairs on my own. the diagrams on the website were a great help. this is a great company to do business with. part was here in 3 days.
Parts Used:
-
Fred from Coeur d'alene, ID
-
Difficulty Level:Really Easy
-
Total Repair Time:Less than 15 mins
-
Tools:Pliers, Screw drivers
2 of 4 people
found this instruction helpful.
Was this instruction helpful to you?
Thank you for voting!
Speed control switch went out
Unplugged wires from old switch, plugged them into the new switch. The new Switch have the mounting brackets in different places from the old one. Be sure to match up the numbers by the posts with the correct wires
Parts Used:
-
Joyce from STRAWBERRY PT, IA
-
Difficulty Level:Really Easy
-
Total Repair Time:Less than 15 mins
-
Tools:Pliers
1 person
found this instruction helpful.
Was this instruction helpful to you?
Thank you for voting!
Bad speed control
Thank goodness for YouTube. Pretty much followed the process of taking it out. Was easy, but having a video made it a bit simpler.
Parts Used:
-
Thomas from LILBURN, GA
-
Difficulty Level:Easy
-
Total Repair Time:Less than 15 mins
-
Tools:Screw drivers
1 person
found this instruction helpful.
Was this instruction helpful to you?
Thank you for voting!
Mixer speed control was not connecting properly.
Found a kitchen aid repair video. Found your site for the part I needed. The connections were not like what the video showed but there were enough connector symbols that I was able to understand where they needed to connect. Marking the connections helped for making the new connections when the new circuit board came.
Parts Used:
-
Eileen from GREEN BAY, WI
-
Difficulty Level:Really Easy
-
Total Repair Time:Less than 15 mins
-
Tools:Pliers, Screw drivers
1 person
found this instruction helpful.
Was this instruction helpful to you?
Thank you for voting!
The stand mixer would not rotate at low speed. Upon disassembly found one of the two alignment pins of the upper gear case broken.
1. Removed the decorative band then the upper motor cover.
2. Removed the upper gear case cover. Found one of the two alignment pins broken.
3. Inspected gears.
4. Cleaned out old grease.
5. Repacked with new food grade grease.
6. Reassembled.
2. Removed the upper gear case cover. Found one of the two alignment pins broken.
3. Inspected gears.
4. Cleaned out old grease.
5. Repacked with new food grade grease.
6. Reassembled.
Parts Used:
-
Russell from NEW LONDON, CT
-
Difficulty Level:Really Easy
-
Total Repair Time:30 - 60 mins
-
Tools:Screw drivers
1 person
found this instruction helpful.
Was this instruction helpful to you?
Thank you for voting!
I stripped a couple of gears due with a batch of very hard dough
Taking apart the machine is really easy. I was worried the grease would have spilled all over the places, but when the machine is cool, the grease is solid, so no spill. Replace the parts is quite straightforward, and there are plenty of tutorials on line. The only tip is that the grease used by KitchenAid is dark, and it is not easy to see all the small parts when you take the gearbox apart, so pay attention at what you do and at what you throw away... when I got to put it back together I missed a special concave washer which must have been trapped in the grease. Other than that... it has been an easy repair, the mixer is back up and running and I saved a ton on $$$
Parts Used:

-
cosimo from EL CERRITO, CA
-
Difficulty Level:Really Easy
-
Total Repair Time:1- 2 hours
-
Tools:Screw drivers, Socket set
1 person
found this instruction helpful.
Was this instruction helpful to you?
Thank you for voting!
Gear Stripped was trying to replace
Could not get it properly installed. Had to take to a repair center for completion.
Parts Used:
-
Stuart from Pittsford, NY
-
Difficulty Level:Difficult
-
Total Repair Time:1- 2 hours
-
Tools:Screw drivers
2 of 4 people
found this instruction helpful.
Was this instruction helpful to you?
Thank you for voting!
Mixer changed speeds irregularly. Also, the plastic gear housing was cracked in two places.
I replaced the electronic speed control and the plastic housing with a new metal housing, both fitting perfectly and easily installed. Excellent replacement parts.
Parts Used:
-
Jack from Antioch, TN
-
Difficulty Level:Really Easy
-
Total Repair Time:30 - 60 mins
-
Tools:Screw drivers
1 of 2 people
found this instruction helpful.
Was this instruction helpful to you?
Thank you for voting!