




















KL26M1XOB5 KitchenAid Mixer - Instructions
Keep searches simple. Use keywords, e.g. "leaking", "pump", "broken" or "fit".
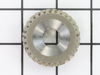
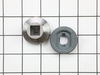
bevel gear was stripped
opened the mixer.. all screws in kitchaid are the same so not to worry... opened up and replaced the gears... and put it back together... diagram helped in that front and rear bearings of connecting gear are the same # on diagram it is easy to confuse when you put it back together, but the item number and description of each helped make sure it was in the right place. Otherwise... time to fix would have been less....
Parts Used:


-
Mark from Florence, OR
-
Difficulty Level:Really Easy
-
Total Repair Time:15 - 30 mins
-
Tools:Pliers, Screw drivers
Was this instruction helpful to you?
Thank you for voting!
stripped gear.
took mixer cover off, took gear box cover off, removed gears, replaced gears, replaced covers, made cookies, no problem!!
Parts Used:
-
Craig from Cawker City, KS
-
Difficulty Level:Really Easy
-
Total Repair Time:15 - 30 mins
-
Tools:Screw drivers
Was this instruction helpful to you?
Thank you for voting!
Mixer would not fully rotate under any load
Removing the cover of the mixers "guts", it was immediate evident the a major gear had lost a few of its "teeth". Parts Select clearly offered the required part of this $300 mixer for a favorable price. I was fully impressed that it arrived within 4 days or my ordering the part. I simply exchanged the damaged gear and restored the mixer to service and I'm fully impressed with the Parts Select Company for their swift response to my needs.
Parts Used:
-
Rick from Warwick, RI
-
Difficulty Level:Really Easy
-
Total Repair Time:15 - 30 mins
-
Tools:Pliers, Screw drivers
Was this instruction helpful to you?
Thank you for voting!
worn teeth on worm gear. beater not turning
took off the strap band around mixer, took off the cover (4 screws, took off gear cover (4 screws) took off the retaining ring(used pliers and screwdriver) took off upper gear, took out retaining pin, took off lower gear (becareful to grab the planetary assembly as it will fall out after you take out the retaining pin) cleaned out all of the gear grease (the teeth that were missing were in it. replaced the planetary assembly, lower gear and retaining pin. replaced the upper gear, replaced the retaining ring (used screwdriver and hammer. you have to spread the ring with end of screw driver so it will fit on the shaft then tap lightly with screwdriver and hammer to get it down to the keyway for the ring.) replaced the gear grease with NEW grease, reaplaced the gear cover, replaced the mixer cover, replaced the strap band and plugged it in to test it. IT was quieter than before and works great. i spent less than $30 to repair my 10 year old, out of warranty, Kitchen Aid Mixer. much better than the $32.00 to ship it to factory repair shop and get an estimate to repair. I needed it to make a cake for my nephews wedding. I had my parts in 2 DAYS!!! it was a great experience over all.
Parts Used:
-
Joanna from Tower Hill, IL
-
Difficulty Level:Really Easy
-
Total Repair Time:15 - 30 mins
-
Tools:Pliers, Screw drivers
Was this instruction helpful to you?
Thank you for voting!
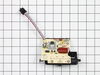
Mixer is running in high speed then shut down.
I replaced the switch component twice and I still have the same problem. I will purchase a new motor now see if that works? I'll post what happens thanks
Parts Used:
-
Scott from Farmingville, NY
-
Difficulty Level:Really Easy
-
Total Repair Time:15 - 30 mins
-
Tools:Screw drivers
Was this instruction helpful to you?
Thank you for voting!
Variable speed switch replacement
Easy repair that replaced the variable speed switch. The broken switch only ran at high speed. To replace the mixer would cost at least $500. The new switch was $45 and was an easy install. I marked the four electrical leads with a Sharpie and loosened the two screws holding the switch. The repair was super easy. It was like heling an old friend recover from an illness.
Parts Used:
-
Robert from Little Compton, RI
-
Difficulty Level:Really Easy
-
Total Repair Time:15 - 30 mins
-
Tools:Screw drivers, Wrench set
Was this instruction helpful to you?
Thank you for voting!
Mixer stopped working and gave grinding sounds
Following Replacement Part Youtube instructions, I disassembled the mixer and found what caused the sounds and prevented the mixer from operating. The worm follower gear had been ground down by the worm gear. I found that the shaft from the planetary gear had not been adequately greased and siezed preventing the worm follower gear from turning. The worm gear is obviously made of harder material and thus, was able to wear away the follower. I appreciate the your help which saved having to replace a perfectly good/expensive mixer. Thanks.
Parts Used:
-
brian from carlsbad, CA
-
Difficulty Level:Easy
-
Total Repair Time:15 - 30 mins
-
Tools:Screw drivers
Was this instruction helpful to you?
Thank you for voting!
no power and have bad noise
remove the cover,take out four screw from gear box,remove the gear box,clean all gears,then you see damage gear,replace it ,install new grease.
Parts Used:

-
Man fui from East Brunswick, NJ
-
Difficulty Level:Easy
-
Total Repair Time:15 - 30 mins
-
Tools:Pliers, Screw drivers
Was this instruction helpful to you?
Thank you for voting!
Stripped worm gear
Looked at the schematic for this model on Parts Select. Removed Aluminum band screw, removed the 4 screws that hold the top of the mixer. Lifted the top off. Removed 4 screws and lifted the gear case. Removed snap ring and took off tapered gear. Removed pin and removed worm gear. Picked out the metal, in the grease, from the old worm gear, using a magnet then inserted new worm gear and put it back together in reverse order. There was plenty of grease and didn't need to add any.
Parts Used:
-
Johna from Ketchikan, AK
-
Difficulty Level:Easy
-
Total Repair Time:15 - 30 mins
-
Tools:Pliers, Screw drivers
Was this instruction helpful to you?
Thank you for voting!
Speed control stuck from sugar/flour build up on slide
Took housing off, removed computer board and disconnected speed control assembly from board. Soaked plastic slide in hot water and freed up mech. Discovered a crack in plastic slide from forcing it. Ordered new assembly and installed. TIP: Keep slide clean of substances that will jam it by cleaning occasionally with water. For a complete cleaning you will have to remove it. Total of 6 easy to reach screws.
Parts Used:
-
David from Dekalb, IL
-
Difficulty Level:Easy
-
Total Repair Time:15 - 30 mins
-
Tools:Screw drivers
Was this instruction helpful to you?
Thank you for voting!
Gears worn and Speed control sensor
I have to thank you at Partselect.com. You happen to help me help other people. Now I have several people bringing me their Kitchenaids to me instead of sending them in. I replaced two worm gears on a Kitchenaid 6 and the Hall sensor on a Kitchenaid 5. Very easy to do. Next week I have another Kitchenaid 5 to replace the motor on. Thankyou again for having the parts I need
Parts Used:

-
robert from san antonio, TX
-
Difficulty Level:Easy
-
Total Repair Time:15 - 30 mins
-
Tools:Pliers, Screw drivers
Was this instruction helpful to you?
Thank you for voting!
Broken Part to KitchenAid Mixer
Great experience. Reasonable cost. Quick delivery. Would certainly use PartSelect again
Parts Used:

-
PJ from Rome, GA
-
Difficulty Level:Really Easy
-
Total Repair Time:Less than 15 mins
Was this instruction helpful to you?
Thank you for voting!
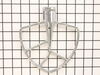
missing part
-
Bill from Charlotte, NC
-
Difficulty Level:Really Easy
-
Total Repair Time:Less than 15 mins
Was this instruction helpful to you?
Thank you for voting!
worn gear causing slippage under load
removed cover. Removed cover over gears. Used lock washer pliers to remove lock washer. Took out gears. Cleaned metal shavings from old gear and grease. Reassembled using new gear. Took about 15 minutes and saved $$ over sending mixer out for the repair.
Parts Used:
-
Rodney from Thornton, NH
-
Difficulty Level:Easy
-
Total Repair Time:Less than 15 mins
-
Tools:Screw drivers
Was this instruction helpful to you?
Thank you for voting!
Mixer wouldn't slow down
I unplugged the mixer, then I removed the Phillips screw holding the beauty ring, then removed the 4 screws that hold the motor housing together. I removed the housing top, and unscrewed the speed control switch. I marked each one of the connectors of the switch (there are 4) 1-4 then disconnected the speed sensor from the switch and the motor. Replaced the new sensor and connected that to the new speed control switch. reconnected the connectors to the terminals I took them from ( 1 - 4 ) screwed it into place. replaced the top motor housing, I screwed that back with the four screws. replaced the beauty ring and screw. plugged it in and tested it and it was like new
Parts Used:
-
Sal from STATEN ISLAND, NY
-
Difficulty Level:Easy
-
Total Repair Time:Less than 15 mins
-
Tools:Screw drivers
Was this instruction helpful to you?
Thank you for voting!