




















KG25H0XOB5 KitchenAid Mixer - Instructions
Keep searches simple. Use keywords, e.g. "leaking", "pump", "broken" or "fit".
Replacement of digital window in oven unit
I did not do the repair myself, however, I contacted a suggested service company which in turn was a company I had used before when I had problems with my JenAir microwave. Excellent service, prompt and very professional. Thank you JenAir for your assistance in providing promptly the parts needed to complete this job.
Parts Used:

-
Bedalia from Rialto, CA
-
Difficulty Level:Really Easy
-
Total Repair Time:30 - 60 mins
-
Tools:Screw drivers, Wrench (Adjustable)
0 of 1 people
found this instruction helpful.
Was this instruction helpful to you?
Thank you for voting!
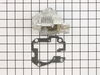
Plastic gear cover broken
Removed plastic cover, removed grease and put in new mixer and put new cover back on.
Parts Used:
-
CHRISTINA from NEW GLOUCESTER, ME
-
Difficulty Level:Easy
-
Total Repair Time:15 - 30 mins
-
Tools:Nutdriver, Screw drivers
0 of 1 people
found this instruction helpful.
Was this instruction helpful to you?
Thank you for voting!
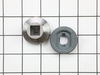
Grinding sound
Replaced cracked plastic gearcase/transmission with new medal one and replaced hub bevel gear attachment, bevel gear and gasket.
Parts Used:

-
Mary from York, PA
-
Difficulty Level:Really Easy
-
Total Repair Time:Less than 15 mins
-
Tools:Screw drivers
0 of 1 people
found this instruction helpful.
Was this instruction helpful to you?
Thank you for voting!
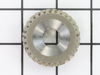
mixer beater quite
disassembled unit gear head and replaced broken part, then reassembled
Parts Used:
-
Kenneth from Brookings, OR
-
Difficulty Level:Really Easy
-
Total Repair Time:1- 2 hours
-
Tools:Screw drivers
0 of 3 people
found this instruction helpful.
Was this instruction helpful to you?
Thank you for voting!
Stripped worm follower gear.
Watched the video. Ordered the parts. Watched the video again. Replaced the worm follower gear and bearings on the worm gear. Added grease. Installed new gear housing. Put it all back together and tested. Works like new. Now I get cakes and goodies again and have a happy wife who thinks I'm super handyman. Thanks
Parts Used:
-
Johnna from Childress, TX
-
Difficulty Level:Really Easy
-
Total Repair Time:1- 2 hours
-
Tools:Screw drivers
Was this instruction helpful to you?
Thank you for voting!
Gears were slipping
Noticed worm gear was worn out, ordered the parts, it came very next day. On YouTube instructions were very easy to follow. Important point to remember,I washed the parts in water with chlorine in it. Retaking ring was tough to take out, as I did not have parrot beak plier, could not find it at Home Depot or Lows. Putting the retaining ring I used circular nut driver, to press it on the shaft to slide down by hammering it. While assembling follow the instruction step by step from the you tube. Machine works smoothly. Performing well. Thanks to part select, excellent web page, efficient delivery. I would recommend them to all.
Parts Used:


-
fatema from dublin, CA
-
Difficulty Level:Really Easy
-
Total Repair Time:1- 2 hours
-
Tools:Pliers, Screw drivers
Was this instruction helpful to you?
Thank you for voting!
Clanking noise, motor strain/ ultimate burn out.
First of all, go to the web site and download the schematics of the model #. It will show all the parts and part #s. Secondly watch a u tube video of the actual strip down process of the professional 600 series stand mixer. With this knowledge, do one of two processes 1: strip down the machine, remove the gears and check for defects- order parts. Or 2: replace all the parts( little money) and have a totally refurbished , smooth running mixer. I kept the good used gears for spares. I replaced 90 % of the internals ( including motor) and have a smooth running machine. I initially burned out the mother 2 months after initial purchase, sent it back under warentee, and received it back . Wen I stripped it down 10 years later, there was very little grease in the gear housing. This is what probable ruined the gears. Use plenty of grease in the housing and gears. The grease is one of the most expensive items, but you can't find it anywhere, so order it, along with everything else, from Parts Select.
Parts Used:


-
Francis from Plymouth, MA
-
Difficulty Level:Really Easy
-
Total Repair Time:30 - 60 mins
-
Tools:Screw drivers
Was this instruction helpful to you?
Thank you for voting!
Stripped worm gear
Used the meat grinder attachment, with the retaining ring too tight for the motor to turn the augur, so a gear stripped and the mixer would not run. I opened the mixer top, removed the transmission cover, removed enough grease to diagnose the problem (6 teeth stripped off the steel worm gear). I ordered a replacement steel worm gear and, while I was at it, a new retaining ring, bevel gear, retaining pin and the large planetary gear, as I could not tell the condition of these until I disassembled the whole gear train. I then removed the gear train components (needed a snap ring pliers to remove the retaining ring -- I don't recommend trying to remove it with an y other tool), washed them in acetone, cleaned out the transmission case and went over it with a magnet to get stray gear tooth remnants, replaced the worm and bevel gears and reassembled, using the original planetary gear, retaining pin and retaining ring. Filled the bottom of the transmission with planetary grease first, then, once the gear train had been replaced, slathered a big pile of grease over it, replaced the transmission cover. The machine then ran perfectly, so I replaced the mixer's top cover and decorative band and was back in business mixing with it about 30 minutes after cleaning the last of the grease off my hands. I should mention, I used a LOT of paper towels for this job. This was a fun job and I was sorry that it was so easy to do, as I enjoy working with gears and grease.
Parts Used:


-
OLIVER from ANCHORAGE, AK
-
Difficulty Level:Really Easy
-
Total Repair Time:30 - 60 mins
-
Tools:Screw drivers
Was this instruction helpful to you?
Thank you for voting!
main shaft for beatter slipped way down
-
John from Kaukauna, WI
-
Difficulty Level:Really Easy
-
Total Repair Time:30 - 60 mins
-
Tools:Screw drivers
Was this instruction helpful to you?
Thank you for voting!
Stripped Worm Gear
Had to repalce all the parts due to several issues caused the main problem. I am a mechanic by trade so it was easy to repair.
Parts Used:


-
John from Ewing, NJ
-
Difficulty Level:Easy
-
Total Repair Time:30 - 60 mins
Was this instruction helpful to you?
Thank you for voting!
Mixer stopped mixing
Remove Beaty band, one screw. Remove four screws holding top. Remove worm gear, by simply lifting it out. Removed all grease. Repacked with fresh grease. Take out gear case/ transmission bearing, clear all old grease, repack with new grease. Install into new gear case housing. Assemble, and Repack new worm gear and front and rear worm gear bearings, utilize old washers (2), and one small ball bearing washer. Rotate worn gear and bushing to spread the new grease throughout the gears. Replace top cover, four screws . Replace beauty ring, one screw. Run unit for 20 to 30 seconds, under no load to distribute the new grease. Works like a charm. 45 minutes to one hour. To complete.
Parts Used:
-
Francis from Pleasant Valley, NY
-
Difficulty Level:Easy
-
Total Repair Time:30 - 60 mins
-
Tools:Pliers, Screw drivers
Was this instruction helpful to you?
Thank you for voting!
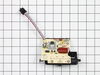
$500 mixer had only 1 yr. warranty
___ Remove silver decorative band/1 screw ___ Remove top of mixer/4 screws ___ Remove circuit board/2 screws ___ remove 5 wires from ckt. bd. (be sure where they go) ___ Install new ckt. bd. with proper electircal connections ___ test mixer/OK ___ Reassemble & retest/OK
Parts Used:
-
wilfred from north yarmouth, ME
-
Difficulty Level:A Bit Difficult
-
Total Repair Time:15 - 30 mins
-
Tools:Screw drivers
Was this instruction helpful to you?
Thank you for voting!
Mixer stopped working and gave grinding sounds
Following Replacement Part Youtube instructions, I disassembled the mixer and found what caused the sounds and prevented the mixer from operating. The worm follower gear had been ground down by the worm gear. I found that the shaft from the planetary gear had not been adequately greased and siezed preventing the worm follower gear from turning. The worm gear is obviously made of harder material and thus, was able to wear away the follower. I appreciate the your help which saved having to replace a perfectly good/expensive mixer. Thanks.
Parts Used:
-
brian from carlsbad, CA
-
Difficulty Level:Easy
-
Total Repair Time:15 - 30 mins
-
Tools:Screw drivers
Was this instruction helpful to you?
Thank you for voting!
Stripped worm gear
Looked at the schematic for this model on Parts Select. Removed Aluminum band screw, removed the 4 screws that hold the top of the mixer. Lifted the top off. Removed 4 screws and lifted the gear case. Removed snap ring and took off tapered gear. Removed pin and removed worm gear. Picked out the metal, in the grease, from the old worm gear, using a magnet then inserted new worm gear and put it back together in reverse order. There was plenty of grease and didn't need to add any.
Parts Used:
-
Johna from Ketchikan, AK
-
Difficulty Level:Easy
-
Total Repair Time:15 - 30 mins
-
Tools:Pliers, Screw drivers
Was this instruction helpful to you?
Thank you for voting!
Speed control stuck from sugar/flour build up on slide
Took housing off, removed computer board and disconnected speed control assembly from board. Soaked plastic slide in hot water and freed up mech. Discovered a crack in plastic slide from forcing it. Ordered new assembly and installed. TIP: Keep slide clean of substances that will jam it by cleaning occasionally with water. For a complete cleaning you will have to remove it. Total of 6 easy to reach screws.
Parts Used:
-
David from Dekalb, IL
-
Difficulty Level:Easy
-
Total Repair Time:15 - 30 mins
-
Tools:Screw drivers
Was this instruction helpful to you?
Thank you for voting!