




















KFXS25RYMS5 KitchenAid Refrigerator - Instructions
Keep searches simple. Use keywords, e.g. "leaking", "pump", "broken" or "fit".
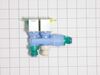
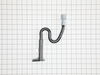
condensation line backing up freezing in freezer compartment. ice maker freezing up into inlet tube.
replaced condensation tube with upgrade thawed freezer compartment so outlet hole was free of ice. that means pulling back compartment open to verify the hole is indeed free of ice. the ice maker on the other hand was freezing up solid, replaced solenoid config. as recommended by the tech. still same scenario. turned freezer temp up as far as it would go past recommended temp, which is 4 above zero F. still same results water cup that feeds the tray freezes solid then water runs all over a freezes until you cant get the tray out to work on it. moral to that story it didn't work.
Parts Used:
-
Scott from KELLOGG, IA
-
Difficulty Level:Really Easy
-
Total Repair Time:15 - 30 mins
1 person
found this instruction helpful.
Was this instruction helpful to you?
Thank you for voting!
Clip cracked on back of kickplate and would not attach.

-
Joseph from MT PROSPECT, IL
-
Difficulty Level:Really Easy
-
Total Repair Time:Less than 15 mins
1 person
found this instruction helpful.
Was this instruction helpful to you?
Thank you for voting!
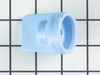
Lost cap for filter
-
Marybeth from VACAVILLE, CA
-
Difficulty Level:Very Easy
-
Total Repair Time:Less than 15 mins
1 person
found this instruction helpful.
Was this instruction helpful to you?
Thank you for voting!
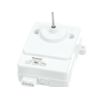
Freezer and refridgerator just stopped working.
The Condenser Fan Motor was already removed due to searching for the problem. The new fan motor looked different from the original but I felt very comfortable that Part Select had sent me the new part showing original part number changing numbers over the years. Simply placed the fan blades onto the new motor lined up 2 of the holes placed screws and tightened then plugged the wire ribbon into the Condensor Fan Motor, plugged in the Refridgerator and it worked beautifully.
The instruction video on the Part Select Web Site made it so incredibly easy to install. Installation took under 3 minutes!
The instruction video on the Part Select Web Site made it so incredibly easy to install. Installation took under 3 minutes!
Parts Used:
-
Daniel F from CALEDONIA, MN
-
Difficulty Level:Very Easy
-
Total Repair Time:Less than 15 mins
-
Tools:Screw drivers
1 person
found this instruction helpful.
Was this instruction helpful to you?
Thank you for voting!
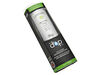
Replace ice & water Filter
Open and remove lower cover on filter holder by opening tabs that hold lower cover and remove lower cover.
Firmly hold back of unit and firmly hold and turn filter in counter clockwise to unlock and remove.
Install new filter by holdin back of unit and install new filter by turning in clock wise direction and then replace lower cover.
Firmly hold back of unit and firmly hold and turn filter in counter clockwise to unlock and remove.
Install new filter by holdin back of unit and install new filter by turning in clock wise direction and then replace lower cover.
Parts Used:
-
James from Whittier, CA
-
Difficulty Level:A Bit Difficult
-
Total Repair Time:Less than 15 mins
3 of 7 people
found this instruction helpful.
Was this instruction helpful to you?
Thank you for voting!
Light out.

-
Carlton from CHICAGO, IL
-
Difficulty Level:Really Easy
-
Total Repair Time:Less than 15 mins
-
Tools:Screw drivers
1 person
found this instruction helpful.
Was this instruction helpful to you?
Thank you for voting!
Low Water Pressure
-
John from Ketchikan, AK
-
Difficulty Level:Really Easy
-
Total Repair Time:Less than 15 mins
3 of 7 people
found this instruction helpful.
Was this instruction helpful to you?
Thank you for voting!
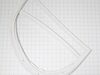
Replaced freezer seal.
When you open the box, have flat place prepared so you can lay the seal down to allow it time to relax. Only handle the seal by the corners. Lay it flat. I used a hair dryer to remove the creases during its time in the box. Keep the hair dryer moving, don't rush this step, take your time and allow the seal to relax on its own. Once it's completely relaxed. Remove the old seal by starting at the corners. No tools needed just keep working around the entire seal. Inspect the seal chanel and clean as needed. Pick up the new seal by the corners and press in place with your fingers, starting at the corners. I found doing the top first then the sides, leaving the bottom to last worked for me. Hope this helps.
Parts Used:
-
Richard from Lawrence, KS
-
Difficulty Level:Really Easy
-
Total Repair Time:30 - 60 mins
1 person
found this instruction helpful.
Was this instruction helpful to you?
Thank you for voting!
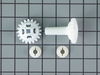
Broken Freezer Drawer Gear
Checked Video online. Had to remove the 2 snap on track/gear covers. Pry out the gear with screwdriver and the gear bearing unit. Align the flat side of the bearing unit and snap in. Position the cut teeth on the gear to match original and snap into the bearing. Insert the connecting rod into the long shaft gear and then push back into the short shaft gear. The video said to remove the drawer front but I did not and don't see that it necessary.
Parts Used:
-
Wayne from Red Banks, MS
-
Difficulty Level:Really Easy
-
Total Repair Time:30 - 60 mins
-
Tools:Screw drivers
1 person
found this instruction helpful.
Was this instruction helpful to you?
Thank you for voting!
Icemaker quit
Watched you tube video,.....followed,....went very well.....picked the right wiring harness,.....no problems.......making ice in 1 hour
Parts Used:
-
Kenneth E from AUGUSTA, KS
-
Difficulty Level:Easy
-
Total Repair Time:30 - 60 mins
-
Tools:Nutdriver, Screw drivers
1 person
found this instruction helpful.
Was this instruction helpful to you?
Thank you for voting!
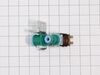
Leaking water valve
-
Tony from ELGIN, IL
-
Difficulty Level:Really Easy
-
Total Repair Time:30 - 60 mins
-
Tools:Nutdriver
1 person
found this instruction helpful.
Was this instruction helpful to you?
Thank you for voting!
Ice maker stopped making ice .
Turn ice maker off
Remove ice tray
Remove side panel cover
Unplug ice machine
Slide ice machine out remove bottom section
Install new ice machine
Very good instruction videos on you tube.
Remove ice tray
Remove side panel cover
Unplug ice machine
Slide ice machine out remove bottom section
Install new ice machine
Very good instruction videos on you tube.
Parts Used:
-
William from PKS, NC
-
Difficulty Level:Really Easy
-
Total Repair Time:30 - 60 mins
-
Tools:Nutdriver, Screw drivers
1 person
found this instruction helpful.
Was this instruction helpful to you?
Thank you for voting!
Needed to replace old kickplate as it no longer was attached
Put new one on matching the sctew feet and design of the grill
Parts Used:
-
CHRISTINE from MARBLEHEAD, OH
-
Difficulty Level:Very Easy
-
Total Repair Time:30 - 60 mins
1 person
found this instruction helpful.
Was this instruction helpful to you?
Thank you for voting!
Water pooling on the floor.
This problem is caused by a "Duckbill" rubber grommet attached to the bottom drain tube of the freezer. This duckbill opens up during the defrost cycle and allows water to drain down the "water slide" to the evaporator pan. It doesn't take much to gum the Duckbill. Once gummed up the defrost water is trapped. The Defrost Cycle eventually makes the water flow out of the coil area to the bottom of the freezer then eventually to the floor. The repair involves unplugging the unit, removing the bottom back cover with a 1/4 nut driver, pop the power clip out to give you room, reach in and pull the duckbill grommet and the water slide, then installing this replacement drain kit. This is a p trap replacement that actually fixes the root cause of this problem. A tricky part is removing the water slide, you can see the white snap that holds the slide in place. Using a small flat blade from the top releases the snap and the unit is pulled upward rather easily. This replacement drain clip snaps in the same place. If I had to do this again it wouldn't take more than two minutes to replace. Oh, one major thing, you need to manually defrost the unit. I pulled the front door off, it is held with 4 screws ... don't remove them just loosen them and it pops off easily. I pulled the bottom tray out an it gave me room to squirt hot water with a baster into the back freezer area. Eventually everything thawed out. If I had it to do over I would have waited on connecting the tube to the evaporator pan and placed the bottom of the tube into a small sauce pan or something to collect the drain water and easily dump it into the sink. I used a sponge and that took forever. BTW, just to reiterate, use this item and not that Duck Bill for replacement, this actually fixes the root cause of this problem!
Parts Used:
-
Michael from McKinney, TX
-
Difficulty Level:A Bit Difficult
-
Total Repair Time:1- 2 hours
-
Tools:Nutdriver
1 person
found this instruction helpful.
Was this instruction helpful to you?
Thank you for voting!
It took a little time to run the new wire harness.
Looked up a video on utube. That was a big help. The new ice maker didn't come with a insulation guide.
Parts Used:
-
Larry from DENHAM SPGS, LA
-
Difficulty Level:A Bit Difficult
-
Total Repair Time:More than 2 hours
-
Tools:Nutdriver, Pliers, Screw drivers
1 person
found this instruction helpful.
Was this instruction helpful to you?
Thank you for voting!