




















KFXS25RYBL4 KitchenAid Refrigerator - Instructions
Keep searches simple. Use keywords, e.g. "leaking", "pump", "broken" or "fit".
no water when under sink water filter installed
I called the installer of my filter unit and he told me that often, thhe fridge filter is the problem. Like magic it worked
Parts Used:
-
Emi from Arlington, VA
-
Difficulty Level:Easy
-
Total Repair Time:Less than 15 mins
11 of 19 people
found this instruction helpful.
Was this instruction helpful to you?
Thank you for voting!
leaking water onto floor
replaced the poorly designed "duck bill" drain with this P trap. Very simple repair done by accessing through the back of the refrigerator. The video on this website walked me right through the repair. It did however fail to mention that the ice has to be removed from the inside. I had to remove the drawer face and pull outs. Then the ice maker and back panel are removed. I used a heat gun and screwdriver to chip and melt the ice build up. If one had the luxury of having another refrigerator to move food in to you could just unplug the unit until the ice melts.
Parts Used:
-
Mark from ALTO, MI
-
Difficulty Level:Really Easy
-
Total Repair Time:30 - 60 mins
7 of 8 people
found this instruction helpful.
Was this instruction helpful to you?
Thank you for voting!
not making ice
watched diagnosis and repair videos online, assessed problem, order part and replaced ice maker. was not expecting to replace wiring harness but got it done and icemaker is working just fine.
Parts Used:
-
Thomas from SURPRISE, AZ
-
Difficulty Level:A Bit Difficult
-
Total Repair Time:1- 2 hours
-
Tools:Nutdriver, Pliers
6 of 6 people
found this instruction helpful.
Was this instruction helpful to you?
Thank you for voting!
The icemaker had had failed.
They send you just the guts, the inner core of the icemaker, and don't include the back piece that has the motor to rotate the screw-drive dispenser and the blower. You get 2 wiring harnesses, and since no instructions come with, you get to figure out which one. The replacement has a few different plugs than the original and those competent can determine which without too much problem. One obstacle was the grounding screw which was inaccessible without removing another part which would have added greatly to the difficulty. I snipped off the old wire and the ring-terminal on the new one and joined the two with a wire clasp. Works like a charm. I had previously replaced the cycling thermostat and checked that the water valve solenoid was within the proper ohm boundaries-don't spend the money for the whole thing without trying those first! Mine must be an odd model because no YouTube videos showed the icemaker from this model.
Parts Used:
-
Roger from FORT PIERCE, FL
-
Difficulty Level:Difficult
-
Total Repair Time:More than 2 hours
-
Tools:Nutdriver, Pliers, Screw drivers
6 of 6 people
found this instruction helpful.
Was this instruction helpful to you?
Thank you for voting!
Warm ref and frz
Removed old starter and capacitor as per your website instruction.
Plugged in new parts.
Compresser turned on
Plugged in new parts.
Compresser turned on
Parts Used:

-
Peter from MASSAPEQUA PK, NY
-
Difficulty Level:Very Easy
-
Total Repair Time:Less than 15 mins
-
Tools:Nutdriver, Pliers
6 of 6 people
found this instruction helpful.
Was this instruction helpful to you?
Thank you for voting!
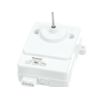
Refrigerator would cool for a very short period of time. Then the compressor would shutdown via internal thermal overload or high head pressure. This was caused by the lack of airflow across the condenser coils and compressor.
(1) Slide out appliance and remove power source. (2) Removed lower access cover on rear of refrigerator. (3) Disconnected plug to the condenser fan motor. (4) remove blades by pulling gently forward (5) remove mounting hardware holding the fan motor (3 screws) (6) motor is now free and new motor can be installed
Parts Used:
-
Daniel from RICHTON, MS
-
Difficulty Level:Very Easy
-
Total Repair Time:Less than 15 mins
-
Tools:Nutdriver, Pliers
10 of 18 people
found this instruction helpful.
Was this instruction helpful to you?
Thank you for voting!
Stopped cooling/freezing
It is as easy as is shown in the self-help video. (1) Disconnect the power, (2) Roll the appliance out so you can get to the back, (3) Using a nut driver remove all the screws from the lower back panel then remove the panel, (4) Remove the tensioner wire, (5) unplug the electrical connection to the capacitor, (6) gently but firmly remove the capacitor and starter relay as one unit, (7) preassemble your new capacitor and starter relay as one unit, (8) now simply reverse your steps for installing and you are done! These two parts saved me the cost of a new refrigerator. Almost as easy as changing a light bulb. PS: while you have the panel removed you can do a thorough cleaning with a soft brush and vacuum.
Parts Used:
-
Roper from PALM BAY, FL
-
Difficulty Level:Really Easy
-
Total Repair Time:15 - 30 mins
-
Tools:Nutdriver
6 of 6 people
found this instruction helpful.
Was this instruction helpful to you?
Thank you for voting!
broken light switch in the freezer
We removed the old switch, unplugged it, plugged the new one in and it was easy to do. But when we tried to put the switch back in we had a very hard time doing it. Eventually got it in, but if it had not been for the difficulty we had getting the new switch to snap in to place, it would have taken under 5 minutes.
Parts Used:

-
kathleen from GREEN VALLEY, AZ
-
Difficulty Level:Easy
-
Total Repair Time:Less than 15 mins
-
Tools:Screw drivers
6 of 6 people
found this instruction helpful.
Was this instruction helpful to you?
Thank you for voting!
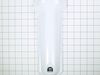
Broken latch on water filter cover.
Reviewed replacement instructions video on your website. Just followed the easy instructions to pop out old cover and pop in new cover. I would not have tried to replace it myself had I not seen your video. Super easy.
Parts Used:
-
Gloria from Laurinburg, NC
-
Difficulty Level:Really Easy
-
Total Repair Time:Less than 15 mins
6 of 6 people
found this instruction helpful.
Was this instruction helpful to you?
Thank you for voting!
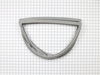
FROST, ICE buildup along and inside the bottom of freezer and door
Removed old gasket by carefully pulling it out of the retaining groove. Installed the new gasket starting the corners first and then seating the upper and lower straight portion gently in the retainer groove. Total time for installation was at most 5 minutes. After a week no ice or frost has been found along the bottom of door or freezer. Note: the new gasket came in a small box for shipping purposes and the new gasket was twisted in a v for this purpose. Upon arrival, I laid it out flat on table overnight so it could cool to room temperature and straighten. I would recomend this procedure for a perfect installation.
Parts Used:
-
Jerry from SNELLVILLE, GA
-
Difficulty Level:Very Easy
-
Total Repair Time:Less than 15 mins
6 of 7 people
found this instruction helpful.
Was this instruction helpful to you?
Thank you for voting!
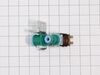
Water inlet valve not working
-
Theo from Layton, UT
-
Difficulty Level:Easy
-
Total Repair Time:30 - 60 mins
-
Tools:Socket set, Wrench (Adjustable)
6 of 7 people
found this instruction helpful.
Was this instruction helpful to you?
Thank you for voting!
Chaged out Door Light Switch
By sliding athin screwdriver blade down the side of the old switch the expasion prong that hold the switch in place was compressed enough to allow the switch to come out easlily. Plugged in new swithc and snapped in place. Plugged the refrigerator back in and light has worked great sense!
Parts Used:

-
Scott from Kansas City, MO
-
Difficulty Level:Really Easy
-
Total Repair Time:30 - 60 mins
-
Tools:Screw drivers
7 of 10 people
found this instruction helpful.
Was this instruction helpful to you?
Thank you for voting!
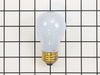
Bulb wouldn't light up, when freezer drawer was pulled open
The repair didn't get done, because both times that I requested a 25-Watt Light Bulb, I received a 3.6 Watt bulb instead & neither one worked. So I tried testing the original bulb in a table lamp & it worked. So I sense that the problem may be in the switch that allows the light to turn on when the drawer is opened & shut off when the drawer is closed.
Parts Used:
-
Dennis from LOUISVILLE, KY
-
Difficulty Level:Very Easy
-
Total Repair Time:Less than 15 mins
5 of 5 people
found this instruction helpful.
Was this instruction helpful to you?
Thank you for voting!
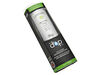
The filter was clogged.
Replaced filter and the water started to flow like the Nile River and the ice maker came back to life.
Parts Used:
-
Debbie from Bluffton, SC
-
Difficulty Level:Easy
-
Total Repair Time:Less than 15 mins
8 of 14 people
found this instruction helpful.
Was this instruction helpful to you?
Thank you for voting!
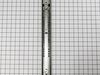
Broken black plastic spring mechanism inside freezer rail
Remove rail and removed broken black plastic spring mechanism with new one and then replace rail.
Parts Used:
-
Ronald from WESTERVILLE, OH
-
Difficulty Level:Really Easy
-
Total Repair Time:30 - 60 mins
-
Tools:Nutdriver, Screw drivers
7 of 12 people
found this instruction helpful.
Was this instruction helpful to you?
Thank you for voting!