




















KESH307HWH5 KitchenAid Range - Instructions
Keep searches simple. Use keywords, e.g. "leaking", "pump", "broken" or "fit".
Hot Plate wouldn't heat, element burned out
Moved Oven from wall, removed eight screws holding down the Burner Top. Lifted Top and held it up to remove two screws on the side of the element. Disconnected four wires, replaced element, connected the four wires again and assembled in reverse mode of dissasembly. All went pretty simple, moving oven from wall and adjusting/level it back in place was the most time consuming.
Part works fine, delivery was faster than expected during the Holidays. Good Job Thanks!!!
HAPPY NEWYEAR!!!!
Part works fine, delivery was faster than expected during the Holidays. Good Job Thanks!!!
HAPPY NEWYEAR!!!!
Parts Used:

-
Donald from San Diego, CA
-
Difficulty Level:Easy
-
Total Repair Time:30 - 60 mins
-
Tools:Pliers, Socket set
0 of 2 people
found this instruction helpful.
Was this instruction helpful to you?
Thank you for voting!
Bulb Replacement
I pulled down the wire around the glass cover. . . Released on end of the wire from its holder being careful to not let the glass cover drop. Unscrewed the bulb and replaced with replacement. Easy, easy.
Parts Used:

-
Judith from Phoenix, AZ
-
Difficulty Level:Really Easy
-
Total Repair Time:Less than 15 mins
0 of 2 people
found this instruction helpful.
Was this instruction helpful to you?
Thank you for voting!
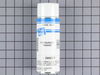
Both outside door handles turned very beige
Everything worked perfectly---thanks to the suggestion of your call center agent. She suggested that since the replacement door handles were no longer available, I should consider repainting them--it worked like a charm. Please tell her she was a life saver. We rent that house in Fl and my returning tenants had complained about the discoloring refer handles. Thank you
Parts Used:
-
Howard from Boynton Beach, FL
-
Difficulty Level:Easy
-
Total Repair Time:30 - 60 mins
-
Tools:Nutdriver
23 of 72 people
found this instruction helpful.
Was this instruction helpful to you?
Thank you for voting!
Smooth top burner won't heat one element
Unplug appliance first. Remove rear cover plate (only to disconnect burner plug). Remove plastic upper side covers. Open oven door & remove two screws holding burner top. Lift off entire top, flip upside down and change element.
Parts Used:
-
James from Geneseo, IL
-
Difficulty Level:Really Easy
-
Total Repair Time:15 - 30 mins
-
Tools:Screw drivers
1 of 6 people
found this instruction helpful.
Was this instruction helpful to you?
Thank you for voting!
our glass top range burner did not work
We looked online for instructions, not sure how to "lift" the glass top.... There were 2 screws/hex head at the front of the range under the top that when removed allowed the top to be lifted up ..... the elements are on the underside, and with the removal of a few screws and unplugging the element connections (real easy) the burned out element was easily removed and the new one replaced... Less than 15 minutes for the whole operation...HOW COOL!
Parts Used:
-
steve from miramonte, CA
-
Difficulty Level:Really Easy
-
Total Repair Time:Less than 15 mins
-
Tools:Nutdriver, Screw drivers
0 of 4 people
found this instruction helpful.
Was this instruction helpful to you?
Thank you for voting!
Light bulb failure
Received the part the day after ordering. Appreciated the quick service and repair took less than a minute.
Parts Used:
-
Grant from Alexandria, VA
-
Difficulty Level:Really Easy
-
Total Repair Time:Less than 15 mins
Was this instruction helpful to you?
Thank you for voting!
I was missing a temperature knob.
We had been missing it for years. Perhaps it melted, maybe the dog. Anyway, Home Depot didnt have the match. I order the exact knob, received it in a very timely manner. Took it out of the package, and without any tool, placed it it it rightful spot. My wife is happy now. Thanks for helping me.
Parts Used:

-
Scott from The Colony, TX
-
Difficulty Level:Really Easy
-
Total Repair Time:Less than 15 mins
Was this instruction helpful to you?
Thank you for voting!
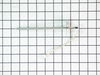
oven would not heat past 170 degrees
Pulled the oven out from the counters and unplugged the electrical cord. Unscrewed the three screws holding the center back panel on and removed the panel. Located the temperature probe in the upper left part of the oven and followed the wiring to where it was connected. Unconnected the wire from the connector. Removed the screw holding the probe and pulled it out from the oven. Put the new part on and screwed it to the oven. Connected the wiring to the connector. Put the panel into the holding brackets and screwed in the three screws. Plugged in the oven and put it back against the wall. Turned on the oven, set a temperature and watched to see if it stopped at the set temperature. Bake3d dinner and ate it.
Parts Used:
-
Clarke from San Diego, CA
-
Difficulty Level:Really Easy
-
Total Repair Time:Less than 15 mins
-
Tools:Screw drivers
Was this instruction helpful to you?
Thank you for voting!
Oven Drawer Roller Snapped Off

-
Kimberly from Sandusky, OH
-
Difficulty Level:Really Easy
-
Total Repair Time:Less than 15 mins
-
Tools:Screw drivers
Was this instruction helpful to you?
Thank you for voting!
Oven Light bulb and gasket needed replaced
Removed the light cover - unscrew the bulb - place the gasket on the base of the light cover - replace the bulb - replace the light cover
Parts Used:

-
Steven from Carnegie, PA
-
Difficulty Level:Really Easy
-
Total Repair Time:Less than 15 mins
Was this instruction helpful to you?
Thank you for voting!
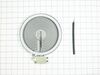
One of the burner wasn't light up.
The repair was very easy. It took me less than ten minutes. There were only five screws including two to hold heat element that I have to unscrew and transferred the old clip the screw onto new heat element.
Parts Used:
-
Sam from Fairport, NY
-
Difficulty Level:Really Easy
-
Total Repair Time:Less than 15 mins
-
Tools:Screw drivers
Was this instruction helpful to you?
Thank you for voting!
Light lens broke when self clean cycle was used
I searched Whirlpool, Sears and random appliance stores and Part Select was the only company to have the lens available. All other manufacturers said the lens was no longer manufactured as a stand alone piece and I would have to buy the entire light assembly. Thank you Parts Select!!!!!
Parts Used:

-
James from Buford, GA
-
Difficulty Level:Really Easy
-
Total Repair Time:Less than 15 mins
Was this instruction helpful to you?
Thank you for voting!
burner bad
looked it up on line how to change it. before I ordered part, to see how much of a job it was. was real simple to change, had no problem. also part select sent the correct part. Job went well
Parts Used:
-
Edward J from Baxter, MN
-
Difficulty Level:Easy
-
Total Repair Time:Less than 15 mins
-
Tools:Nutdriver
Was this instruction helpful to you?
Thank you for voting!
Front Burner Burnt Out
This job replacing the was so easy, it took about ten min,to do it thanks
Parts Used:
-
Leonard from Kansas City, MO
-
Difficulty Level:Really Easy
-
Total Repair Time:Less than 15 mins
-
Tools:Nutdriver, Pliers
Was this instruction helpful to you?
Thank you for voting!
Gasket for oven light wore out and needed replacing.
I very simply replaced the gasket where it belonged and I was good to go!
Parts Used:
-
Karen from San Jose, NM
-
Difficulty Level:Really Easy
-
Total Repair Time:Less than 15 mins
-
Tools:Screw drivers
Was this instruction helpful to you?
Thank you for voting!