




















KERK807PWW00 KitchenAid Range - Instructions
Keep searches simple. Use keywords, e.g. "leaking", "pump", "broken" or "fit".
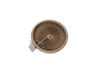
Burned out heating element for radiant heat burner
I watched the video, purchased the correct heating element and did the repair as illustrated in the video. I simply removed the cook top, removed the ground wire, removed the wiring harness, removed the failed heating element, installed the new heating element and reinstalled the wiring. Piece of cake!
Parts Used:
-
Jay from Brevard, NC
-
Difficulty Level:Easy
-
Total Repair Time:30 - 60 mins
-
Tools:Screw drivers
Was this instruction helpful to you?
Thank you for voting!
range installer broke a screw off & busted the plastic piece
-
Christina from West Des Moines, IA
-
Difficulty Level:Easy
-
Total Repair Time:30 - 60 mins
-
Tools:Pliers, Screw drivers
Was this instruction helpful to you?
Thank you for voting!
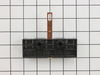
Melted and fused together wires due to non-grounding of terminal block
We called a dear handyman church member with years of repair service to his home, personal vehicles and general maintenance of our little church and parsonage. Known for his trade as an engineer with over 50 years in the industry wearing white shirts and working in an office; however, he is not afraid to get his hand dirty. We all worked together (my husband, daughter and me) to troubleshoot and resolve the problem and the terminal block purchased from "parts select" was just the answer to all our problems and worries. The range is fully operational and works like new. Thanks.
Parts Used:
-
Dr PauMari from Alamogordo, NM
-
Difficulty Level:Really Easy
-
Total Repair Time:1- 2 hours
-
Tools:Nutdriver, Pliers, Screw drivers, Socket set, Wrench (Adjustable), Wrench set
Was this instruction helpful to you?
Thank you for voting!
inner glass broken; fan not engaging
Door repair assembly was simple, did without any instructions or manuals. Fan assembly, the actual fan replacement was easy, it was the number of pieces of metal that needed to be removed i order to get the main rear panel off to access. Also had to remove panel from inside the oven; requires two people to loosen screws from inside while the other person holds the fan assembly from the rear side of the oven. Didn't have any instructions for this task either, figured it out anyway, just follow the layers.
Parts Used:


-
robynn from Newcastle, CA
-
Difficulty Level:Really Easy
-
Total Repair Time:1- 2 hours
-
Tools:Pliers, Screw drivers
Was this instruction helpful to you?
Thank you for voting!
worn out hinges
Tried reusing old door hinges after removing door to access temp sensor and broke the oven glass twice.with new hinges , new glass went in easily.
Parts Used:

-
Kenneth from West Orange, NJ
-
Difficulty Level:Difficult
-
Total Repair Time:More than 2 hours
-
Tools:Nutdriver, Pliers, Screw drivers, Wrench set
Was this instruction helpful to you?
Thank you for voting!