




















KERA205PWH2 KitchenAid Range - Instructions
Keep searches simple. Use keywords, e.g. "leaking", "pump", "broken" or "fit".
replaced oven lightbulb

-
peggy ann from forest city, NC
-
Difficulty Level:Really Easy
-
Total Repair Time:Less than 15 mins
0 of 1 people
found this instruction helpful.
Was this instruction helpful to you?
Thank you for voting!
oven light burnt out
1. Unscrewed glass cover on bulb
2. Removed old bulb
3. Screwed in new bulb
4. Replaced glass cover
5. Mixed drink & baked cupcakes
2. Removed old bulb
3. Screwed in new bulb
4. Replaced glass cover
5. Mixed drink & baked cupcakes
Parts Used:
-
William from Schwenksville, PA
-
Difficulty Level:Easy
-
Total Repair Time:Less than 15 mins
3 of 10 people
found this instruction helpful.
Was this instruction helpful to you?
Thank you for voting!
Light burned out in upper oven
-
Shirley from Las Vegas, NV
-
Difficulty Level:Really Easy
-
Total Repair Time:Less than 15 mins
0 of 1 people
found this instruction helpful.
Was this instruction helpful to you?
Thank you for voting!
light bulb went out in my oven
My husband took the plastic cover off and took out old bulb and screwed in the new one. Then put the cover back on.
Parts Used:
-
Janet from Ada, MI
-
Difficulty Level:Really Easy
-
Total Repair Time:Less than 15 mins
2 of 7 people
found this instruction helpful.
Was this instruction helpful to you?
Thank you for voting!
Oven gets too hot,if set at 350 it heats to 550. Changed the sensor and was not the problem.
Took off the screws on the back of the stove and took out the sensor, and put in the new one.
Parts Used:
-
Joanne from Negaunee, MI
-
Difficulty Level:Really Easy
-
Total Repair Time:Less than 15 mins
-
Tools:Screw drivers
0 of 2 people
found this instruction helpful.
Was this instruction helpful to you?
Thank you for voting!
Bulb Replacement
I pulled down the wire around the glass cover. . . Released on end of the wire from its holder being careful to not let the glass cover drop. Unscrewed the bulb and replaced with replacement. Easy, easy.
Parts Used:
-
Judith from Phoenix, AZ
-
Difficulty Level:Really Easy
-
Total Repair Time:Less than 15 mins
0 of 2 people
found this instruction helpful.
Was this instruction helpful to you?
Thank you for voting!
Both outside door handles turned very beige
Everything worked perfectly---thanks to the suggestion of your call center agent. She suggested that since the replacement door handles were no longer available, I should consider repainting them--it worked like a charm. Please tell her she was a life saver. We rent that house in Fl and my returning tenants had complained about the discoloring refer handles. Thank you
Parts Used:
-
Howard from Boynton Beach, FL
-
Difficulty Level:Easy
-
Total Repair Time:30 - 60 mins
-
Tools:Nutdriver
23 of 74 people
found this instruction helpful.
Was this instruction helpful to you?
Thank you for voting!
water pump went out
it was very easy i took the pump off only two clips and two hoses holding it type in the model number at parts select it came right up soi new it right one from the picture got with in 3 days put it back on less then 10 mins
Parts Used:
-
paul from windsor, VA
-
Difficulty Level:Really Easy
-
Total Repair Time:Less than 15 mins
-
Tools:Pliers
2 of 12 people
found this instruction helpful.
Was this instruction helpful to you?
Thank you for voting!
Switch burnt out/Lens broken
Removed the three screws holding on the back plate and removed plate.
Popped out the switch and used the pliers to pull off the wires. Connected the wires to the new switch.
Popped out the broken light. Slid the new lens into the front panel. Slid the light housing onto the new lens.
Re-attached the back plate.
Popped out the switch and used the pliers to pull off the wires. Connected the wires to the new switch.
Popped out the broken light. Slid the new lens into the front panel. Slid the light housing onto the new lens.
Re-attached the back plate.
Parts Used:

-
John from Somersworth, NH
-
Difficulty Level:Really Easy
-
Total Repair Time:15 - 30 mins
-
Tools:Pliers, Screw drivers
1 of 11 people
found this instruction helpful.
Was this instruction helpful to you?
Thank you for voting!
the turn off switch was wont work
tested found the membrane switch was defective.unpluged the stove,removed back panel . removed the electronic controler then replaced the membrane switch.reinstaled all components.pluged in and tested. Work grad!!!!!!!!
Parts Used:

-
safet from saint louis, MO
-
Difficulty Level:Really Easy
-
Total Repair Time:15 - 30 mins
-
Tools:Pliers, Screw drivers
Was this instruction helpful to you?
Thank you for voting!
Replacing the Upper Spray Arm, part # PS2581378
The detection of the part and the replacement of the upper spray arm was quite easy, because of its unique shape and function, and also because it was easy to screw in place. I saved the web order page in case this part tends to deteriorate frequently, even though it is the first time it showed this problem since we purchased this appliance.
Parts Used:
-
Vittorio from Wakefield, MA
-
Difficulty Level:Really Easy
-
Total Repair Time:15 - 30 mins
Was this instruction helpful to you?
Thank you for voting!
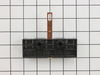
Terminal Block was melted where the cord had came lose.
Removed the therminal block and put the new one in.Using a screwdriver, very easy repair.
Parts Used:
-
Louise from Humansville, MO
-
Difficulty Level:Really Easy
-
Total Repair Time:15 - 30 mins
-
Tools:Screw drivers
Was this instruction helpful to you?
Thank you for voting!
terminal block back of range shorted and burned
EASY!! Repairs saved $300.00 on serviceman fees they will rip you off for this simple repare
Parts Used:
-
Louis from Grantsville, UT
-
Difficulty Level:Really Easy
-
Total Repair Time:15 - 30 mins
-
Tools:Screw drivers, Socket set
Was this instruction helpful to you?
Thank you for voting!
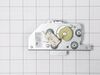
Could not get self cleaning oven to engage
Removed back of stove, 8 screws, removed original latch assembly and installed new assembly. One thing that can cause you difficulty is that the rod that connects the assembly to the front latch on the door can disconnect and has to be reconnected.[Problem]
Parts Used:
-
Charles from Fairfield Bay, AR
-
Difficulty Level:Really Easy
-
Total Repair Time:15 - 30 mins
-
Tools:Screw drivers
Was this instruction helpful to you?
Thank you for voting!
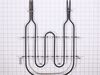
Broiler/Oven top element burned out
Pulled range away from wall and disconnected the wires after pulling out the electrical plug from the wall. Removed 4 phillips head screws to remove element from inside of oven, pushed new element in to person on back side, connected the wires there, while second person held element up to top of oven. Came around and put the screws back in. Was so glad to receive the element within 4 days after order. Thanks so much!
Parts Used:
-
Robert from Three Forks, MT
-
Difficulty Level:Really Easy
-
Total Repair Time:15 - 30 mins
-
Tools:Screw drivers
Was this instruction helpful to you?
Thank you for voting!