




















KECC508GBL3 KitchenAid Cooktop - Instructions
Keep searches simple. Use keywords, e.g. "leaking", "pump", "broken" or "fit".
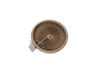
Duel Burner , Inside Burner Out
Removed burned out burner, replaced new burner tested works fine
Parts Used:
-
ROBERT from MOSINEE, WI
-
Difficulty Level:Really Easy
-
Total Repair Time:15 - 30 mins
-
Tools:Nutdriver, Pliers, Screw drivers
Was this instruction helpful to you?
Thank you for voting!
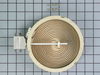
1200 watt r/rear burner element has an opening in the elementg
Shut off 220 volt power to range. Removed two screws for cooktop element access. Used needle-nose pliers to remove power (2) and control (2) lugs and wires. Remove defective cooking element module, replaced. Reverse steps for new unit.
Parts Used:
-
Jayson from Cape Coral, FL
-
Difficulty Level:Really Easy
-
Total Repair Time:15 - 30 mins
-
Tools:Pliers, Screw drivers
Was this instruction helpful to you?
Thank you for voting!
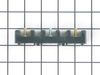
circuit breaker blew
I went to the source of power on the stove and noticed one of the terminals had come loose from the terminal block and had shorted out against the cover of the terminal junction. After prying the loose terminal off cover I ordered new terminal block and received it the 2nd day. I removed the old terminal block and replaced the part in about 10 minutes..Thank you Parts Select for your easy to find diagrams and quick delivery.
Parts Used:
-
Richard from Sarasota, FL
-
Difficulty Level:Easy
-
Total Repair Time:Less than 15 mins
-
Tools:Pliers, Screw drivers
Was this instruction helpful to you?
Thank you for voting!
burner not as hot as it should be
I unplugged the stove and removed two screws on bottom of stove top (above oven door) one screw holding burner bracket in place. Took one wire off at a time and hooked to new burner, tightened all screws back down.
Parts Used:
-
Joel from Dillon, SC
-
Difficulty Level:Really Easy
-
Total Repair Time:Less than 15 mins
-
Tools:Pliers, Screw drivers
Was this instruction helpful to you?
Thank you for voting!
RIght rear burner on glasstop range stopped working
Cut power to range in breaker panel. Then removed two screws (1/4" nutdriver) or phillips head just under top in front. No need to move range out from wall. Once those two screws were out, I lifted the top carefully (since wires are attached to back of range) and propped it up with a piece of spare lumber I had lying around. Then removed two screws holding right rear burner, and doing one wire at a time, pulled the wires from bad burner and reattached wires to new burner. Oh, I did need some pliers to pull the wires from the old burner; they were on real tight. ALSO, the old burner had a series of numbers around it. I quickly learned that these helped you line up the burner correctly. So I noted the numbers with the screw holes in the old burner and made sure I used the same number holes in the new burner. Once new wires were attached, I attached the new burner, aligning the same hole numbers as the removed burner, and everything lined up perfectly. Two screws were inserted to hold the burner. I lowered the top and reinserted the two screws under the front of the top and I was done. Total time was about 13 to 14 minutes. Honestly, very easy. Plus prior to me taking on the project, I had called a Maytag repair shop, who said their fee was $99, plus parts, plus any extra time required for labor, but the latter was not likely something that typically occured.
Parts Used:
-
Gerald from Hedgesville, WV
-
Difficulty Level:Really Easy
-
Total Repair Time:Less than 15 mins
-
Tools:Nutdriver, Pliers
Was this instruction helpful to you?
Thank you for voting!
Glass top stove burner not working
OMG you have no idea how grateful I am. My husband and I watched your how-to-video and decided that it looked pretty easy for us to replace on our own. We saved close to $200 between the flat fee for a service call plus labor. Thank you very much. We were also pleased how fast our part was shipped to us.
Parts Used:
-
Juan from Miami, FL
-
Difficulty Level:Really Easy
-
Total Repair Time:15 - 30 mins
-
Tools:Screw drivers
Was this instruction helpful to you?
Thank you for voting!
2 burners burned out of flat top stove
I can't believe how easy this was to fix. 1. Unplug the stove. 2. remove the screws that hold the stove top in place. 3. pull the top up, unplug the electrical wires and unscrew the ground wire 4. remove the stove top and flip it over. 4. unscrew braces holding the burners in place. 5. with pliers, remove the wire connections between stove top and old burners 6. replace with new burners. 7. reattach everything. And you're done! Go brag to the neighbors about what you just did.
Parts Used:
-
Lacey from Raleigh, NC
-
Difficulty Level:Really Easy
-
Total Repair Time:15 - 30 mins
-
Tools:Pliers, Screw drivers
Was this instruction helpful to you?
Thank you for voting!
dual element burned out
A breeze. Lifted top, propped it, removed defective element, disconnected wire modules,connected modules to new element, fastened new element, closed top.
Parts Used:
-
Edwin from Christoval, TX
-
Difficulty Level:Really Easy
-
Total Repair Time:15 - 30 mins
-
Tools:Screw drivers
Was this instruction helpful to you?
Thank you for voting!
Rear left burner,went out.
I did exactly what your instruction video showed. The most important thing to remember is to TURN THE POWER OFF FIRST.
Parts Used:
-
Ruben from Port St Lucie, FL
-
Difficulty Level:Really Easy
-
Total Repair Time:15 - 30 mins
-
Tools:Screw drivers
Was this instruction helpful to you?
Thank you for voting!
glass top,small burner did not function, open circuit in heating coil element
Remove top oven door,remove two hex head screws located underneath cook top at the front on both sides,slid the range top forward approx. three(3) inches to obtain access needed to unplug the wiring harness, located behind the vertical part of the cook top,removed the cook top,placing it on a padded table with the glass side down,disconnected the three (3)wire spades and unscrewed three screws anchoring heating element to the cook top frame, replaced defective heating assembly with new. Repeated above steps noted above,in reverse order. And yes, all work was done after power was shut off at power panels dedicated oven circuit.
Parts Used:
-
James from Sacramento, CA
-
Difficulty Level:Really Easy
-
Total Repair Time:15 - 30 mins
-
Tools:Nutdriver, Screw drivers
Was this instruction helpful to you?
Thank you for voting!
Center of Front Burner not heating up
Ceramic cooktop: Turn off power to the unit. remove long "locking" screws from underside of the unit; remove clips (may take a little effort if they are "frozen" in place) From underneath unit lift it up and out of the counter - do not try to lift from ceramic top- remove 4 control knobsun - remove 12 screws (3 per side) attaching ceramic top to the unit - carefully work ceramic top off the bottom frame; its a friction fit - do not force it. Place ceramic top in a safe, flat space. Note the orientation of the burner - you will need to replace the new one in the exact same orientation - also note the connections on the existing unit and match them to where they will go on the new unit. (note: my old unit had a black wire that was replaced by a solid metal strip) work the wire clips off the existing unit, flip it ove and note the number on the "clock face" where the spring clips attach. You may need to drill a small pilot hole from the top side. remove the spring clips from the old unit and place them on the new unit. These clips align the unit in the proper location and provide proper contact with the bottom of the ceramic top. Replace the top gentley working it onto the base and replace the 12 screws. Place the unit back in the countertop being careful to lift up to reposition so you don't disturb the foam tape along the edge of the opening. Replace the clips in the side of the unit, replace the mounting screws, replace the control knobs, turn power back on. You should be done. Takes about 30 minutes.
Parts Used:
-
Bob from Aberdeen, NJ
-
Difficulty Level:Really Easy
-
Total Repair Time:15 - 30 mins
-
Tools:Screw drivers
Was this instruction helpful to you?
Thank you for voting!
Burned out heating element for radiant heat burner
I watched the video, purchased the correct heating element and did the repair as illustrated in the video. I simply removed the cook top, removed the ground wire, removed the wiring harness, removed the failed heating element, installed the new heating element and reinstalled the wiring. Piece of cake!
Parts Used:
-
Jay from Brevard, NC
-
Difficulty Level:Easy
-
Total Repair Time:30 - 60 mins
-
Tools:Screw drivers
Was this instruction helpful to you?
Thank you for voting!
range installer broke a screw off & busted the plastic piece
-
Christina from West Des Moines, IA
-
Difficulty Level:Easy
-
Total Repair Time:30 - 60 mins
-
Tools:Pliers, Screw drivers
Was this instruction helpful to you?
Thank you for voting!
the bottom hinge pin fell out and door was loose
Ordered parts that I thought were correct. BUT I ordered from the door parts... which gave me the wrong screw and unnecessary shims. What I really needed was the cabinet parts! At the time of doing the order, I could not find the owner manual... but found it before the parts arrived. That is what saved me and also thanks to me, for being a pack rat and my grandson finding the spacer on floor after it came out. That made it possible to fix the door. The screw I tried to install, but soon realized it was wrong. I went thru the pack rat stash and found the screw that fell out late last year.....! I then noticed the screw holding the hinge bracket was loose, now that is almost impossible to tighten because everything or tools that I owned were tooooo long (it's only 1 1/2" off the floor)! I tightened that and put the spacer and bottom hinge pin in. The screw was only 3/4" off the floor and difficult to get into the hole without a mirror on the floor under the spot. I finally used a clamp wrench to hold the screw and thread the screw into the hole. From there, most sockets are too long, so I did find a short socket. Now that still took me to the mirror, so I used the clamp wrench to hold the socket to tighten the screw. Thank goodness I am mechanically inclined and can look at a schematic to to understand how something works or I would have had to call for a mechanic. Also I should say ... FIND you manual before ordering to start with the right parts! Manual showed the parts of the cabinet and the door as one long picture, which helped with the repair and would have for ordering.
Parts Used:
-
Peggy from Ogden, UT
-
Difficulty Level:A Bit Difficult
-
Total Repair Time:1- 2 hours
-
Tools:Pliers, Screw drivers, Socket set, Wrench (Adjustable), Wrench set
Was this instruction helpful to you?
Thank you for voting!
Surface element with Limiter - 6" - 1200W went out
First, I turned the circuit breaker off to the range. Then, I pulled the range out so that I could get to the screws which held the glass top in place. They were located on the sides of the range. I had to remove the trim pieces on the sides to get to the forward screws. Once that was done, I lifted the glass top, unplugged the wire harness, flpped it over on a protected surface. I noted the numbers on the old coil where the clips held it in place and put the clips on the new coil in the same place. The old wires just clipped on to the new coil exactly as they clipped on to the old coil. I put it all back together and it works great! I am a 70 year old woman who did this all by myself. You young guys should have no problem.
Parts Used:
-
Carolyn from Rockville, MD
-
Difficulty Level:A Bit Difficult
-
Total Repair Time:1- 2 hours
-
Tools:Screw drivers, Socket set
Was this instruction helpful to you?
Thank you for voting!