




















KEBS208SSS00 KitchenAid Wall Oven - Instructions
Keep searches simple. Use keywords, e.g. "leaking", "pump", "broken" or "fit".
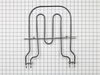
Smaller broiler coil stopped working.
Our double-oven is wall-mounted, so accessing the backside to change the wires (as shown in the instruction video) was not a practical do-it-yourself option. After turning off the circuit breaker and disconnecting the broken broiler element, it is pretty easy to pull the four connection wires through the backside of the oven, which allowed us to disconnect the slide clips. We attached twist-ties to each clip/wire before disconnecting to keep the clips/wires from pulling back behind the oven wall when moving the new element into position. We found it necessary to crimp a few clips onto the new element to make secure connections, but the rest of the project went pretty much as shown in the video and the new element works great.
Parts Used:
-
Patrick from SANTA CLARA, CA
-
Difficulty Level:Easy
-
Total Repair Time:30 - 60 mins
-
Tools:Pliers, Screw drivers
6 of 6 people
found this instruction helpful.
Was this instruction helpful to you?
Thank you for voting!
Bad Bake Element
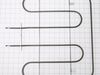
The existing bake element was charred and in pieces so could not be pulled out. We destructively disassembled the range and pulled out the pieces along with the melted insulation. The wall behind was also scorched.
Parts Used:
-
Gary from NELLYSFORD, VA
-
Difficulty Level:Very Difficult
-
Total Repair Time:More than 2 hours
-
Tools:Nutdriver, Pliers, Screw drivers, Socket set, Wrench (Adjustable), Wrench set
5 of 5 people
found this instruction helpful.
Was this instruction helpful to you?
Thank you for voting!
bUILT IN OVEN NOT COMING UP TO TEMPERATURE
Replaced oven temp sensor, removed oven door and interior racks for easy access to oven upper rear sensor access. Used philips head screw driver to remove both screws, gently pulled old senor out of reat oven wall until electrical connector clear of rear wall, disconnected connector, connected new sensor and gently pushed wiring and connector back into opening, reinstalled door and racks. Ran open thru cycle and used oven thermometer to check temp. fast easy install
Parts Used:

-
Kenneth from BUFFALO, NY
-
Difficulty Level:Very Easy
-
Total Repair Time:15 - 30 mins
-
Tools:Screw drivers
5 of 5 people
found this instruction helpful.
Was this instruction helpful to you?
Thank you for voting!
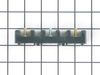
Loose terminal caused block to overheat and break
Removed all terminals and block mounting screws. Repaired one burnt terminal and reassembled. Replacement part was an exact fit and reassembly whnet very well.
Parts Used:
-
Dana from Black Mountain, NC
-
Difficulty Level:Really Easy
-
Total Repair Time:Less than 15 mins
-
Tools:Nutdriver, Screw drivers
6 of 10 people
found this instruction helpful.
Was this instruction helpful to you?
Thank you for voting!
Center broiler element burned out
Removed oven door for easy access. Removed 4 phillip head screws that held broiler element from top of oven. pulled wires a couple of inches out from back of oven and used flat screw driver to help separate the wires connecting the broiler from the oven. Did the opposite to install the new element,.
The best part of this operation was the fact that the part arrived from Part Select by Fed X the next day after ordering it all for a shipping cost of $8.75. Great Service Highly recommend Part Select.
The best part of this operation was the fact that the part arrived from Part Select by Fed X the next day after ordering it all for a shipping cost of $8.75. Great Service Highly recommend Part Select.
Parts Used:
-
Ronald from DAVIS, CA
-
Difficulty Level:Really Easy
-
Total Repair Time:30 - 60 mins
-
Tools:Pliers, Screw drivers
4 of 4 people
found this instruction helpful.
Was this instruction helpful to you?
Thank you for voting!
oven light would not come on
cut power off and placed sturdy table same height as bottom of oven in front of oven. removed trim screws. pulled oven out onto table. removed top cover and panel on left side . tested transformer to be sure it was bad. then replaced transforner
Parts Used:

-
david from SOUTHAVEN, MS
-
Difficulty Level:Really Easy
-
Total Repair Time:1- 2 hours
-
Tools:Screw drivers
4 of 5 people
found this instruction helpful.
Was this instruction helpful to you?
Thank you for voting!
All elements would heat to around 200 degrees, then stop
Disconnect the sensor harness and checked resistance on the sensor,should read around 1100 ohm I only got 25.The sensor is mounted in the oven cavity back wall below upper element,the door must be removed. Unscrew 2 Philips head screw,unhook the harness,install new sensor,reconnect harness,install screws.
Parts Used:
-
frank from Wilmington, NC
-
Difficulty Level:Really Easy
-
Total Repair Time:15 - 30 mins
-
Tools:Screw drivers
3 of 3 people
found this instruction helpful.
Was this instruction helpful to you?
Thank you for voting!
Oven will not maintain set temp
Remove rear panel - remove sensor from inside - unplug from rear - reverse to install - did not fix problem
Parts Used:
-
Sam from TINLEY PARK, IL
-
Difficulty Level:Easy
-
Total Repair Time:30 - 60 mins
-
Tools:Screw drivers
3 of 3 people
found this instruction helpful.
Was this instruction helpful to you?
Thank you for voting!
burnt out element
good, used tie wire with a hooked end to fish one wire out of the back, to keep from removing the oven
Parts Used:
-
Bruce from ELKTON, OR
-
Difficulty Level:Easy
-
Total Repair Time:30 - 60 mins
-
Tools:Screw drivers
2 of 2 people
found this instruction helpful.
Was this instruction helpful to you?
Thank you for voting!
Oven upper heating element went out.
Turned the breaker off to the stove.
Removed 4 screws holding the element in place.
Disconnected the electric connection from element.
I had to replace the screws which were corroded.
Connect the new element electric connection.
Replace the 4 screws.
Turn on the power.
Turn on oven to burn off the smell of the new element.
You are done.
Removed 4 screws holding the element in place.
Disconnected the electric connection from element.
I had to replace the screws which were corroded.
Connect the new element electric connection.
Replace the 4 screws.
Turn on the power.
Turn on oven to burn off the smell of the new element.
You are done.
Parts Used:
-
Lewis from WICHITA, KS
-
Difficulty Level:Really Easy
-
Total Repair Time:30 - 60 mins
-
Tools:Screw drivers
2 of 2 people
found this instruction helpful.
Was this instruction helpful to you?
Thank you for voting!
Baking element failed
Remove the oven from the wall
Remove the rear panel
Remove the 2 bottom panels
Lift and fold back the insulation
Remove the element enclosure
Replace the element
Reverse the steps to assemble
* the oven would not preheat and the top elements were working
Remove the rear panel
Remove the 2 bottom panels
Lift and fold back the insulation
Remove the element enclosure
Replace the element
Reverse the steps to assemble
* the oven would not preheat and the top elements were working
Parts Used:
-
ROBERT from BISMARCK, ND
-
Difficulty Level:A Bit Difficult
-
Total Repair Time:1- 2 hours
-
Tools:Nutdriver
2 of 2 people
found this instruction helpful.
Was this instruction helpful to you?
Thank you for voting!
Broiler quit broiling
Turned off circuit breaker to oven
Removed oven door
Removed screws of reflector plate and top and back of oven
Gently pulled element out and down slightly
Removed slide crimps on wires
Replaced reflector plate on new element
Connected slide crimps on wires
Screwed reflector plate with new element to top and back of oven
Done. Total time 22 minutes
Tested and it’s perfect!
Removed oven door
Removed screws of reflector plate and top and back of oven
Gently pulled element out and down slightly
Removed slide crimps on wires
Replaced reflector plate on new element
Connected slide crimps on wires
Screwed reflector plate with new element to top and back of oven
Done. Total time 22 minutes
Tested and it’s perfect!
Parts Used:
-
Linda from BOLIVAR, TN
-
Difficulty Level:Really Easy
-
Total Repair Time:15 - 30 mins
-
Tools:Screw drivers
2 of 2 people
found this instruction helpful.
Was this instruction helpful to you?
Thank you for voting!
Oven temperature did match target temp entered on control panel.
I found that what was keeping the old temp sensor electrical connection attached to the stove-side connection was a little tab. It wasn't obvious that that was the thing that was keeping the connection secure but there weren't any other alternatives. So pushing the tab up with the metal probe (just a narrow rigid metal wire) allowed me to pull the connection apart.
All this takes place way at the back of the oven so its difficult to fiddle with a screwdriver and the retaining screws at arms length. Putting a bit of scotch tape around the screw to keep it attached to the screwdriver kept it from falling off. My hand was a bit shaky extended like that so that was the way to go.
Bottom line, if your oven won't reach or hold the temp you dial in on the control panel it's the temperature sensor. Now if I set it for 300 deg. that's what I get.
All this takes place way at the back of the oven so its difficult to fiddle with a screwdriver and the retaining screws at arms length. Putting a bit of scotch tape around the screw to keep it attached to the screwdriver kept it from falling off. My hand was a bit shaky extended like that so that was the way to go.
Bottom line, if your oven won't reach or hold the temp you dial in on the control panel it's the temperature sensor. Now if I set it for 300 deg. that's what I get.
Parts Used:
-
Richard from EVANSTON, WY
-
Difficulty Level:Really Easy
-
Total Repair Time:15 - 30 mins
-
Tools:Screw drivers
2 of 2 people
found this instruction helpful.
Was this instruction helpful to you?
Thank you for voting!
YouTube

-
Janet from GALLATIN, TN
-
Difficulty Level:Really Easy
-
Total Repair Time:Less than 15 mins
-
Tools:Screw drivers
2 of 3 people
found this instruction helpful.
Was this instruction helpful to you?
Thank you for voting!
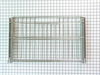
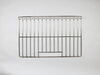
Old oven rack was not possible to clean any more
Order part from this site was very easy. It matched perfectly and I had no problem installing it
Parts Used:
-
Alena from WEST HILLS, CA
-
Difficulty Level:Very Easy
-
Total Repair Time:Less than 15 mins
2 of 3 people
found this instruction helpful.
Was this instruction helpful to you?
Thank you for voting!