




















KDRS407VBU01 KitchenAid Range - Instructions
Keep searches simple. Use keywords, e.g. "leaking", "pump", "broken" or "fit".
Broke inside glass by touching it while hot with wet rag
first you have to remove door, so open door all the way, pull back the lever on each hinge, then close door all the way, it will be able to be pulled straight out then, but be careful, its a heavy sucker. I layed a blanket out on table and layed door on blanket, start by taking out screws around the edges of door, keep these in separate container.(don't lose any). now you need to separate the door in half, this can be a lil difficult, mine had grease build up on one end that I had to be scraped . pay special attention to how the brackets go and how the door comes apart, this info will be needed later, now that door is in half, you will need to start taking the 2 other layers of glass out, please pay attention how you take apart, it has to be replaced exactly right. take pics if needed. when you get to the broken glass, take out carefully, and place glass over opening, centered well. now you have to start replacing the other layers, the replaced broken glass is kept in place by pressure, once you get the other glass layers in do not lift up door, you will need to put in the screws under the door, one of which tightens the hinge base to the door, these are the screws that tighten the replaced glass, I found this out the hard way and had to undo the whole thing again to recenter the glass, once tight, just keep going backwards replacing the other half of door. once you do this you will either say, wow that stunk, or wow that was easier than I thought. if you don't have patience, then take the door and glass to a repair shop, because you are dealing with 3 pieces of glass costing 50.00 each. be smart.
Parts Used:

-
Helen from Bryson City, NC
-
Difficulty Level:A Bit Difficult
-
Total Repair Time:1- 2 hours
-
Tools:Screw drivers
Was this instruction helpful to you?
Thank you for voting!
Spilled liquid on hot door glass
Hardest part was getting the oven door off. Since I bought this house with oven already in place, I had no owner's manual. Tried to get it off with tips found on this site, no go. Went online and found the manual which said to insert allen wrench in holes in hinge, then lift up FROM THE BOTTOM. That is the key. Got door off, then found that replacing the inner glass is a multi step process that starts with the outside door, then multiple brackets to the next inside glass, then more braces to next glass, then finally you are at the broken (inside) glass.My advice would be to take pictures on cell phone or whatever of each level, so you know what goes where when you put it all back. I figured it out but would be faster with a picture. Anyway, got all together and the oven works fine, door looks great!.
Parts Used:
-
Donna from Castle Rock, CO
-
Difficulty Level:A Bit Difficult
-
Total Repair Time:1- 2 hours
-
Tools:Screw drivers
Was this instruction helpful to you?
Thank you for voting!
broken inner glass in oven door
I removed the oven door using the instructions in the book that came with the oven useing 2 allen wrenches as described. I called up the parts list for the oven door on my computer and made a copy.This was very helpful in removeing the door and getting to the broken glass and installing the new glass The one thing that that i regret was not ordering the insulation frame that went around the new glass. It was difficult getting it back in place.I would order this part if I have to do this again. I ordered the new glass on a Saturday and the new glass was delivered on Tuesday.Thank you for the great service. Bill- Texas
Parts Used:
-
W E from Jacksonville, TX
-
Difficulty Level:Easy
-
Total Repair Time:1- 2 hours
-
Tools:Screw drivers
Was this instruction helpful to you?
Thank you for voting!
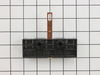
Melted and fused together wires due to non-grounding of terminal block
We called a dear handyman church member with years of repair service to his home, personal vehicles and general maintenance of our little church and parsonage. Known for his trade as an engineer with over 50 years in the industry wearing white shirts and working in an office; however, he is not afraid to get his hand dirty. We all worked together (my husband, daughter and me) to troubleshoot and resolve the problem and the terminal block purchased from "parts select" was just the answer to all our problems and worries. The range is fully operational and works like new. Thanks.
Parts Used:
-
Dr PauMari from Alamogordo, NM
-
Difficulty Level:Really Easy
-
Total Repair Time:1- 2 hours
-
Tools:Nutdriver, Pliers, Screw drivers, Socket set, Wrench (Adjustable), Wrench set
Was this instruction helpful to you?
Thank you for voting!