




















JGBP25DEM7WW General Electric Range - Instructions
Keep searches simple. Use keywords, e.g. "leaking", "pump", "broken" or "fit".
Sometimes the cake bakes, sometimes it doesn't
First replaced temperature sensor following YouTube instructions.
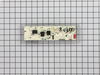
Then removed upper back panel to expose the control board. Removed the screws holding the control board, but DID NOT disconnect the wires. Moved the old control board up over the top of the range to let it rest on the stove top.
Fit the new overlay on the new control board. There are edges on the bottom and one side of the control board that makes aligning it easy.
Then ONE AT A TIME, starting with the largest connector on the end of the board, disconnected a lead and reconnected to the new board. NOTE: THE CONNECTORS ON THE NEW BOARD ARE IN DIFFERENT LOCATIONS THAN ON THE OLD! But if you look closely, they are all labeled. Simply find the same label on the new board and connect the lead from that connector on the old board. Making the right connections is NOT a problem. And there are connectors on the new board that are NOT USED! A note in the packaging warns of this.
Remounted the control board, replaced the back panel, and plugged the range back in. The new control board flashed all the LEDs and the clock started blinking. Set the clock. Turned the oven on and confirmed that it lit, cycled on and off during preheat, and beeped when it came out of preheat.
Since this was a new sensor and a new control board, I used my DMV and thermocouple to check the min/max temp during the heating cycle. Had to calibrate the temp down 5 degrees. Instructions for doing this are on the web and in the owners manual. It is easy.
Finally, did the GE Biscuit Test (Google it) and the biscuits were a bit under baked at the minimum time and a bit over baked at the maximum time. Perfect!
Everything fit, everything worked, took about 45 minutes start to finish. Wife is happy and I'm getting baked goodies again!
Then removed upper back panel to expose the control board. Removed the screws holding the control board, but DID NOT disconnect the wires. Moved the old control board up over the top of the range to let it rest on the stove top.
Fit the new overlay on the new control board. There are edges on the bottom and one side of the control board that makes aligning it easy.
Then ONE AT A TIME, starting with the largest connector on the end of the board, disconnected a lead and reconnected to the new board. NOTE: THE CONNECTORS ON THE NEW BOARD ARE IN DIFFERENT LOCATIONS THAN ON THE OLD! But if you look closely, they are all labeled. Simply find the same label on the new board and connect the lead from that connector on the old board. Making the right connections is NOT a problem. And there are connectors on the new board that are NOT USED! A note in the packaging warns of this.
Remounted the control board, replaced the back panel, and plugged the range back in. The new control board flashed all the LEDs and the clock started blinking. Set the clock. Turned the oven on and confirmed that it lit, cycled on and off during preheat, and beeped when it came out of preheat.
Since this was a new sensor and a new control board, I used my DMV and thermocouple to check the min/max temp during the heating cycle. Had to calibrate the temp down 5 degrees. Instructions for doing this are on the web and in the owners manual. It is easy.
Finally, did the GE Biscuit Test (Google it) and the biscuits were a bit under baked at the minimum time and a bit over baked at the maximum time. Perfect!
Everything fit, everything worked, took about 45 minutes start to finish. Wife is happy and I'm getting baked goodies again!
Parts Used:


-
Richard from LEESBURG, FL
-
Difficulty Level:Really Easy
-
Total Repair Time:30 - 60 mins
-
Tools:Nutdriver, Pliers, Screw drivers
2 of 2 people
found this instruction helpful.
Was this instruction helpful to you?
Thank you for voting!
Existing oven bottom was damaged.
Removed two screws to remove old bottom. Insert new oven bottom and re-attach screws.
Parts Used:
-
Charlotte from CHICAGO, IL
-
Difficulty Level:Really Easy
-
Total Repair Time:30 - 60 mins
-
Tools:Nutdriver
2 of 2 people
found this instruction helpful.
Was this instruction helpful to you?
Thank you for voting!
The oven burner would not ignite
Removed oven door, warming drawer, oven bottom, oven burner, disconnected wires to igniter. Also, instructions said to turn off gas supply at pressure regulator, {little red lever.} I also turned off main gas supply, and un-plugged power cord. Removing the igniter and replacing with new one was easy. Splicing wires and putting everything back together was also pretty easy. The only problem was when I tryed to open the gas to the pressure regulator, the little red lever popped off. Very cramped area to work in, could'nt get a tool to fit in there. So, I got some nylon string, made a loop, looped it on the notch on the pin, pulled it out and got the little red lever back onto the pin and then was able to open the valve. There is no gas going to the burner if that lever is not on holding the pin out, and you can't put that lever back on unless the pin is pulled out. If I ever do that job again I will not touch the red lever, I will just shut off the main gas supply. It would have been a pretty easy fix if that lever would not have popped off.
Parts Used:
-
Robert from Fallbrook, CA
-
Difficulty Level:A Bit Difficult
-
Total Repair Time:1- 2 hours
-
Tools:Screw drivers, Socket set
2 of 2 people
found this instruction helpful.
Was this instruction helpful to you?
Thank you for voting!
Oven not lighting
Secured the power, Opened the back of the range, and discovered a rodent chewed the wires in half so I striped the ends and wired them back together, the oven works great !!
Parts Used:
-
Charles from SAINT LOUIS, MI
-
Difficulty Level:Really Easy
-
Total Repair Time:30 - 60 mins
-
Tools:Nutdriver
2 of 2 people
found this instruction helpful.
Was this instruction helpful to you?
Thank you for voting!
Drawer sticking and not operating smoothly
I was so sick of this drawer and I over heard a buddy telling a story about a website that you can get ANY piece for appliances. I take the drawer out, look up the website (partselect.com) look at the appliance diagram and find the missing piece. Order it, get it, install it. My wife thinks I'm a hero and I think I'm pretty cool too.
Parts Used:
-
Bill from Philadelphia, PA
-
Difficulty Level:Easy
-
Total Repair Time:Less than 15 mins
-
Tools:Screw drivers
3 of 5 people
found this instruction helpful.
Was this instruction helpful to you?
Thank you for voting!
Drawer support broke
Remove drawer by pulling out and lifting up so drawer will slide out of range. Use 1/4 inch Nutdriver or socket - remove the screw that holds the drawer support to the body of the range. Remove support and install new one with screw Pay attention to the way the support fits. There are two holes one for the screw and the other for the plastic prong on the bottom of the support. The prong fits in the bottom hole and the screw in the above hole.
Parts Used:
-
Charles from BOULDER, WY
-
Difficulty Level:Really Easy
-
Total Repair Time:Less than 15 mins
-
Tools:Nutdriver
2 of 2 people
found this instruction helpful.
Was this instruction helpful to you?
Thank you for voting!
Part rusted over time...22 years.
Unscrewed eight screws. Removed rusted part. Cleaned area with Windex. Replaced new part.
Parts Used:
-
Jeannene from HUNTINGTON, TX
-
Difficulty Level:Very Easy
-
Total Repair Time:Less than 15 mins
-
Tools:Screw drivers
2 of 2 people
found this instruction helpful.
Was this instruction helpful to you?
Thank you for voting!
Broken drawer glider
Took off broken part and replaced it with the new part by removing a Phillips head screw, the broken part, replace with new and reinstalling the same screw.
Parts Used:
-
James from RANCHO MIRAGE, CA
-
Difficulty Level:Very Easy
-
Total Repair Time:Less than 15 mins
-
Tools:Screw drivers
2 of 2 people
found this instruction helpful.
Was this instruction helpful to you?
Thank you for voting!
no problems it was very easy the parts were a perfect match
first you have close the main gas line, then you remove the nut in the center of each burner then you have to push in the two tabs located in the front part of the stove. one on each side of the out side burners. then you lift the top of the stove. then you will need a wrench to loosen the nuts on the tub. then you have to line up the new ones. put the stove top back on then you have to put the nuts on each burner then you can test for gas leaks
Parts Used:
-
Luis E from HANOVER PARK, IL
-
Difficulty Level:Very Easy
-
Total Repair Time:15 - 30 mins
-
Tools:Socket set, Wrench set
2 of 2 people
found this instruction helpful.
Was this instruction helpful to you?
Thank you for voting!
F 3 code came on my panel, the oven wasn’t getting to the right temperature
I remove the old thermostat and realized right away it was burned, the replacement was very easy to clip on
Parts Used:
-
Enrico from DURHAM, NC
-
Difficulty Level:Very Easy
-
Total Repair Time:Less than 15 mins
-
Tools:Wrench set
2 of 2 people
found this instruction helpful.
Was this instruction helpful to you?
Thank you for voting!
Bottom trim piece on 24 year old stove had rusted. Replace trim piece was still available.
Very simple. Lift oven door off brackets and set on floor. Remove sheet metal screws holding on existing trim piece, Clean area beneath trim.
Put new trim piece on, don't tighten any of the screws until all have been started as some adjustment is needed to align the holes for the screws.
Put new trim piece on, don't tighten any of the screws until all have been started as some adjustment is needed to align the holes for the screws.
Parts Used:
-
Donald from FAYETTEVILLE, NY
-
Difficulty Level:Very Easy
-
Total Repair Time:Less than 15 mins
-
Tools:Socket set
2 of 2 people
found this instruction helpful.
Was this instruction helpful to you?
Thank you for voting!
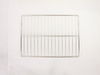
oven racks very old and writing on knobs worn ff
-
Patricia from SAN JOSE, CA
-
Difficulty Level:Very Easy
-
Total Repair Time:Less than 15 mins
2 of 2 people
found this instruction helpful.
Was this instruction helpful to you?
Thank you for voting!
lights blown out

-
Gerald from WINTERVILLE, GA
-
Difficulty Level:Very Easy
-
Total Repair Time:Less than 15 mins
6 of 14 people
found this instruction helpful.
Was this instruction helpful to you?
Thank you for voting!
rusted trim strip
-
Larry from Sarasota, FL
-
Difficulty Level:Really Easy
-
Total Repair Time:15 - 30 mins
-
Tools:Socket set
3 of 5 people
found this instruction helpful.
Was this instruction helpful to you?
Thank you for voting!
The trim piece on the bottom of the door was rusted making the unit look really dirty and used.
It was pretty simple. Just remove the door as the bottom piece holds all the parts together. Place on table top and remove old trim. Install new trim and install door. The only difficult part was the trim had a space for the glass door front. I opened up the space so that the glass would seat easier. Went together real easy. Stove looks like it's brand new.
Parts Used:
-
Glenn from West Melbourne, FL
-
Difficulty Level:Really Easy
-
Total Repair Time:15 - 30 mins
-
Tools:Nutdriver
2 of 2 people
found this instruction helpful.
Was this instruction helpful to you?
Thank you for voting!