




















JES9860CAS02 Jenn-Air Range - Instructions
Keep searches simple. Use keywords, e.g. "leaking", "pump", "broken" or "fit".
Inner glass pane broke during self-cleaning operation
I removed all the screws that held the trim and inner frame to the outside window unit first. Then, I removed a protective glass from over the two inner panes. Next after removing the frame that held the two inner glass panes together, I took the broken inner glass pane out and replaced it with the new one. Then basically I just retraced my steps and had the door put back together in about 45 minutes. You just need to pay close attention to your disassembly so that you are able to put the pieces back together quickly.
Parts Used:

-
Mark from Abingdon, VA
-
Difficulty Level:Easy
-
Total Repair Time:30 - 60 mins
-
Tools:Screw drivers
4 of 7 people
found this instruction helpful.
Was this instruction helpful to you?
Thank you for voting!
Oven heat loss, door gasket needed replacement
The entire "project" took me less than 3 minutes, and required no tools at all! First, the saleswoman over the phone pointed me to the correct product for my problem ($30 less than what I thought I needed), and it arrived at my home within 4 days. Then, it was just a matter of pulling off the old gasket, and snapping the new one in place! Simple!
Parts Used:

-
Stephen from Chapell Hill, NC
-
Difficulty Level:Really Easy
-
Total Repair Time:Less than 15 mins
3 of 4 people
found this instruction helpful.
Was this instruction helpful to you?
Thank you for voting!
Bake element blew up
took the old one out (two phillips head screws)and put the new one in. done. took about 5-6 minutes.
Parts Used:

-
Kevin from Norfolk, VA
-
Difficulty Level:Easy
-
Total Repair Time:Less than 15 mins
-
Tools:Screw drivers
4 of 7 people
found this instruction helpful.
Was this instruction helpful to you?
Thank you for voting!
element burn out
-
steve from mcminnville, OR
-
Difficulty Level:Easy
-
Total Repair Time:Less than 15 mins
-
Tools:Pliers, Screw drivers
4 of 7 people
found this instruction helpful.
Was this instruction helpful to you?
Thank you for voting!
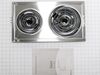
eyes burned out on old cartridge
Simply unpluged the old cartridges and plugged in the new ones, it could not have been easier. My 18 year old cooktop looks brand new. My old cartridges were black and the new ones are stainless, but, the look is good, since most new appliances are now stainless. The best part is that it cost less than half of what a new cooktop would have cost plus all of the mess that would have been made tearing out the old one and installing a new one. Thanks PartSelect, A Very Satisfied Customer.
Parts Used:
-
Dwayne from Minden, LA
-
Difficulty Level:Really Easy
-
Total Repair Time:Less than 15 mins
3 of 4 people
found this instruction helpful.
Was this instruction helpful to you?
Thank you for voting!
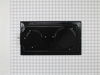
The original grill didn't work well, and I needed 4 eyes to cook on. I received the new module quickly, and had it installled in 20 seconds. Immediate heat and good looks. It really transfors this old range!! Thanks!!
Lifted out and unplugged grill. Plugged in and put in place new module. I tested it right then and it worked great!
Parts Used:
-
Frederick from Birmingham, AL
-
Difficulty Level:Really Easy
-
Total Repair Time:Less than 15 mins
5 of 10 people
found this instruction helpful.
Was this instruction helpful to you?
Thank you for voting!
bake element needed replacement
-
svetlana from chicago, IL
-
Difficulty Level:Really Easy
-
Total Repair Time:Less than 15 mins
-
Tools:Screw drivers
4 of 7 people
found this instruction helpful.
Was this instruction helpful to you?
Thank you for voting!
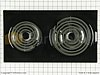
Stove did not include any burners only grill
-
Malcolm from Lynchburg, VA
-
Difficulty Level:Really Easy
-
Total Repair Time:Less than 15 mins
2 of 2 people
found this instruction helpful.
Was this instruction helpful to you?
Thank you for voting!
Needed part for stove, so I could list and sell the house.
I needed two parts for the Jenn-Air stove that was in a house I was trying to get ready to sell. I didn't realize I needed the parts until the day before the house was to be listed. So, I was able to order from Parts Select and have the parts shipped overnight for an extra fee. They arrived the next morning. After opening the box, I realized the wrong color had been shipped. I called and the service I received was just awesome. The overnight shipping was refunded. And the right part was shipped out at no extra charge. I was told to keep the first part that had been shipped as well. The new part arrived the next day. Thumbs up for Parts Select! They are my new go-to-guy!
Parts Used:

-
Emily E from Saint Louis, MO
-
Difficulty Level:Really Easy
-
Total Repair Time:Less than 15 mins
3 of 5 people
found this instruction helpful.
Was this instruction helpful to you?
Thank you for voting!
I wanted to replace the grill set and the older style solid cartridge element in my cook top.
I simply removed the old cartridge by lifting it up and pulling the plug end out. I slid the new coil cartridge with the plug end in its place. The grill replacement was similar. Remove the grll grates, pull out the burner element from its plug position, remove the grill rocks and insert the new coil cartridge in its place. No tools or special skills required. It's like I now have a new cook top.
Parts Used:
-
John from Las Vegas, NV
-
Difficulty Level:Really Easy
-
Total Repair Time:Less than 15 mins
2 of 2 people
found this instruction helpful.
Was this instruction helpful to you?
Thank you for voting!
Oven would not heat
Spoke to your very helpful staff, who advised me that a likely problem was the oven sensor. I took a chance and ordered the part, which came promptly. Your service video for the part was most helpful in my decision to try the part. Installation was a breeze, but it was the oven controller board that had failed and not the oven sensor. That called for a service professional, who ultimately fixed the problem. Your service though, was excellent and I would highly recommend you to others.
Parts Used:

-
francis from mount holley, VA
-
Difficulty Level:Really Easy
-
Total Repair Time:Less than 15 mins
-
Tools:Screw drivers
2 of 2 people
found this instruction helpful.
Was this instruction helpful to you?
Thank you for voting!
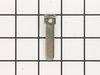
A local repair shop informed the individual that the burner unit could not be repaired and she would have to replace the cooktop..
After examining the burner unit I noticed that one of the male contact spades was burned and look deformed. After removing the spade I discovered that it had been originally manufactured incorrectly. I went on line to try and find the part. I found it at this site . I ordered 2 of the spades and replaced the deformed spade and another one that looked like it had gotten a little hot. She tried the unit and it worked perfectly. She had not used that burner unit for a very lengthy time. The investigation of the problem took a little time, but the repair went very fast. Moral is :" If a spade doesn't look right, it probably isn't", but either the individual spade or plug can be replaced. This site is now my "GO TO" place for parts.
Parts Used:
-
Sonny from MOUNT VERNON, GA
-
Difficulty Level:Very Easy
-
Total Repair Time:Less than 15 mins
-
Tools:Screw drivers, Socket set
2 of 2 people
found this instruction helpful.
Was this instruction helpful to you?
Thank you for voting!
Bad burner on surface module.
Remove old module and insert new one. Took longer to get out of box than to install.
Parts Used:
-
Russell from CHAMPAIGN, IL
-
Difficulty Level:Very Easy
-
Total Repair Time:Less than 15 mins
2 of 2 people
found this instruction helpful.
Was this instruction helpful to you?
Thank you for voting!
Cracked glass top
-
PHYLLIS from CAMANO ISLAND, WA
-
Difficulty Level:Very Easy
-
Total Repair Time:Less than 15 mins
2 of 2 people
found this instruction helpful.
Was this instruction helpful to you?
Thank you for voting!
Oven would over heat and produce a F2 error code on the display. It would not turn off or cool down until I switched the circuit breaker off.
I switched the oven sensor easily enough, but it did not remedy the problem, so we are in the process of replacing the oven since it's about 20 yrs. old.
Parts Used:
-
richard from SAINT MARYS, KS
-
Difficulty Level:Very Easy
-
Total Repair Time:Less than 15 mins
-
Tools:Screw drivers
2 of 2 people
found this instruction helpful.
Was this instruction helpful to you?
Thank you for voting!