




















JES1351WB002 General Electric Microwave - Instructions
Keep searches simple. Use keywords, e.g. "leaking", "pump", "broken" or "fit".
Microwave wouldn’t heat
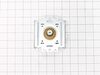
I want to preface this review by stating that I do some DIY from YouTube, but have no experience in electronic repair. The microwave is over the stove with the extendavent. First I unplugged the microwave, removed the vent and started to unscrew the microwave from the mount. I used a power drill to speed things up. I was able to remove the microwave on my own. I unscrewed the lid on the microwave and took the lid off and there is the magnetron. I opened up needle nose pliers to have each end touch the terminals of the capacitor (holds the power, Dangerous). I made sure to keep my hands on the rubber handles and avoid touching the metal part of the pliers. I used the pliers to remove the plug of the capacitor to the magnetron as well. The magnetron has 4 screws (2 top, 2 bottom). There is a magnet that can hold the screws to keep from falling but I’d still recommend a screwdriver with a magnet on the end. The magnetron has another set of wires connected by a metal bracket like a holder, not really connecting any wiring to the magnetron itself. I had to unscrew 1 screw to removed that. Adding everything back on was easy, same steps back. I plugged in the microwave and tested a cup of water before I mounted it back above the stove. Voila! I did need my wife’s help to hold the microwave on the hinge while screwing into the mount. It doesn’t take a lot of muscle for the help. $85 for the part and ~40 mins to fix a $400 microwave!
Parts Used:
-
Rex from ROSEVILLE, CA
-
Difficulty Level:Really Easy
-
Total Repair Time:30 - 60 mins
-
Tools:Pliers, Screw drivers
1 person
found this instruction helpful.
Was this instruction helpful to you?
Thank you for voting!
Timer, light and control pad worked. Turn table and heat did not work. Oven would not start up.
I first read where someone had the same problem. Their solution was a burned-out fuse. I ordered a new fuse...installed it and that did not solve my problem. I revisted PartSelect and read how Marla (from Arlington, TX)solved her problem. I purchased a secondary switch and when it arrived, I made a copy of Marla's instructions and followed them to the letter. I installed the new secondary switch into the secondary space, put everything back together and the oven STILL DID NOT WORK. I had to take the latching panel apart again and test each switch to see if there was another bad one. I found that the third switch was burned out. So I took the new switch out of the second slot and installed it into the third slot. I tested the switches before reinstalling the latching panel. This time everything worked. So I put everything back together, reinstalled the microwave on the wall, tested it again, and everything worked perfectly.
Parts Used:

-
Pearlie from Beulaville, NC
-
Difficulty Level:A Bit Difficult
-
Total Repair Time:30 - 60 mins
-
Tools:Screw drivers
1 person
found this instruction helpful.
Was this instruction helpful to you?
Thank you for voting!
Unit would not heat
Used a Motor cycle Jack to remove both unites combined. Removed side panels exposing internal working parts. Removed nonworking Magnetron and replaced it with new Magnetron. The process was completed in about 1 hour.
Parts Used:
-
william from LA VERNE, CA
-
Difficulty Level:Easy
-
Total Repair Time:30 - 60 mins
-
Tools:Pliers, Socket set, Wrench (Adjustable)
1 person
found this instruction helpful.
Was this instruction helpful to you?
Thank you for voting!
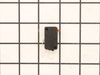
The unit would run when the door was open!
First I had to accept the fact that the unit was designed to keep non-professional people from doing any repairs. The switch was installed in such a manner that I had to break the mounting to remove the switch, then drill a hole in the mounting to secure the new switch in place.
Parts Used:
-
Mike from BLUFFTON, SC
-
Difficulty Level:A Bit Difficult
-
Total Repair Time:1- 2 hours
-
Tools:Nutdriver, Pliers, Screw drivers, Socket set, Wrench set
1 person
found this instruction helpful.
Was this instruction helpful to you?
Thank you for voting!
no power in microwave in turn table wouldn't turn light would work act like door was open
remov cover to check voltage and found problem at the interlock switch ohm the switch and found it was open replace both switches it work fine now
Parts Used:
-
johnny from port orange, FL
-
Difficulty Level:Easy
-
Total Repair Time:1- 2 hours
-
Tools:Screw drivers
5 of 13 people
found this instruction helpful.
Was this instruction helpful to you?
Thank you for voting!
Not heat
-unplug
-remove top and front covers
-unplug wire connectors from heating assembly
-remove heating assembly from metal stand and push out of the way
-remove metal stand from dry
-pull out heating assembly
-install new one in reserve order
-remove top and front covers
-unplug wire connectors from heating assembly
-remove heating assembly from metal stand and push out of the way
-remove metal stand from dry
-pull out heating assembly
-install new one in reserve order
Parts Used:
-
Kip from POWELL, OH
-
Difficulty Level:Very Easy
-
Total Repair Time:15 - 30 mins
-
Tools:Screw drivers, Socket set
1 person
found this instruction helpful.
Was this instruction helpful to you?
Thank you for voting!
Microwave would not heat. Convection still worked.
I verified I had 120 volts going into transformer when the microwave was supposed to be running. The capacitor and HV diode both tested good. Be sure to discharge the capacitor before working in this area. This isolated trouble to either the transformer or magnetron. The windings of the transformer measured good. So ordered a magnetron. It was very easy to swap. There were 4 screws and one connector. This fixed our microwave.
Parts Used:
-
Stacie from Granbury, TX
-
Difficulty Level:Really Easy
-
Total Repair Time:Less than 15 mins
-
Tools:Screw drivers
1 person
found this instruction helpful.
Was this instruction helpful to you?
Thank you for voting!
Microwave would not heat up
-
Suzanne from POWELL, OH
-
Difficulty Level:Really Easy
-
Total Repair Time:15 - 30 mins
1 person
found this instruction helpful.
Was this instruction helpful to you?
Thank you for voting!
Door Switch went bad, Internal Fan would run every time you open the door
Unscrewed the control panel (2 screws), lift up and let hang, with a plan screwdriver open bracket holding the switch, unplug 2 wires, replace with new switch, plug in the 2 wires, push switch back into bracket. Then slide on the control panel, put the 2 screws back. Easy fix.
Parts Used:
-
gilbert from TOMS RIVER, NJ
-
Difficulty Level:Really Easy
-
Total Repair Time:15 - 30 mins
-
Tools:Screw drivers
1 person
found this instruction helpful.
Was this instruction helpful to you?
Thank you for voting!
No heat.
-
Mack from Jacksonville, FL
-
Difficulty Level:Really Easy
-
Total Repair Time:Less than 15 mins
-
Tools:Pliers, Screw drivers
0 of 1 people
found this instruction helpful.
Was this instruction helpful to you?
Thank you for voting!
no heat
unplug the unit then pull down , lot of screws are on top. open the cover . you could see the parts that need to replace on the right hand side (heavy side). disconnect wires then test the parts that need to replace by a tester to make sure that it's really broke .then unscrew part and replace .
Parts Used:
-
Nelia from Streamwood, IL
-
Difficulty Level:Really Easy
-
Total Repair Time:30 - 60 mins
-
Tools:Nutdriver, Screw drivers
0 of 1 people
found this instruction helpful.
Was this instruction helpful to you?
Thank you for voting!
Replacement of Magnetron
I UNPLUGGED the microwave and removed the cover, using a phillips and a Torx screwdriver for the machine screws. I set these screws aside, so as not to confuse them with the later encountered screws. I photographed the magnetron to assure proper placement of the 6 phillips machine screws involved in reassembly (marking the the locations on the old magnetron would do as well. I marked the old magnetron "old", to avoid later confusion. I removed the two screws holding the shields to the magnetron. I removed 3 of the 4 screws holding the magnetron to the microwave, leaving one of the top screws. I held the magnetron securely and removed the last screw, pulling out a the part of the magnetron that penetrated the microwave. I installed the new magnetron in reverse order. One problem I encountered was locating one of the six screws, which had been pulled into the old magnetron by magnetism.
Parts Used:
-
Benjamin from Anchorage, AK
-
Difficulty Level:Really Easy
-
Total Repair Time:15 - 30 mins
-
Tools:Screw drivers
0 of 1 people
found this instruction helpful.
Was this instruction helpful to you?
Thank you for voting!
No heat
-
Edwin from New York, NY
-
Difficulty Level:Really Easy
-
Total Repair Time:15 - 30 mins
-
Tools:Screw drivers
0 of 1 people
found this instruction helpful.
Was this instruction helpful to you?
Thank you for voting!
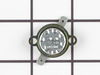
Small explosion inside unit blew out the flame sensor
Unit was painted inside recently, but apparently some paint fumes still lingered so that when the unit was turn on, there was a very small explosion that took out the flam sensor thermostat. This thermostat interrupts the white leg of the AC input and cuts off all power.Performing a continuity test on the flame sensor showed it was permanently open (no continuity). Turns out I had a similar part from an old coffee maker and when I installed this part, the microwave turned on just fine. So I order the correct sensor from Parts Select. Part installation involved removing the TT20 Security Star bits (4) and the right/left side phillips screws. Now the top/side unit cover comes off by pulling the cover backwards and up and out. The flame sensor is in the middle of the front section underneath the top cover, and comes out easily with pull-off connectors. There are also bendable pins that hold the sensor down flush to the top of the unit.
Parts Used:
-
Paul from Palm Coast, FL
-
Difficulty Level:Really Easy
-
Total Repair Time:15 - 30 mins
-
Tools:Nutdriver, Pliers, Screw drivers
Was this instruction helpful to you?
Thank you for voting!
Microwave would turn on ,BUT turn table would not turn and oven would not heat.
Took off cover , unpluged switches , took off switch assy, off/on test hooped and howlered for about 5 mins .Then laughed about other sites said could get those switches. Just wanted to say I LOVE Partselect. Super fast del , great price. JUST AWSOME!!!!!!!!!!!!!!!!!!!!!!!!!!!!
Parts Used:
-
Earl from New Philidelphia, OH
-
Difficulty Level:Easy
-
Total Repair Time:15 - 30 mins
-
Tools:Screw drivers
Was this instruction helpful to you?
Thank you for voting!