




















JES1133WD - Instructions
Keep searches simple. Use keywords, e.g. "leaking", "pump", "broken" or "fit".
No heat.

-
Mack from Jacksonville, FL
-
Difficulty Level:Really Easy
-
Total Repair Time:Less than 15 mins
-
Tools:Pliers, Screw drivers
0 of 1 people
found this instruction helpful.
Was this instruction helpful to you?
Thank you for voting!
Microwave operated but did not heat
Initial failure of over range microwave Aug 3rd. Control Panel worked but no heat. Took to local LG authoriaed local repair place. They fixed it quickly and we re-installed it. Worked fine for 2 months then had similar failure again. Agaim took to same authorized repairer. They kept unit for 3 months but finally concluded theu could not fix it and suggested we contact LG for a partial refund. When they tested the unit during re-assembly in my presence, there was a blue flash and the fuse blew. Since we had built a custom tile mural back splash around this unit, I brought it home, ordered a number of time delay fuses new capacitor and two new high voltage diodes. However, using my Fluke DMM, I checked the existing capacitor and high voltage diode and they checked OK so I just replaced the time delay fuse. The high voltage transformer leads had 2 possible ways to connect to capacitor and diode. Tried one way, plugged unit in and turned it on, and immediatly blew the fuse. Replaced the fuse and reversed the high voltage transformer connections,amd turned unit pn, and it worked perfectly. Since we had experienced several power failures during the time of the original failure, the repairer concluded that power spikes might be at fault, so I also purchased a TrippLite ISOBAR4ULTRA 3300 Joule surge protector between wall outlet and microwave, and re-installed over range. It has worked perfectly since.
Parts Used:

-
Donald from Oak Ridge, TN
-
Difficulty Level:Easy
-
Total Repair Time:1- 2 hours
-
Tools:Screw drivers
3 of 10 people
found this instruction helpful.
Was this instruction helpful to you?
Thank you for voting!
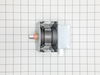
Microwave would only heat food items to a warm condition
Removed microwave cover using screwdriver and anti tamper bit available at local hardware store. Megnetron had broken magnet making discovery of deffective part easy. Removed wire connector and three screws attaching magnetron to case, removed magnetron and installed new item in reverse order. Installed cover and made popcorn for operational check of microwave. Happy days..........
Parts Used:
-
John from Tijeras, NM
-
Difficulty Level:Really Easy
-
Total Repair Time:30 - 60 mins
-
Tools:Screw drivers
Was this instruction helpful to you?
Thank you for voting!
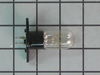
Microwave light went out
I have the built-in microwave in the cabinet. The hard part was getting it out of the cabinet. Once out, removing the cover and replacing the bulb and fuse was very easy. You need the tamper proof star bits to take out the screws holding the cover to the microwave. I got the bit set from Amazon for about $8. My fuse was OK. But I replaced it anyway, since it was 4-year-old. I am no expert in appliance repair, but found it fairly easy to do the repair. After unplugging the microwave, wait for 20 to 30 minutes before opening it, so that the capacitor inside completely discharges. It is supposed to discharge in 30 seconds, but why take a chance of electrocution..?
Parts Used:
-
Peter from Clovis, CA
-
Difficulty Level:Easy
-
Total Repair Time:30 - 60 mins
-
Tools:Screw drivers
Was this instruction helpful to you?
Thank you for voting!
microwave just stopped working
First unplugged the microwave, took top grill off, took control panel off, took wires off and used color coded tape to make sure they went back in right places, took fuse out and replaced it and put every thing back and it all worked fine and to top it off my wife did it all. So it was pretty easy.
Parts Used:
-
James from Fall Branch, TN
-
Difficulty Level:Easy
-
Total Repair Time:30 - 60 mins
-
Tools:Pliers, Screw drivers
Was this instruction helpful to you?
Thank you for voting!
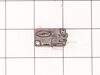
Had to lift on the door for the microwave to run, suspected the door switches.
Ordered the switches from Partselect, arrive in two days. Had trouble removing the plastic connectors from the old switch terminals, one of the plastic protectors broke, but was able to reuse it. It took a little figuring out how to remove the existing switches. Must push in a tab and rotate the switch on a little pin, then remove. Must be careful not to break the plastic tabs holding the switches in place. Replaced all (3) switches at the same time. All in all it was pretty easy.
Parts Used:

-
Arthur from Windham, NH
-
Difficulty Level:Easy
-
Total Repair Time:30 - 60 mins
-
Tools:Pliers, Screw drivers
Was this instruction helpful to you?
Thank you for voting!
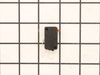
When trying to run, intermittently, the light would come on but the tray wouldn't rotate or cook. When the door was open, the tray would intermittently rotate.
I pulled out the unit and found 2 interlock switches that are depressed when the door closes. After cycling the door open/closed I found that one of the switches occasionally would stay depressed. The repair was easy (after I took off the panels so I could get to the switch) I simply removed 2 screws that attached the interlock switch assemblies to the main unit. Then I popped out the defective switch and popped in the new one. This did indeed fix my problem.
Parts Used:
-
Sam from Chandler, AZ
-
Difficulty Level:Easy
-
Total Repair Time:15 - 30 mins
-
Tools:Nutdriver, Screw drivers
Was this instruction helpful to you?
Thank you for voting!
All power to the microwave went out.
PartSelect had helpful repair instructions on-line which made the repair easier and faster. Unfortunately, there were other problems with the oven that immediately blew the new fuse I had just installed. It was then determined that additional repair would most likely cost almost as much as a new microwave.
Parts Used:
-
Michael from East China Township, MI
-
Difficulty Level:Easy
-
Total Repair Time:Less than 15 mins
-
Tools:Screw drivers
Was this instruction helpful to you?
Thank you for voting!
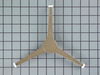
Broken Rotating Ring Guide
The groove inside the microwave that the rotating ring guide traveled was rusted due to moisture; the rusted groove caused the rotating ring guide to lag, putting pressure on the ring guide until it broke. I sanded the rusted area and repainted. The interior of microwave looks like new and the rotating ring guide now has a smooth surface to rotate. The ring guide was very simple to install without any tools.
Parts Used:
-
David from New Castle, IN
-
Difficulty Level:Really Easy
-
Total Repair Time:Less than 15 mins
Was this instruction helpful to you?
Thank you for voting!
Microwave would not heat
I went on line, put in microwave repair and watched a video on repair. I then took the oven down from over the range and took it apart. I could see were the magnetron had burned out. There was a hole with obvious burn marks. I went on line looking for the needed part. I clicked on PartSelect and order the magnetron. I received the part within three days, regular shipping. As I had not put the oven back together it took only a few moments to save 150 to 200+ dollars. I put it back together and happy, happy me, it worked.
Parts Used:
-
David from Roanoke, VA
-
Difficulty Level:Easy
-
Total Repair Time:Less than 15 mins
-
Tools:Screw drivers
Was this instruction helpful to you?
Thank you for voting!
Quit working
-
William from Socorro, NM
-
Difficulty Level:Really Easy
-
Total Repair Time:Less than 15 mins
-
Tools:Pliers, Screw drivers
Was this instruction helpful to you?
Thank you for voting!
broken glass tray

-
Aldeen B from Hayward, CA
-
Difficulty Level:Really Easy
-
Total Repair Time:Less than 15 mins
Was this instruction helpful to you?
Thank you for voting!
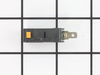
Microwave Function Not Working but Speed Cook Okay
Used diagram on the web-site and a screw driver to replace the fuse and just one of the 2-Terminal Micro-Switches. When I looked at the three micro-switches one of them had a brown connector and you could see it had been burned. I just replaced that 2-Terminal Microswitch and the connector and the Fuse. Now the Microwave is working fine.
Parts Used:
-
Brett from Pleasant Hill, MO
-
Difficulty Level:Really Easy
-
Total Repair Time:Less than 15 mins
-
Tools:Screw drivers
Was this instruction helpful to you?
Thank you for voting!
microwave won't heat
bought a fuse but that didn't solve the problem. Guess I need a new microwave
Parts Used:
-
Stephanie from Kernersville, NC
-
Difficulty Level:Really Easy
-
Total Repair Time:Less than 15 mins
-
Tools:Pliers, Screw drivers
Was this instruction helpful to you?
Thank you for voting!
Microwave would turn on ,BUT turn table would not turn and oven would not heat.
Took off cover , unpluged switches , took off switch assy, off/on test hooped and howlered for about 5 mins .Then laughed about other sites said could get those switches. Just wanted to say I LOVE Partselect. Super fast del , great price. JUST AWSOME!!!!!!!!!!!!!!!!!!!!!!!!!!!!
Parts Used:
-
Earl from New Philidelphia, OH
-
Difficulty Level:Easy
-
Total Repair Time:15 - 30 mins
-
Tools:Screw drivers
Was this instruction helpful to you?
Thank you for voting!