




















JE740BH01 General Electric Microwave - Instructions
Keep searches simple. Use keywords, e.g. "leaking", "pump", "broken" or "fit".
Microwave wouldn't start after "Start" pushed
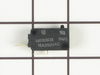
Took cover off, noted the two side by side switches easily visible and we hought one of these was responsible. Then son noted a third switch at the top of the plastic assembly which inserts at an odd angle. When it was inspected signs of a previous short showed up with burnt contact points. Reinserted at same odd angle as there were guide holes, closed things up and oven worked 100%. Great prompt service and great website!! We will use you again
Parts Used:
-
Don from Monte Sereno, CA
-
Difficulty Level:A Bit Difficult
-
Total Repair Time:Less than 15 mins
-
Tools:Screw drivers
11 of 14 people
found this instruction helpful.
Was this instruction helpful to you?
Thank you for voting!
When you open the door at the start the fan wood come on
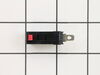
I removed the unit from the wall removed the top two screws holding the panel above the door I the two screws holding the control panel removed the three switchs I found the top one to be blown and replaced it
Parts Used:
-
Larry from CHARLOTTE, NC
-
Difficulty Level:Easy
-
Total Repair Time:15 - 30 mins
-
Tools:Screw drivers
9 of 9 people
found this instruction helpful.
Was this instruction helpful to you?
Thank you for voting!
Oven blows 20 amp fuse
Primary door switch was shorted and blew the fuse when the oven was plugged in. Replaced primary door interlock switch.
Parts Used:
-
PATRICK from Covington, LA
-
Difficulty Level:A Bit Difficult
-
Total Repair Time:15 - 30 mins
-
Tools:Screw drivers
12 of 18 people
found this instruction helpful.
Was this instruction helpful to you?
Thank you for voting!
Microwave stays on when door opened
Removed control panel first then removed bracket holding door switches 8 screws total very easy fix ????
Parts Used:
-
Charles from OAKDALE, NY
-
Difficulty Level:Very Easy
-
Total Repair Time:15 - 30 mins
-
Tools:Screw drivers
9 of 10 people
found this instruction helpful.
Was this instruction helpful to you?
Thank you for voting!
ove black out
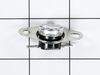
must of had loose connection from wire terminal
to thermostat from factory. thermostat and wires
were melted. removed thermostat. and cut burnt
wires back. replaced thermostat and terminals.
used better quality terminals than factory.
also checked and tightened other loose connections. there was enough wire left after cut back to just put on new terminals.
to thermostat from factory. thermostat and wires
were melted. removed thermostat. and cut burnt
wires back. replaced thermostat and terminals.
used better quality terminals than factory.
also checked and tightened other loose connections. there was enough wire left after cut back to just put on new terminals.
Parts Used:
-
Glen from Highland, IL
-
Difficulty Level:Easy
-
Total Repair Time:15 - 30 mins
-
Tools:Screw drivers
10 of 13 people
found this instruction helpful.
Was this instruction helpful to you?
Thank you for voting!
Microwave powered up when door was opened
After researching on line and watching installation videos, ordered all three switches and installed. Disassembly of microwave was simple, removing the bracket holding the switches was a little tricky, it sits behind a metal post and you have to angle and wiggle it out. One note of caution when replacing all three switches, be sure to install correct switch in correct location. Had two of one style switch and one of a second style, and put one in wrong place, causing microwave to power up again when door was opened. After thinking it through and doing a second disassembly, and double checking installation instructions, corrected problem and microwave now works fine.
Parts Used:
-
Ken from WARE, MA
-
Difficulty Level:Really Easy
-
Total Repair Time:30 - 60 mins
-
Tools:Nutdriver, Screw drivers
8 of 8 people
found this instruction helpful.
Was this instruction helpful to you?
Thank you for voting!
When running a burning plastic smell coming from the venting air.
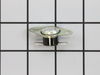
Took the cover off (removed the five screws, two of which were security screws off the back) and found one connector on the thermal cut out with its shielding melted. Very easy swap out of the new cut out and we were up and running as if new.
Parts Used:
-
Paul from Modesto, CA
-
Difficulty Level:Really Easy
-
Total Repair Time:Less than 15 mins
-
Tools:Screw drivers
10 of 14 people
found this instruction helpful.
Was this instruction helpful to you?
Thank you for voting!
microwave did not operate
this is not fair to the do it yourself person because I have been an electrican for forty one years I removed the cover spotted the burnt limit switch ordered the part replaced the part and checked operation of the microwave thanks for the painless task of locating and ordering of needed part
Parts Used:
-
Kenneth from Giddings, TX
-
Difficulty Level:Really Easy
-
Total Repair Time:Less than 15 mins
-
Tools:Screw drivers
9 of 14 people
found this instruction helpful.
Was this instruction helpful to you?
Thank you for voting!
The microwave turntable rotates when the door is open.
This is sometimes described in other repair notes as "microwave 'runs' when door is open."
With power disconnected: Remove the microwave's metal grill surround. Three lower screws accessible with lower oven door open. Two screws accessible at top of microwave door opening with door open.
Remove microwave control panel: Remove two femaleTorx head screws (#27?) that secure the panel, accessible at right side of door opening. The right side of the control panel is secured by plastic tabs fitting into slots in the oven frame. Take good care to note how these tabs disengage from the slots (lift and shift). Tab breakage very possible! Once disengaged, the panel hinges outward and downward and is self-supported. It may be necessary to guide some of the wiring out of the way to fully lower.
There are three door switches, one "monitor" and two "secondary" switches. All switches are housed in a plastic frame, which must be lifted out of position for access, each switch is retained by flexible plastic, breakable-looking hooked fingers. Also note that the electrical connectors have tiny release tabs that must be depressed in order to pull them off of the switches. In my case the topmost switch, one of the "secondary" switches, was clearly bad since there was no "snap" or click when pressing the switch's button. Maybe you can determine which switch is bad before proceeding but I had ordered all three to avoid going through this exercise again any time soon.
Replace switch or switches, place switch carrier back into position and otherwise reverse the disassembly steps.
With power disconnected: Remove the microwave's metal grill surround. Three lower screws accessible with lower oven door open. Two screws accessible at top of microwave door opening with door open.
Remove microwave control panel: Remove two femaleTorx head screws (#27?) that secure the panel, accessible at right side of door opening. The right side of the control panel is secured by plastic tabs fitting into slots in the oven frame. Take good care to note how these tabs disengage from the slots (lift and shift). Tab breakage very possible! Once disengaged, the panel hinges outward and downward and is self-supported. It may be necessary to guide some of the wiring out of the way to fully lower.
There are three door switches, one "monitor" and two "secondary" switches. All switches are housed in a plastic frame, which must be lifted out of position for access, each switch is retained by flexible plastic, breakable-looking hooked fingers. Also note that the electrical connectors have tiny release tabs that must be depressed in order to pull them off of the switches. In my case the topmost switch, one of the "secondary" switches, was clearly bad since there was no "snap" or click when pressing the switch's button. Maybe you can determine which switch is bad before proceeding but I had ordered all three to avoid going through this exercise again any time soon.
Replace switch or switches, place switch carrier back into position and otherwise reverse the disassembly steps.
Parts Used:
-
DeWitt from Boulder, CO
-
Difficulty Level:Easy
-
Total Repair Time:30 - 60 mins
-
Tools:Nutdriver, Screw drivers
6 of 6 people
found this instruction helpful.
Was this instruction helpful to you?
Thank you for voting!
Microwave Oven overheated
I thought I was setting the timer only on the microwave and accidently cooked an empty oven for 10 minutes. It was dead and I used the schematic and figured out the problem. Got the part and installed in 10 or less minutes. Oven is back in action.
Parts Used:
-
David from Collegeville, PA
-
Difficulty Level:Really Easy
-
Total Repair Time:Less than 15 mins
-
Tools:Screw drivers
9 of 16 people
found this instruction helpful.
Was this instruction helpful to you?
Thank you for voting!
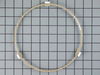
broken little wheel
-
KAREN from GATES MILLS, OH
-
Difficulty Level:Really Easy
-
Total Repair Time:Less than 15 mins
7 of 10 people
found this instruction helpful.
Was this instruction helpful to you?
Thank you for voting!
Fan was running when I opened the door.
I replaced the switch at the bottom per instruction. I had both switches. I think it was the monitor door switch.It works fine now. Thank you Part Select .
Parts Used:
-
Teddy from CLERMONT, FL
-
Difficulty Level:Easy
-
Total Repair Time:15 - 30 mins
-
Tools:Screw drivers
5 of 5 people
found this instruction helpful.
Was this instruction helpful to you?
Thank you for voting!
Micrwave won't run - turntable turns backwards when door opened...
Most of the effort is simply getting the oven out of the built in enclosure and the sheet metal off. This take about 15 minutes then you have to remove the two screws (not handy location) that hold the door latch/switch assembly so you can remove the switch. I did this BEFORE ordering so I could test the switch (it was charred) and verify the part needed. WATCH OUT - some ovens use a normally open an some a normally closed version of this switch - you have to get the right one. I checked several suppliers that were showing the WRONG switch for my model. PartSelect had it right. Once I received the switch I had it on and the oven installed and running in less than 30 miutes. Working fine since then...
Parts Used:
-
Roger from Fountain Hills, AZ
-
Difficulty Level:Easy
-
Total Repair Time:30 - 60 mins
-
Tools:Nutdriver, Screw drivers
5 of 5 people
found this instruction helpful.
Was this instruction helpful to you?
Thank you for voting!
Microwave wasn't heating up foods
Per instructions on part select.com website. But needs further repair because still doesn't heat food and pad is partially disabled.
Parts Used:
-
William from LAKE ELSINORE, CA
-
Difficulty Level:Really Easy
-
Total Repair Time:30 - 60 mins
-
Tools:Pliers, Screw drivers
6 of 9 people
found this instruction helpful.
Was this instruction helpful to you?
Thank you for voting!
Power worked but would not cook
Took the front panel off, played with the switch while it was plugged in to verify the switch was bad. I actually was able to tweak the switch just right to keep the microwave working while the part was being delivered. When it came it was just removing two small screws and replacing. Very easy.
Parts Used:
-
Jim from Albuquerque, NM
-
Difficulty Level:Really Easy
-
Total Repair Time:Less than 15 mins
-
Tools:Screw drivers
5 of 6 people
found this instruction helpful.
Was this instruction helpful to you?
Thank you for voting!