




















JDTS3924SL0 Whirlpool Dishwasher - Instructions
Keep searches simple. Use keywords, e.g. "leaking", "pump", "broken" or "fit".
Lost dishwasher brackets
I called an experienced plumber, who balanced and installed my new dishwasher properly, using the brackets I ordered from Parts Select, after an INEXPERIENCED plumber had tossed the factory-provided mounting brackets out with the shipping carton. Relief!
Parts Used:

-
Judith from Essex, MA
-
Difficulty Level:Easy
-
Total Repair Time:15 - 30 mins
-
Tools:Screw drivers
78 of 118 people
found this instruction helpful.
Was this instruction helpful to you?
Thank you for voting!
Broken Mounting bracket
-
Roy from HIGGINSVILLE, MO
-
Difficulty Level:Really Easy
-
Total Repair Time:15 - 30 mins
-
Tools:Screw drivers
8 of 14 people
found this instruction helpful.
Was this instruction helpful to you?
Thank you for voting!
There was no problem
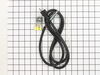
I simply had to hook up the power cord to the dishwasher so i could plug it into the outlet rather than direct wire the appliance. Everything went very smoothly. Everything needed for installation other than tools was provided. Easy to follow instructions if you know a little about electrical wiring.
Parts Used:
-
Briant from Byron, MN
-
Difficulty Level:Easy
-
Total Repair Time:30 - 60 mins
-
Tools:Pliers, Screw drivers, Wrench (Adjustable)
13 of 30 people
found this instruction helpful.
Was this instruction helpful to you?
Thank you for voting!
Someone had used the wrong type of power cord
Recently bought a whirlpool dishwasher, the dishwasher was converted to a portable dishwasher and they did not use the cord application power cord so they machine was blowing our breaker, instructions were very simple and installation was easy!
Parts Used:
-
Jonathan from DOWNS, KS
-
Difficulty Level:Very Easy
-
Total Repair Time:Less than 15 mins
-
Tools:Pliers, Screw drivers, Wrench (Adjustable)
2 of 2 people
found this instruction helpful.
Was this instruction helpful to you?
Thank you for voting!
none
-
Ronald from VAN BUREN TWP, MI
-
Difficulty Level:Very Easy
-
Total Repair Time:Less than 15 mins
-
Tools:Screw drivers
2 of 2 people
found this instruction helpful.
Was this instruction helpful to you?
Thank you for voting!
Owner lost parts. Reordered them.
Cut DW brackets to size, attached to DW. Bent back tabs, pushed DW into place and installed screws.
Parts Used:

-
DANIEL from STAMFORD, CT
-
Difficulty Level:Really Easy
-
Total Repair Time:Less than 15 mins
-
Tools:Pliers, Screw drivers
2 of 2 people
found this instruction helpful.
Was this instruction helpful to you?
Thank you for voting!
installer from lowes di not do it right, forgot to put scew in, instead he used shims, as usuall no more installs from Lowes
-
Joel from ROLLA, MO
-
Difficulty Level:Really Easy
-
Total Repair Time:Less than 15 mins
-
Tools:Pliers, Screw drivers
4 of 9 people
found this instruction helpful.
Was this instruction helpful to you?
Thank you for voting!
Intermittent power loss
Remove power source, then remove old power cord.Run new power cord through existing opening ang attach to existing power box on bottom o f dishwasher. Install electrical leads and device ground. Reinstall cabinet bottom. Check out operation by running a cycle. All ok!
Parts Used:
-
Fred from SICKLERVILLE, NJ
-
Difficulty Level:Really Easy
-
Total Repair Time:30 - 60 mins
-
Tools:Nutdriver, Screw drivers
2 of 3 people
found this instruction helpful.
Was this instruction helpful to you?
Thank you for voting!
The dishwasher came without the middle rack arm manifold
I just popped the new one onto the bottom of the middle rack and it was done. Easiest repair I have EVER done!
Parts Used:

-
Patrick from WICHITA, KS
-
Difficulty Level:Very Easy
-
Total Repair Time:Less than 15 mins
-
Tools:Screw drivers
1 of 3 people
found this instruction helpful.
Was this instruction helpful to you?
Thank you for voting!
Dishwasher Loose
-
Donald from Mount Washington, KY
-
Difficulty Level:Really Easy
-
Total Repair Time:Less than 15 mins
-
Tools:Screw drivers
0 of 1 people
found this instruction helpful.
Was this instruction helpful to you?
Thank you for voting!
With qrantz counter top needed to secure dishwasher to side not top of cabinet opening.
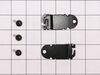
Solution was very simple with the side mounting bracket kit, the only problem was somehow one of the brackets was damaged out of the box . There's a slight off-set on the bracket to allow it to fit properly next to the dishwasher but this one had been flatten out. Had to have happened before going into the shipping box because they were very well protected with bubblewrap. Also, brackets are fairly heavy gage metal so it would have taken some amount of force to do this. Fortunately I was was able to bend it back into a useable shape. It wasn't perfect to look at but because it's mounted behind the side of the dishwasher it didn't matter as long as it worked.
Parts Used:
-
Scott from Rapid City, SD
-
Difficulty Level:Really Easy
-
Total Repair Time:15 - 30 mins
-
Tools:Pliers
0 of 1 people
found this instruction helpful.
Was this instruction helpful to you?
Thank you for voting!
The Dishwasher was not firmly connected to the counter
Very simple repair when you're supplied with the proper parts. Their delivery time is exceptional !
Parts Used:
-
Antony from Lakewood Ranch, FL
-
Difficulty Level:Really Easy
-
Total Repair Time:Less than 15 mins
-
Tools:Screw drivers
0 of 2 people
found this instruction helpful.
Was this instruction helpful to you?
Thank you for voting!
Under Counter Anti-Tip Brackets Broke
I put this unit in about 3 years ago and the brackets broke at the crease and the dishwasher fell forward. Found the right bracket and when it arrived looked a match. Checked link to video showing how to properly install the brackets. The original manufacturer never stated that the tab that goes through the frame is supposed to be bent 90 degrees to prevent the bracket from coming out. Thank you PartSelect for that video because I would probably end up ordering brackets again in a few years.
Parts Used:
-
Scott from Maple Valley, WA
-
Difficulty Level:Really Easy
-
Total Repair Time:Less than 15 mins
-
Tools:Pliers, Screw drivers
Was this instruction helpful to you?
Thank you for voting!
I had not needed to install the mounting brackets that came with the dishwasher because the old counter top was 1 inch lower than standard and I was able to just wedge the dishwasher into the space and it would not tip.
I simply disconnected the power line to the dishwasher and pulled it out enough to install the mounting brackets. The installation manual that came with the dishwasher described how to install the brackets and I simply followed directions.
Parts Used:
-
Bob from Montrose, CO
-
Difficulty Level:Really Easy
-
Total Repair Time:15 - 30 mins
-
Tools:Nutdriver, Pliers, Screw drivers
Was this instruction helpful to you?
Thank you for voting!