




















JDP39DN1WW General Electric Range - Instructions
Keep searches simple. Use keywords, e.g. "leaking", "pump", "broken" or "fit".
Was burned out
-
BRINDIA from DOVER, TN
-
Difficulty Level:Really Easy
-
Total Repair Time:30 - 60 mins
-
Tools:Screw drivers, Socket set
2 of 2 people
found this instruction helpful.
Was this instruction helpful to you?
Thank you for voting!
Oven would not get come up to temperature
I knew I had a bad control board. Using the repair videos, replacing this part was very easy to do. While I was at it, I replaced my oven temperature sensor. as well, and even though it wasn't bad, I replaced my oven heating element so that I could get some more mileage out of my 14-year-old range. The issue: after completing my repair actions, my oven element still would not heat. I double-checked my connections and I discovered I hadn't ensured one of the wires on the control board was properly seated. This was one of the wires that go to the heating element. After ensuring proper connection, everything worked perfectly!
Parts Used:
-
Arthur from INDIANAPOLIS, IN
-
Difficulty Level:Really Easy
-
Total Repair Time:30 - 60 mins
-
Tools:Pliers, Screw drivers, Socket set
2 of 2 people
found this instruction helpful.
Was this instruction helpful to you?
Thank you for voting!
Element brunt into
make sure to throw breaker and power is off of range, the elements still have power on them when range is off. Took door off, pulled racks out, pulled the two screws holding the element in place. Pull elements straight out and unplug the wires connecting to thr element and reverse the prosses.
Parts Used:
-
Robert from BREWTON, AL
-
Difficulty Level:Really Easy
-
Total Repair Time:30 - 60 mins
-
Tools:Nutdriver, Pliers
2 of 2 people
found this instruction helpful.
Was this instruction helpful to you?
Thank you for voting!
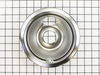
Needed new drip pans
-
Patricia from GORDONVILLE, TX
-
Difficulty Level:Really Easy
-
Total Repair Time:Less than 15 mins
2 of 2 people
found this instruction helpful.
Was this instruction helpful to you?
Thank you for voting!
lights blown out

-
Gerald from WINTERVILLE, GA
-
Difficulty Level:Very Easy
-
Total Repair Time:Less than 15 mins
6 of 14 people
found this instruction helpful.
Was this instruction helpful to you?
Thank you for voting!
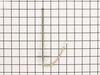
Replaced Oven Thermostat Sensor in oven
1) Shut off power to oven
2) Removed oven door using snap down hinges on door
3) Removed 4-phillips head screws holding the oven frame to cabinets
4) Pulled oven out of cabinet and set it on stool in front of opening
5) Remove 2-hex screws holding metal shield covering the electrical wiring on back of oven
6) Unplugged bad thermostat connector
7) Removed the single hex screw holding thermostat inside the oven
8) Pulled the thermostat and lead wire from oven
9) Fed the new thermostat wire into inside back of oven
10) Reverse steps 1-7
2) Removed oven door using snap down hinges on door
3) Removed 4-phillips head screws holding the oven frame to cabinets
4) Pulled oven out of cabinet and set it on stool in front of opening
5) Remove 2-hex screws holding metal shield covering the electrical wiring on back of oven
6) Unplugged bad thermostat connector
7) Removed the single hex screw holding thermostat inside the oven
8) Pulled the thermostat and lead wire from oven
9) Fed the new thermostat wire into inside back of oven
10) Reverse steps 1-7
Parts Used:
-
C Thomas from SAN MARCOS, CA
-
Difficulty Level:Very Easy
-
Total Repair Time:15 - 30 mins
-
Tools:Screw drivers, Socket set
2 of 2 people
found this instruction helpful.
Was this instruction helpful to you?
Thank you for voting!
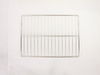
oven racks very old and writing on knobs worn ff
-
Patricia from SAN JOSE, CA
-
Difficulty Level:Very Easy
-
Total Repair Time:Less than 15 mins
2 of 2 people
found this instruction helpful.
Was this instruction helpful to you?
Thank you for voting!
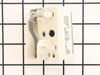
Defective switch
Replaced element control switches
Parts Used:
-
Mary from EDENTON, NC
-
Difficulty Level:Easy
-
Total Repair Time:15 - 30 mins
-
Tools:Screw drivers, Socket set
2 of 2 people
found this instruction helpful.
Was this instruction helpful to you?
Thank you for voting!
Oven temp wouldn't regulate.
-
Ronald from Crumpler, NC
-
Difficulty Level:Very Easy
-
Total Repair Time:15 - 30 mins
-
Tools:Nutdriver, Pliers, Screw drivers
2 of 2 people
found this instruction helpful.
Was this instruction helpful to you?
Thank you for voting!
front lift burner not working and surface light on with everything off
unplugged the range removed 4 screws from back top cover then took the knob off controller removed 2 screws from behind the knob removed 1 wirer at a time and placed it on the new controller in same order the wires came off put everything back to gather did not fix the problem .
Parts Used:
-
kevin from GAYLORD, MI
-
Difficulty Level:Really Easy
-
Total Repair Time:15 - 30 mins
-
Tools:Nutdriver, Screw drivers
2 of 2 people
found this instruction helpful.
Was this instruction helpful to you?
Thank you for voting!
Surface burner stopped working & light indicator remained on
It took my son very little time to install control switch. Using a screw driver he removed the back panel directly behind burner units & replaced the control switch. Very easy.
Parts Used:
-
Cynthia from BALDWINSVILLE, NY
-
Difficulty Level:Very Easy
-
Total Repair Time:15 - 30 mins
-
Tools:Screw drivers
2 of 2 people
found this instruction helpful.
Was this instruction helpful to you?
Thank you for voting!
Top left electric burner on the stove top did not heat up
Simple to repair. Take off the cowling around the burner element on the stove top and pull out the old element. Slide in the new heating element with the cowling paying attention to the three spoke support areas on the stove burner frame. Very simple. A 5 minute repair. No tools required.
Parts Used:

-
Jeff from SAN RAFAEL, CA
-
Difficulty Level:Really Easy
-
Total Repair Time:Less than 15 mins
2 of 2 people
found this instruction helpful.
Was this instruction helpful to you?
Thank you for voting!
burner was damaged so it didn't work
Easy repair, just had to take the damaged burner out and slide the new burner in....
Parts Used:
-
Joan from ORLANDO, FL
-
Difficulty Level:Really Easy
-
Total Repair Time:Less than 15 mins
2 of 2 people
found this instruction helpful.
Was this instruction helpful to you?
Thank you for voting!
broken light cover
-
Francis from LAKE ELSINORE, CA
-
Difficulty Level:Very Easy
-
Total Repair Time:Less than 15 mins
2 of 2 people
found this instruction helpful.
Was this instruction helpful to you?
Thank you for voting!
I had to replace the surface heating element on my Selectra stove top.
I just inserted the replacement where the old one had been connected. It took less than 5 minutes. It was so simple & easy that 'repair' is too generous a word -- & I am NOT handy, in any sense of the word. It took me longer to figure out where to find the model number!
Parts Used:
-
Elaine from SAINT JAMES, NY
-
Difficulty Level:Very Easy
-
Total Repair Time:Less than 15 mins
2 of 2 people
found this instruction helpful.
Was this instruction helpful to you?
Thank you for voting!