




















JCSP42DN2WW General Electric Range - Instructions
Keep searches simple. Use keywords, e.g. "leaking", "pump", "broken" or "fit".
Needed backsplash to complete installation
Installation team. A personal comment--your representative, John, that I spoke with this afternoon was very helpful when I called to question a charge on my credit card statement, and you can be certain that if I have need of an appliance part again, I will think of your firm first.U.L.S. Emory, Texas.
Parts Used:
-
UrsaLynne from Emory, TX
-
Difficulty Level:Really Easy
-
Total Repair Time:15 - 30 mins
-
Tools:Screw drivers
0 of 4 people
found this instruction helpful.
Was this instruction helpful to you?
Thank you for voting!
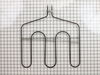
Broiler heating element was not working
Turned off the circuit breaker. Removed 5 screws. Unplugged the heating element and then plugged in the new one and replaced the 5 screws. Very simple.
Parts Used:
-
Jim from Hyrum, UT
-
Difficulty Level:Really Easy
-
Total Repair Time:15 - 30 mins
-
Tools:Socket set
Was this instruction helpful to you?
Thank you for voting!
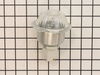
Oven lights were burning out regularly
Replaced the Oven light housing. Unscrewed the two screws that hold the housing in place. Pulled out the housing and disconnected the wire tabs from the light housing tabs. Slid the wire tabs onto the tabs of the new light housing fixture. (Each tab is fitted to the tab in goes on so they can not be mixed up) Pushed the housing fixture back into place and screwed the housing into place.
Parts Used:
-
Douglas from Thornton, CO
-
Difficulty Level:Really Easy
-
Total Repair Time:15 - 30 mins
-
Tools:Socket set
Was this instruction helpful to you?
Thank you for voting!
rear drawer supports broke
Directtions were by diagram only, no written instructions. Drawing was small and difficult to follow but the repair itself was easy.
Parts Used:

-
TERRY from RICHMOND, VA
-
Difficulty Level:Really Easy
-
Total Repair Time:15 - 30 mins
-
Tools:Socket set
Was this instruction helpful to you?
Thank you for voting!
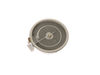
The middle of the element quit working.
Took the old burner out, tranferred the wires from old to new. Installed the new burner. Works fine.
Parts Used:
-
Ruth Ann from New Columbia, PA
-
Difficulty Level:Easy
-
Total Repair Time:15 - 30 mins
-
Tools:Nutdriver, Screw drivers
Was this instruction helpful to you?
Thank you for voting!
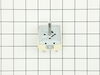
intermittent between low & high elements
remove knobs and plastic nuts behind them, remove the six hex head screws holding switch plate, Remove two screws holding problem switch to plate. Swap wires one for one and reverse the process to complete repair. PS don't forget to turn off the range at the breaker panel.
Parts Used:
-
Fred from Plymouth, NH
-
Difficulty Level:Easy
-
Total Repair Time:15 - 30 mins
-
Tools:Nutdriver, Pliers, Screw drivers
Was this instruction helpful to you?
Thank you for voting!
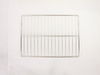
no racks to oven
-
Johnette from Baltimore, MD
-
Difficulty Level:Really Easy
-
Total Repair Time:Less than 15 mins
Was this instruction helpful to you?
Thank you for voting!
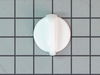
prior knobs were discolored and ugly
just purchased new knobs. The price was great, just took a little longer to receive then anticipated though.
Parts Used:
-
Barbara from Sun City West, AZ
-
Difficulty Level:Really Easy
-
Total Repair Time:Less than 15 mins
Was this instruction helpful to you?
Thank you for voting!
Broiler Element Repair
I was attempting to replace the broiler element on the oven, but I discovered that the wiring may be the actual problem. I suggest before you order parts for a broiler repair, that you test the wires to ensure that you have continuity. I will have to trace the wires back to the source (the other element works fine) and see if I can find the problem with the current. I will keep the broiler element I ordered until I can confirm that the old element works.
Parts Used:
-
Robert from SANTA MARIA, CA
-
Difficulty Level:Easy
-
Total Repair Time:15 - 30 mins
-
Tools:Nutdriver
Was this instruction helpful to you?
Thank you for voting!
one burner not working
Removed two screws to access burner. Removed three power clips from burner, reattached the clips to new burner, removed brace clips and attach to new burner, close lid and reattach stove cover.
Parts Used:
-
Edwin from HIGHLANDS RANCH, CO
-
Difficulty Level:Really Easy
-
Total Repair Time:15 - 30 mins
-
Tools:Socket set
Was this instruction helpful to you?
Thank you for voting!
Plastic slide for storage drawer broken.
Took part out of package, looked at instructions and followed them. Required a screwdriver to screw part on to the drawer.
Parts Used:
-
James from Stuart, VA
-
Difficulty Level:Really Easy
-
Total Repair Time:Less than 15 mins
-
Tools:Screw drivers
Was this instruction helpful to you?
Thank you for voting!
Replaced damaged oven rack
I ordered the oven rack on a Tuesday and received it the very next day - was wowed at the service.
Parts Used:
-
Vicki from Irvine, CA
-
Difficulty Level:Really Easy
-
Total Repair Time:Less than 15 mins
Was this instruction helpful to you?
Thank you for voting!
Missing oven rack
-
Damaris from Easton, PA
-
Difficulty Level:Really Easy
-
Total Repair Time:Less than 15 mins
Was this instruction helpful to you?
Thank you for voting!
I needed an oven with three racks, mine came with two.
-
BETTY from CYPRESS, TX
-
Difficulty Level:Easy
-
Total Repair Time:Less than 15 mins
Was this instruction helpful to you?
Thank you for voting!
Our bottom drawer support broke and the bottom drawer was canted
Simply removed drawer and lined up the newsupports. Made sure the guide pin was lined up and installed with single screw
Parts Used:
-
Robert from Woodinville, WA
-
Difficulty Level:Really Easy
-
Total Repair Time:Less than 15 mins
-
Tools:Screw drivers
Was this instruction helpful to you?
Thank you for voting!