




















JCSP42DN1BB General Electric Range - Instructions
Keep searches simple. Use keywords, e.g. "leaking", "pump", "broken" or "fit".
Light burnt out.
Turned the wire protector to the side. Turned out the old bulb and replaced it with the new. Turned the wire protector back in place and I'm like new.
Parts Used:

-
Roscoe G from ROCHESTER, NY
-
Difficulty Level:Very Easy
-
Total Repair Time:Less than 15 mins
2 of 8 people
found this instruction helpful.
Was this instruction helpful to you?
Thank you for voting!
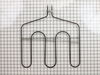
Broiler heating element was not working
Turned off the circuit breaker. Removed 5 screws. Unplugged the heating element and then plugged in the new one and replaced the 5 screws. Very simple.
Parts Used:
-
Jim from Hyrum, UT
-
Difficulty Level:Really Easy
-
Total Repair Time:15 - 30 mins
-
Tools:Socket set
Was this instruction helpful to you?
Thank you for voting!
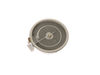
one burner not working
Removed two screws to access burner. Removed three power clips from burner, reattached the clips to new burner, removed brace clips and attach to new burner, close lid and reattach stove cover.
Parts Used:
-
Edwin from HIGHLANDS RANCH, CO
-
Difficulty Level:Really Easy
-
Total Repair Time:15 - 30 mins
-
Tools:Socket set
Was this instruction helpful to you?
Thank you for voting!
The middle of the element quit working.
Took the old burner out, tranferred the wires from old to new. Installed the new burner. Works fine.
Parts Used:
-
Ruth Ann from New Columbia, PA
-
Difficulty Level:Easy
-
Total Repair Time:15 - 30 mins
-
Tools:Nutdriver, Screw drivers
Was this instruction helpful to you?
Thank you for voting!
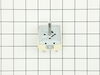
intermittent between low & high elements
remove knobs and plastic nuts behind them, remove the six hex head screws holding switch plate, Remove two screws holding problem switch to plate. Swap wires one for one and reverse the process to complete repair. PS don't forget to turn off the range at the breaker panel.
Parts Used:
-
Fred from Plymouth, NH
-
Difficulty Level:Easy
-
Total Repair Time:15 - 30 mins
-
Tools:Nutdriver, Pliers, Screw drivers
Was this instruction helpful to you?
Thank you for voting!
Broiler Element Repair
I was attempting to replace the broiler element on the oven, but I discovered that the wiring may be the actual problem. I suggest before you order parts for a broiler repair, that you test the wires to ensure that you have continuity. I will have to trace the wires back to the source (the other element works fine) and see if I can find the problem with the current. I will keep the broiler element I ordered until I can confirm that the old element works.
Parts Used:
-
Robert from SANTA MARIA, CA
-
Difficulty Level:Easy
-
Total Repair Time:15 - 30 mins
-
Tools:Nutdriver
Was this instruction helpful to you?
Thank you for voting!
rear drawer supports broke
Directtions were by diagram only, no written instructions. Drawing was small and difficult to follow but the repair itself was easy.
Parts Used:

-
TERRY from RICHMOND, VA
-
Difficulty Level:Really Easy
-
Total Repair Time:15 - 30 mins
-
Tools:Socket set
Was this instruction helpful to you?
Thank you for voting!
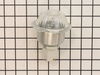
Oven lights were burning out regularly
Replaced the Oven light housing. Unscrewed the two screws that hold the housing in place. Pulled out the housing and disconnected the wire tabs from the light housing tabs. Slid the wire tabs onto the tabs of the new light housing fixture. (Each tab is fitted to the tab in goes on so they can not be mixed up) Pushed the housing fixture back into place and screwed the housing into place.
Parts Used:
-
Douglas from Thornton, CO
-
Difficulty Level:Really Easy
-
Total Repair Time:15 - 30 mins
-
Tools:Socket set
Was this instruction helpful to you?
Thank you for voting!
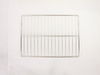
I needed an oven with three racks, mine came with two.
-
BETTY from CYPRESS, TX
-
Difficulty Level:Easy
-
Total Repair Time:Less than 15 mins
Was this instruction helpful to you?
Thank you for voting!
burner control
installed new burner control w/knob. about 30 min. stove back in place. working fine
Parts Used:

-
hugh from sun city center, FL
-
Difficulty Level:Really Easy
-
Total Repair Time:Less than 15 mins
-
Tools:Nutdriver, Screw drivers
Was this instruction helpful to you?
Thank you for voting!
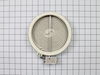
Burner not operational.
Disconnected power supply. Removed damaged element by releasing retainer clips and unplugging wire contacts. Replaced with new element.
Parts Used:
-
Gerald from Philadelphia, PA
-
Difficulty Level:Really Easy
-
Total Repair Time:Less than 15 mins
-
Tools:Screw drivers
Was this instruction helpful to you?
Thank you for voting!
Range lower drawer would not stay on track.
-
Richard from Newark, DE
-
Difficulty Level:Really Easy
-
Total Repair Time:Less than 15 mins
-
Tools:Nutdriver
Was this instruction helpful to you?
Thank you for voting!
Old dishwasher rack and silverware rack
The whole process was very easy! I just got the model number and bought a new rack and silverware holder on,one. There was no assembly needed so I just popped them in and replaced the old ones! Very easy to do!
Parts Used:
-
Anne Marie from Andover, MA
-
Difficulty Level:Really Easy
-
Total Repair Time:Less than 15 mins
Was this instruction helpful to you?
Thank you for voting!
Broken drawer support
Followed the example picture on the part bag. Anyone could do this, incredibly easy. Took about 4 minutes to install both sides.
Parts Used:
-
Mario from Deer Park, WA
-
Difficulty Level:Really Easy
-
Total Repair Time:Less than 15 mins
-
Tools:Nutdriver
Was this instruction helpful to you?
Thank you for voting!
Open door. Put racks in.
-
Harriet from Jacksonville Beach, FL
-
Difficulty Level:Really Easy
-
Total Repair Time:Less than 15 mins
Was this instruction helpful to you?
Thank you for voting!