




















JCSP38BK5BB General Electric Range - Instructions
Keep searches simple. Use keywords, e.g. "leaking", "pump", "broken" or "fit".
Oven slow to heat.
First I removed the 4 screws that hold the element in place. I then pulled the element out about 3 inches. I removed the sensor and disconnected the connector.
Parts Used:
-
Scott from Burleson, TX
-
Difficulty Level:Really Easy
-
Total Repair Time:Less than 15 mins
-
Tools:Nutdriver, Pliers, Screw drivers
6 of 10 people
found this instruction helpful.
Was this instruction helpful to you?
Thank you for voting!
One of the drawer supports broke off
I pulled out the drawer and inserted the new support. This one inserts into the back of the drawer as opposed to the sides. I had ordered two of the replacements even though I only needed one and decided to replace both. I think it was a good move as the drawer works better than when we first got it. Just one simple screw made it complete.
Parts Used:

-
John from Sandy Hook, CT
-
Difficulty Level:Really Easy
-
Total Repair Time:Less than 15 mins
-
Tools:Nutdriver
5 of 7 people
found this instruction helpful.
Was this instruction helpful to you?
Thank you for voting!
Burner at full red hot power despite setting
After removing power from the range, I pulled the unit out for better access to the rear. I carefully pulled all four knobs off the front of the control panel. Next, using a short phillips screwdriver, I removed two screws from the front bottom of the control panel. On the rear of the control panel, there are four screws to loosen, now the whole panel is free to remove toward the front of the unit. The burner switches are held onto the panel with two screws that are located on the front under where the knob had been. The wires are all connected to the switch with crimp type connectors. These are on tight, but can be removed carefully with pliers. Before doing so, I took a picture on my phone to ensure I replaced the wires in the correct order. Everything goes back together in reverse order. This is a good time to clean behind and under the whole stove. The whole process took around 20 minutes.
Parts Used:
-
Matt from TAZEWELL, VA
-
Difficulty Level:Easy
-
Total Repair Time:Less than 15 mins
-
Tools:Nutdriver, Pliers, Screw drivers
4 of 4 people
found this instruction helpful.
Was this instruction helpful to you?
Thank you for voting!
Light not working tried to Remove light assembly not knowing glass could screw out. Without thinking grounded exposed hot wire to burner bracket melting light socket connector. Had to replace socket.
First and most important trun off curcit breaker. Use 1/4 inch but driver to remove socket (2) screws. Remove ground and hot wire clips from old socket, replace on new socket. Screw back into oven ceiling and turn on power. Reset clock and your are done. Very simple.
Parts Used:
-
Richard from CUMMING, GA
-
Difficulty Level:Really Easy
-
Total Repair Time:15 - 30 mins
-
Tools:Socket set
4 of 4 people
found this instruction helpful.
Was this instruction helpful to you?
Thank you for voting!
Burnt Broiler Element
Just like everyone else it was a simple r&r. However, when removing or installing wire clips I make it a habit to hold the ends with needle nose to prevent any: "snap!" ooops! However to prevent burning the element in the first place, it is strongly suggested to push that broil button twice so that it is set to low temp. It is too easy to use the high setting which will shorten the elements life by 40 - 60 %. Also, keep the oven door partially open when using the broiler. Like the manual tells you!!!
Parts Used:
-
ROBERT P. from Santa Fe,, NM
-
Difficulty Level:Really Easy
-
Total Repair Time:Less than 15 mins
-
Tools:Pliers, Screw drivers, Socket set
5 of 7 people
found this instruction helpful.
Was this instruction helpful to you?
Thank you for voting!
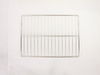
old blackened oven racks
-
Roger from Falls Church, VA
-
Difficulty Level:Really Easy
-
Total Repair Time:Less than 15 mins
8 of 17 people
found this instruction helpful.
Was this instruction helpful to you?
Thank you for voting!
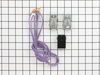
terminal was broken due to maney uses
unscrew the terminal block,pulled the old wires out,installed the new wires installed the new block
Parts Used:
-
Emmett J from Winchester, VA
-
Difficulty Level:Really Easy
-
Total Repair Time:Less than 15 mins
-
Tools:Pliers, Screw drivers
4 of 5 people
found this instruction helpful.
Was this instruction helpful to you?
Thank you for voting!
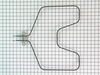
Hole In Back Was Too Small
I had to cut about 1/4 in. Off the top part of the back hold so the bakeing element would set on the bottom of the oven. Everything else went okay.
Parts Used:
-
Lloyd from Hemphill, TX
-
Difficulty Level:A Bit Difficult
-
Total Repair Time:30 - 60 mins
-
Tools:Nutdriver, Pliers
5 of 8 people
found this instruction helpful.
Was this instruction helpful to you?
Thank you for voting!
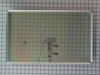
Broker inner glass
-
marc from PARK RIDGE, NJ
-
Difficulty Level:Really Easy
-
Total Repair Time:15 - 30 mins
-
Tools:Screw drivers
4 of 5 people
found this instruction helpful.
Was this instruction helpful to you?
Thank you for voting!
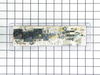
oven would not heat
I removed the 4 hex head screws holding the control panel , then the other 4 slotted screws. Disconnected all wires being careful to keep track of the color coding. Had a little trouble with the adhesive holding the face plate( I don't know why they even used it). Put the new panel in and reconnected it. Re set circuit breaker and tried the oven. It still wouldn't heat. it wasn't the control panel, but a burned out wire connecting the element in the back of the oven. Well, anyway I learned how to do the job and the the new panel activates better, so all was not lost.
Parts Used:
-
Jim from Williamsburg, VA
-
Difficulty Level:Easy
-
Total Repair Time:1- 2 hours
-
Tools:Nutdriver, Pliers, Screw drivers
5 of 8 people
found this instruction helpful.
Was this instruction helpful to you?
Thank you for voting!
OVEN CLOCK CONTROL MALFUNCTIONED
I turned off the circuit breaker and unplugged the stove. I removed the back panel and marked the location of the wires on the new oven clock control. I detached the wires and removed the old card. I installed the new one and reconnected the wires. I plugged the stove and turned on the circuit breaker. All the lights came on and the oven worked fine. I reinstalled the back panel and it took me less than thirty minutes to complete the job.
Parts Used:
-
Gregoire from N CHESTERFLD, VA
-
Difficulty Level:Really Easy
-
Total Repair Time:15 - 30 mins
-
Tools:Pliers, Screw drivers, Wrench set
3 of 3 people
found this instruction helpful.
Was this instruction helpful to you?
Thank you for voting!
Inner glass assembly had cracked
Took the oven door off and removed the inner door panel, put new glass assembly part in and reassembled. The hard part was getting the door hinges locked back into place.
Parts Used:
-
Richard from Gorham, ME
-
Difficulty Level:Really Easy
-
Total Repair Time:30 - 60 mins
-
Tools:Socket set, Wrench set
3 of 3 people
found this instruction helpful.
Was this instruction helpful to you?
Thank you for voting!
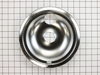
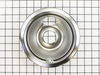
The burner bowls were burnt through and nasty looking.
I carefully removed the burners, removed the bowls and replaced them with the new ones. Easy as pie!
Parts Used:
-
Isabel from The Colony, TX
-
Difficulty Level:Really Easy
-
Total Repair Time:Less than 15 mins
3 of 3 people
found this instruction helpful.
Was this instruction helpful to you?
Thank you for voting!
F2 Warning - Oven overheating
I checked various sites on the net and decided that the temperature sensor was the problem. The GE price for the replacement part was about $105, most of the other sites offered the sensor in the $70 range. PartSelect $12.95 When the part arrived, I removed a small self taping screw, pulled the high temperature wire connector into the oven space, disconnected the quick disconnect fitting, attached the new temperature sensor, pushed the connecting wire into its hole, replaced the screw and that was it. I probably saved about $200 in parts and labor over what a local repairman would have charged. Oh yes!! I first disconnected the power at the breaker box. Very important.
Parts Used:
-
john from bend, OR
-
Difficulty Level:Really Easy
-
Total Repair Time:Less than 15 mins
-
Tools:Socket set
3 of 3 people
found this instruction helpful.
Was this instruction helpful to you?
Thank you for voting!
The burner coil had shorted out and actually burnt a hole in my non stick pan and after I replaced that, it would not heat up again. I actually swapped the wires from the back burner, but the small coils use a different watt switch and it would barely boil water with the big coil. So I ordered this
First turn off the breaker, and test with my milti meter. Raise the top panel where the coils are and prop it open high enough to use a screwdriver to open the front panel.
Then unscrew the three screws on the inside of the top panel, then open the oven door and you will see 4 screws across the bottom of thefront control board panel and two more on each side of the sides of the panel facing straight up. Unscrew those 6 screws and then pull the front control panel forward and out. You might need something or someone to hold the panel, I just let the wires hold the weight, but not highly recommend. Then pull the switch knob off and behind it there are two little bitty screws that hold the switch in place. Unscrew them and pull the switch out of its place. I put the new switch close to the old one and just used the needle nose pliers to unplug one wire at a time and plug it in on the same place as the old one.
Then screw the itty bitty screws in the front that hold the switch in place and put tbe knob back on. Reposition the front panel back into place abs screw in the 9 screws removed for disassembly. Now would be a good time to clean under the burner panel if you haven’t done so yet ( it gets pretty nasty under there). Then put your burner top back down into place and turn your breaker back on. You can either test with your multi meter or like I did, just put the burner on high and watct the coils glow. Such a beautiful sight. Easy fix.
Then unscrew the three screws on the inside of the top panel, then open the oven door and you will see 4 screws across the bottom of thefront control board panel and two more on each side of the sides of the panel facing straight up. Unscrew those 6 screws and then pull the front control panel forward and out. You might need something or someone to hold the panel, I just let the wires hold the weight, but not highly recommend. Then pull the switch knob off and behind it there are two little bitty screws that hold the switch in place. Unscrew them and pull the switch out of its place. I put the new switch close to the old one and just used the needle nose pliers to unplug one wire at a time and plug it in on the same place as the old one.
Then screw the itty bitty screws in the front that hold the switch in place and put tbe knob back on. Reposition the front panel back into place abs screw in the 9 screws removed for disassembly. Now would be a good time to clean under the burner panel if you haven’t done so yet ( it gets pretty nasty under there). Then put your burner top back down into place and turn your breaker back on. You can either test with your multi meter or like I did, just put the burner on high and watct the coils glow. Such a beautiful sight. Easy fix.
Parts Used:
-
sherman from OPELOUSAS, LA
-
Difficulty Level:Really Easy
-
Total Repair Time:Less than 15 mins
-
Tools:Pliers, Screw drivers
4 of 6 people
found this instruction helpful.
Was this instruction helpful to you?
Thank you for voting!