




















JCS905BK4BB General Electric Range - Instructions
Keep searches simple. Use keywords, e.g. "leaking", "pump", "broken" or "fit".
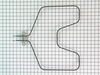
Bake Element burned out
Ordered new bake element and received in two days and was exact replacement. removed the two screws holding the old element mounting plate and attempted to carefully pull out the old element far enough to disconnect electrical house wire from the element
and hang on to. However the old element came out without the house wire connected. After the newbake element plate was mounted to the inside of the oven the range had to pulled out to reconnect the house wire. Step one shut electric power off to range
and hang on to. However the old element came out without the house wire connected. After the newbake element plate was mounted to the inside of the oven the range had to pulled out to reconnect the house wire. Step one shut electric power off to range
Parts Used:
-
Ronald from FORT MILL, SC
-
Difficulty Level:Easy
-
Total Repair Time:15 - 30 mins
-
Tools:Nutdriver, Screw drivers
2 of 2 people
found this instruction helpful.
Was this instruction helpful to you?
Thank you for voting!
lights blown out

-
Gerald from WINTERVILLE, GA
-
Difficulty Level:Very Easy
-
Total Repair Time:Less than 15 mins
6 of 14 people
found this instruction helpful.
Was this instruction helpful to you?
Thank you for voting!
Oven drawer open and close incorrectly
First I removed the oven drawer. Verified that the support clips would rest correctly on rail, then review installation document with supports to locate alternate location for replacement supports. I did have to personally locate 2 fastners not provided with the supports ot complete installation. After installation, oven drawer opens and closes smoothly.
Parts Used:

-
James from Goldsboro, NC
-
Difficulty Level:Easy
-
Total Repair Time:Less than 15 mins
-
Tools:Screw drivers
2 of 2 people
found this instruction helpful.
Was this instruction helpful to you?
Thank you for voting!
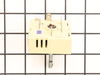
knob thermostat burnt out
it went well as compared to getting a new ~~800$ cooktop and ~~150 to install, I took a shot for 30$ bucks and it worked great!! problem solved and great support ! !! thanks for all your help
Parts Used:
-
John from CENTERPORT, NY
-
Difficulty Level:Really Easy
-
Total Repair Time:30 - 60 mins
-
Tools:Pliers
2 of 2 people
found this instruction helpful.
Was this instruction helpful to you?
Thank you for voting!
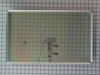
Inner glass broke
Removed torx screws for door handle as well as torx screws for both hinges to separate the door halves to extract broken glass and to install new glass panel. Other reviews said not to remove hinge screws, however I had no problem reinstalling them.
Parts Used:
-
Mark from OLIVE BRANCH, MS
-
Difficulty Level:Easy
-
Total Repair Time:30 - 60 mins
2 of 2 people
found this instruction helpful.
Was this instruction helpful to you?
Thank you for voting!
Replace Infiniti Switch
Turn off breaker, disconnect electrical wiring, remove cooktop from courter top, turn over , remove switch.
Parts Used:
-
Ezekiel from FLORISSANT, MO
-
Difficulty Level:Very Easy
-
Total Repair Time:30 - 60 mins
-
Tools:Nutdriver, Pliers, Screw drivers, Wrench set
2 of 2 people
found this instruction helpful.
Was this instruction helpful to you?
Thank you for voting!
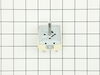
Left front bridge element would not heat
I removed the cooktop from the countertop and propped it up with 2 1x2's on each end. I removed the Torx screws that hold the glass in place. I set the glass aside. I then removed the screws holding the cover for the switches. I set the large central burner aside. I had to spray the screws holding the switch cover in place to loosen them. I then removed the defective left front switch and replaced the it with the GE Parts Select replacement switch. I then put everything back together. This Utube video was helpful although not my model number https://www.youtube.com/watch?v=tmcUqpHNj3Q
Parts Used:
-
Daniel from ATLANTA, GA
-
Difficulty Level:Really Easy
-
Total Repair Time:1- 2 hours
-
Tools:Nutdriver, Pliers, Screw drivers
2 of 2 people
found this instruction helpful.
Was this instruction helpful to you?
Thank you for voting!
Broken rear drawer support
Installed the new brackets at the back of the drawer with the 2 screws provided. The new rear mount design is much better than than the old side mount.
Parts Used:
-
Jesse from Knob Noster, MO
-
Difficulty Level:Really Easy
-
Total Repair Time:Less than 15 mins
-
Tools:Nutdriver
2 of 3 people
found this instruction helpful.
Was this instruction helpful to you?
Thank you for voting!
Erratic oven temp
RE: 2 yr. old GE double wall oven with convection option in upper oven, non-convection in lower oven: baked goods were not browning, were undercooked or burned. Tested both ovens on regular bake setting using 2 oven thermometers. Set ovens for 350. Although after 10 min both ovens beeped "ready", the oven thermometers actually read 200 - then would swing up as high as 500 and as low as 200 during the 20 min test period. Decided to first replace top oven sensor only, just in case it really was a more expensive control panel problem. It was a bit awkward to reach back there with the oven door in the way, but I have long arms! Aimed my flashlight, removed nuts with a socket wrench, pulled out the sensor, popped the clip and the old sensor easily separated from its connection. Snapped on the new sensor, pushed it back in and reset the nuts. Easy. Set the oven for 350 and tested again with 2 oven thermometers for 45 min. Voila! The oven thermometers read exactly 350 when the oven beeped "ready" and it stayed at 350 throughout the entire 45 min retest period with only a 3 degree variation both up and down. What a great improvement! Immediately went online to Parts Select and ordered another sensor for the bottom oven which was having the same problem. Fixed both ovens all for under $30 - and just in time for Christmas cookies! Don't want to know what the repair guy would have charged.......Merry Christmas!
Parts Used:
-
Gail from Glen Allen, VA
-
Difficulty Level:Easy
-
Total Repair Time:15 - 30 mins
-
Tools:Nutdriver, Socket set
2 of 3 people
found this instruction helpful.
Was this instruction helpful to you?
Thank you for voting!
Oven bake element burnt out
We had previously removed the bad element, which was initially confusing because the element plugs were so small and narrow compared to previous experience. After our local parts store couldn't seem to get the correct part in for us, we ordered the exact element here. It plugged in fairly easily, we screwed a few cover plates on, and slid the stove back into place. (and of course switched the appropriate electrical breaker off before replacing the element)
Parts Used:
-
Allan from Clinton, WA
-
Difficulty Level:Easy
-
Total Repair Time:15 - 30 mins
-
Tools:Screw drivers
4 of 9 people
found this instruction helpful.
Was this instruction helpful to you?
Thank you for voting!
Plastic guide Broken
-
NICK from Vernon, CA
-
Difficulty Level:Easy
-
Total Repair Time:15 - 30 mins
-
Tools:Pliers, Screw drivers
9 of 25 people
found this instruction helpful.
Was this instruction helpful to you?
Thank you for voting!
Followed a GE Video on installation
-
Sarah from MONTGOMERY, TX
-
Difficulty Level:Very Easy
-
Total Repair Time:15 - 30 mins
-
Tools:Screw drivers
1 person
found this instruction helpful.
Was this instruction helpful to you?
Thank you for voting!
The light inside the oven had burned out
0. As a safety precaution, unplug the range or hit the relevant fuse breaker before you start. You might also want to grab a flashlight. Definitely do not try to do this while the oven is hot.
1. Pinch the wire over the light bulb cap to remove it. This is inside the oven at the back.
2. Pop off the hemispherical glass cap.
3. Unscrew the old light bulb, and screw the new light bulb in its place.
4. Put the cap back.
5. Secure the cap by putting the wire back in its slots on the cap.
No tools needed, the cap is just held in place with pressure from the wire.
1. Pinch the wire over the light bulb cap to remove it. This is inside the oven at the back.
2. Pop off the hemispherical glass cap.
3. Unscrew the old light bulb, and screw the new light bulb in its place.
4. Put the cap back.
5. Secure the cap by putting the wire back in its slots on the cap.
No tools needed, the cap is just held in place with pressure from the wire.
Parts Used:
-
Catherine from SEATTLE, WA
-
Difficulty Level:Very Easy
-
Total Repair Time:Less than 15 mins
3 of 7 people
found this instruction helpful.
Was this instruction helpful to you?
Thank you for voting!
Remove back panel or access sensor, replace sensor and panel
-
Mike from Glencoe, NM
-
Difficulty Level:Very Easy
-
Total Repair Time:Less than 15 mins
-
Tools:Nutdriver
1 person
found this instruction helpful.
Was this instruction helpful to you?
Thank you for voting!
Burner not working
First, disconnect electrical power to the stove by turning the main fuse to the off position. Confirm that there is no electrical power in the stove. The ceramic top is held by 10 screws that are closest to the ceramic surface. Other screws hold other parts of the stove and not need to be touched when opening the stove. Once the ceramic surface is off there is access to the burners and the various lights and switches. It is important to determine whether it is the burner that is defective or the switch. Inasmuch as the switch has many moving parts, the switch is more likely to be the defective part. Check the switch by gaining access to the switch connections. There is a metal frame held by two screws on each side in the outside of the stove (same area where the initial 10 screws were removed to separate the ceramic surface). Remove these screws and flip the switch assembly so all the wires and cables are accessible. I checked the switch with a continuity tester and by trial and error determined that there were two connections that in all the remainder three switches had continuity when the switch was in the on position while the suspect switch did not. Replaced the suspect switch by pulling the wires and replacing them in identical positions in the new switch (a smartphone camera became very useful to remind me were exactly each cable's connection was). Restore power by turning the fuse to the on position. Check that the burner lights up. If not, change the burner as well. Same simple procedure of disconnecting and connecting cables to the burner). Make sure to disconnect power before working on the burner. Replace the screws that hold the switch assembly. Replace the ceramic top. Replace the screws. Set stove back in its hole. Reset fuse. Total time: 35 mins. Total cost: Approx $25.00 (switch + delivery). Quoted repair by local appliance repair service: $487.50. No contest. Next project is to fix a leaky water dispenser in the refrigerator.
Parts Used:
-
LUIS from CONCORD, MA
-
Difficulty Level:Really Easy
-
Total Repair Time:15 - 30 mins
-
Tools:Nutdriver, Pliers, Screw drivers
1 person
found this instruction helpful.
Was this instruction helpful to you?
Thank you for voting!