




















JCB830DK1WW General Electric Range - Instructions
Keep searches simple. Use keywords, e.g. "leaking", "pump", "broken" or "fit".
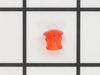
lens snapped off on the inside-plug was left loose
popped out the remainder of old lens, then pushed in new ones and slipped on plugs.
Parts Used:
-
RICKEY from MONTROSE, NY
-
Difficulty Level:Easy
-
Total Repair Time:Less than 15 mins
-
Tools:Screw drivers
3 of 6 people
found this instruction helpful.
Was this instruction helpful to you?
Thank you for voting!
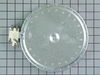
Burner didn't go on
Turned off juice
Pulled stove from wall
Unscrewed 2 screws to loosen range top
Lifted n propped top
Unplugged 4 wires
Unscrewed burner assembly
Installed burner-reversed steps to reassemble
Pulled stove from wall
Unscrewed 2 screws to loosen range top
Lifted n propped top
Unplugged 4 wires
Unscrewed burner assembly
Installed burner-reversed steps to reassemble
Parts Used:
-
Mike from Hatfield, PA
-
Difficulty Level:Really Easy
-
Total Repair Time:Less than 15 mins
-
Tools:Nutdriver, Screw drivers
1 person
found this instruction helpful.
Was this instruction helpful to you?
Thank you for voting!
Not Reaching Temperature above 300 Degrees
Take off 6 screws of back cover of the range, unplug the white wire. Go to the inside of oven, pull out racks. At the top of the oven is your Broiler element, in the center you will see a rod sticking out with one screw holding it in place. Take out screw and pull temperature sensor out toward you. Reverse steps to put it back together.
Parts Used:

-
Ron from SAN TAN VLY, AZ
-
Difficulty Level:Very Easy
-
Total Repair Time:Less than 15 mins
-
Tools:Nutdriver
1 person
found this instruction helpful.
Was this instruction helpful to you?
Thank you for voting!
The light inside the oven had burned out
0. As a safety precaution, unplug the range or hit the relevant fuse breaker before you start. You might also want to grab a flashlight. Definitely do not try to do this while the oven is hot.
1. Pinch the wire over the light bulb cap to remove it. This is inside the oven at the back.
2. Pop off the hemispherical glass cap.
3. Unscrew the old light bulb, and screw the new light bulb in its place.
4. Put the cap back.
5. Secure the cap by putting the wire back in its slots on the cap.
No tools needed, the cap is just held in place with pressure from the wire.
1. Pinch the wire over the light bulb cap to remove it. This is inside the oven at the back.
2. Pop off the hemispherical glass cap.
3. Unscrew the old light bulb, and screw the new light bulb in its place.
4. Put the cap back.
5. Secure the cap by putting the wire back in its slots on the cap.
No tools needed, the cap is just held in place with pressure from the wire.
Parts Used:

-
Catherine from SEATTLE, WA
-
Difficulty Level:Very Easy
-
Total Repair Time:Less than 15 mins
3 of 7 people
found this instruction helpful.
Was this instruction helpful to you?
Thank you for voting!
Replaced stove top burner element
Disconnect stove electrical connection. Removed 2 bolts common to the upper stove top cover. Disconnected 4 wires from burner element along with 2 retaining clips.
Removed burner element and replaced with new element. Reinstalled 4 wires and 2 retaining clips. Lowered stove top cover and reinstalled 2 bolts. Connect stove electrical to wall outlet. Turn on burner element and verify that it works.
Removed burner element and replaced with new element. Reinstalled 4 wires and 2 retaining clips. Lowered stove top cover and reinstalled 2 bolts. Connect stove electrical to wall outlet. Turn on burner element and verify that it works.
Parts Used:
-
Steve from Forest, VA
-
Difficulty Level:Easy
-
Total Repair Time:1- 2 hours
-
Tools:Screw drivers, Socket set
1 person
found this instruction helpful.
Was this instruction helpful to you?
Thank you for voting!
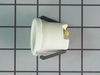
BASE OF BULB BROKE OFF & WELDED TO SOCKET
PULL RANGE OUT FROM WALL & ALSO REMOVED OVEN DOOR BY SLIDING UP. WORKING FROM INSIDE OVEN & ALSO BEHIND I REPLACED PART . ALWAYS " UNPLUG " RANGE BEFORE YOU START.
Parts Used:
-
NEIL from ROCKY POINT, NY
-
Difficulty Level:Easy
-
Total Repair Time:30 - 60 mins
-
Tools:Nutdriver, Pliers
1 person
found this instruction helpful.
Was this instruction helpful to you?
Thank you for voting!
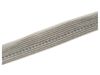
Oven door gasket was damaged and leaking
I watched the repair video on YouTube and followed his instructions as much as possible. Went pretty well as I thought it would be harder. I’m pretty handy so, I was pleased.
Parts Used:
-
Kerry from Sheboygan, WI
-
Difficulty Level:A Bit Difficult
-
Total Repair Time:1- 2 hours
-
Tools:Socket set
1 person
found this instruction helpful.
Was this instruction helpful to you?
Thank you for voting!
Hot burner light lens broke off.
Pull range away from back wall. Remove panel behind control knobs by removing the screws that hold it on. Find hot burner light that holds lens. Remove broken part of lens. Insert new lens into hole on front of control panel and into hot burner light receptacle. Replace back panel. Slide range back into place.
Parts Used:
-
Charles from NEKOOSA, WI
-
Difficulty Level:Easy
-
Total Repair Time:15 - 30 mins
-
Tools:Screw drivers
1 of 2 people
found this instruction helpful.
Was this instruction helpful to you?
Thank you for voting!
Change bulb
-
Louis from LEAGUE CITY, TX
-
Difficulty Level:Really Easy
-
Total Repair Time:30 - 60 mins
-
Tools:Nutdriver
3 of 8 people
found this instruction helpful.
Was this instruction helpful to you?
Thank you for voting!
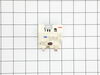
Knob stem broke off.
Pulled stove out to access back panel. Unscrew broken switch/stem. Replaced each wire one at a time to make sure they went in right spot. Screw in new switch. Replaced back panel.
Parts Used:
-
DALE from FREMONT, NE
-
Difficulty Level:Very Easy
-
Total Repair Time:Less than 15 mins
-
Tools:Nutdriver, Pliers, Screw drivers
1 of 2 people
found this instruction helpful.
Was this instruction helpful to you?
Thank you for voting!
Light burnt out.
Turned the wire protector to the side. Turned out the old bulb and replaced it with the new. Turned the wire protector back in place and I'm like new.
Parts Used:
-
Roscoe G from ROCHESTER, NY
-
Difficulty Level:Very Easy
-
Total Repair Time:Less than 15 mins
2 of 6 people
found this instruction helpful.
Was this instruction helpful to you?
Thank you for voting!
oven was not getting up to temp
Once I opened up the back of the range, the sensor wires where there and burnt just like your info said. One nut to take off in the oven and the sensor came right out and the new one went right in. The oven works great, cooked the turkey today. The worst part of the repare was the cleaning behind and under the range, it hasn't moved since it was put in 6 years ago. Very pleased with PS.
Parts Used:
-
walter from townshend, VT
-
Difficulty Level:Really Easy
-
Total Repair Time:Less than 15 mins
-
Tools:Nutdriver
0 of 1 people
found this instruction helpful.
Was this instruction helpful to you?
Thank you for voting!
F2 error when oven was heating up, along with a beeping noise and then it shut off
Unplugged oven, turned off breaker, took cover off back of oven, removed old sensor by disconnecting in back of oven and undoing screw inside oven. Pulled old one out replaced with new took 15min. Cost me less than $20. Parts Select rocks! Even received part in two days with standard shipping!
Parts Used:
-
Lori from Paris, TN
-
Difficulty Level:Really Easy
-
Total Repair Time:15 - 30 mins
-
Tools:Screw drivers, Socket set
0 of 1 people
found this instruction helpful.
Was this instruction helpful to you?
Thank you for voting!
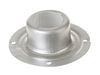
light keep burning out in oven.
Remove the door. Just open a little and pull up. Removed racks. Removed 3 screws with nutdriver. Pulled out housing. Disconnected 2 wires. Assembled new housing with with bulb receptacle and gasket. Reconnected wires and crimped a little to make them snug. Pushed housing back into hole. Put 3 screws back in, inserted bulb and cover. Slid door back on and done. 30 minutes at most.
Parts Used:

-
john from Mc Kees Rocks, PA
-
Difficulty Level:Really Easy
-
Total Repair Time:30 - 60 mins
-
Tools:Nutdriver
2 of 8 people
found this instruction helpful.
Was this instruction helpful to you?
Thank you for voting!
8" Haliant element stopped working/burned out!
After watching the demonstration on YOU TUBE by two separate persons, , I felt I could accomplish this repair job by myself. After all, if a 9 months pregnant lady on YOU TUBE can do it in 15 minutes then so could I. However, my particular stove turned out to be a bit more involved, and different than those whose demonstrations I had viewed! .. First turn off your electrical power at the circuit breaker. There is no need to unplug the stove, just test by turning it on and observing if the display is lit or the burners come on. If it doesn't then you are good to start the repair with the power off. 1) Open the oven door, then bend over and check underneath. There are two screws one on each side at the front. Using an 8 mm socket wrench undo those screws and put them in a safe place where they wont roll away. 2) I would suggest using an old towel or an old sheet once you have the stove top lifted to cover your work surface, so if you drop any little parts that might roll away, you will be able to just pick them up without a problem. Next you will need something to prop the stove top open or someone to hold it for you. I used the box that my new element came in and that worked well. 3) Here's where my stove differed.. I had a metal retaining bar across the two front elements holding them up in place. .. I unscrewed the two small screws that held it in place at the edge of the stove. (I just did it on the side where I was replacing the element). This does not release your element just the bar so you can get access to the element. 4) Next, using your pliers you will see a couple of round washers that have teeth, these are holding a spring in place on a metal peg, this keeps the element from falling or moving out of position.. It was a bit difficult releasing the washers but I eventually did it, with my pliers, and then had to straighten the washers out for use afterwards 5) Once the washers are off, this frees the spring and allows the element to be removed. from the bar. 6)Next, I recommend taking a picture of the wiring, so you will know what goes to where. There are four wires on the old element, so I just followed the color coded placement and fasten them in the same place onto the new element. The wires are a bit stiff to remove, and if you are using pliers be careful as they are fragile and could break. 6) When I removed my GE replacement element from the packaging, it turned out to be a little different, and did not have the two metal pegs on it. In order to make it fit so I could do the repair. I unscrewed the two pegs from the old element, then counting around the outside holes on the new element to get them in the exact same place, I then attempted to screw them in.. This was the difficult part as they did not easily fit, and I had to ream out the holes to get the posts to screw into the new element. 6) Once that was done, the rest is easy just putting it back together the same way you took it apart. With the pegs screwed in place and the four wiring clips put on the new element, then it should not take long to complete. Next fit the spring over the metal peg first, then put the peg through the hole on the retaining bar. Make sure you get them lined up in the correct position. If you don't then they will be out of alignment with the Ring marking on the glass surface. Check this before you get it all put back together. The retaining bar has four holes in it, so you will see what I mean. The metal pegs on my element went into two opposing holes. Once that is done, the spring goes over the peg, then the peg goes into the retaining bar, and lastly, the small round washer fits the bottom of the peg to keep the spring held tight and the element in place on the metal retaining bar. You are almost done. Next simply put the retaining bar back up, make sure your element lines up on the top of your stove in the position it was before, then put the two small screws
Parts Used:
-
Gwendoline from Vero Beach, FL
-
Difficulty Level:A Bit Difficult
-
Total Repair Time:1- 2 hours
-
Tools:Pliers, Screw drivers, Socket set
Was this instruction helpful to you?
Thank you for voting!