




















JCB560DJ1WW General Electric Range - Instructions
Keep searches simple. Use keywords, e.g. "leaking", "pump", "broken" or "fit".
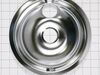
old one did not fit right
took the old one out and dropped the new one in, replaced the electric burner and done
thw worse part was paying as much for s&h as i did for the part itself
thw worse part was paying as much for s&h as i did for the part itself
Parts Used:
-
Pat from PALM BAY, FL
-
Difficulty Level:Really Easy
-
Total Repair Time:30 - 60 mins
4 of 4 people
found this instruction helpful.
Was this instruction helpful to you?
Thank you for voting!
F2 Error on Display
The repair was very easy to do. Our oven was showing the F2 error code, which is associated with an over-temperature fault. Upon inspection, the oven was warm, but definitely not beyond the temperature threshold. I researched the issue and found this temperature sensor.
Swapping the sensor was extremely easy. You take off the back panel of the oven, unhook a single wiring harness, and undo some bolts inside the oven, which allows you to pull off the old sensor. Simply hook up the new sensor to the harness, pull everything back through, replace the fasteners, and you're good to go.
Swapping the sensor was extremely easy. You take off the back panel of the oven, unhook a single wiring harness, and undo some bolts inside the oven, which allows you to pull off the old sensor. Simply hook up the new sensor to the harness, pull everything back through, replace the fasteners, and you're good to go.
Parts Used:

-
Tom from FORNEY, TX
-
Difficulty Level:Very Easy
-
Total Repair Time:Less than 15 mins
-
Tools:Nutdriver, Screw drivers
4 of 4 people
found this instruction helpful.
Was this instruction helpful to you?
Thank you for voting!
Oven Temp. went too high and the door locked. Burnt the food
This temperature sensor is very easy to replace. There are two screws inside the oven in the top middle of the back of the oven. Take these off. on the back of the stove there is a metal plate with 5 screws I believe. Take these off with a nut driver. Then you will see a white connector coming from the spot where you took the other screws off. Take the white connector apart and pull out the temperature sensor from the inside of the oven. Then put the new one in.
Parts Used:
-
Nathan from BILLINGS, MT
-
Difficulty Level:Very Easy
-
Total Repair Time:Less than 15 mins
-
Tools:Nutdriver, Screw drivers
4 of 4 people
found this instruction helpful.
Was this instruction helpful to you?
Thank you for voting!
F2 fault code kept appearing on oven
Removed the oven door and shelves. Moved the oven out from wall, so that I could access the rear panel. Unplugged the oven. Removed the five (5) screws holding the rear panel in place and removed the panel. Disconnected the sensor at the connector. Removed the screw holding the sensor in place inside the oven and removed the sensor. Theaded the sensor wire through the rear of the oven wall. Installed the sensor and screw to hold it in place. Snapped the connector from the sensor to the mating connector at the rear of the oven. Installed the rear panel. Installed the five (5) screws to hold the panel. Plugged the oven back in and slide the oven back to the wall. Installed the oven shelves and the oven door.
Parts Used:
-
emmett from rocky mount, NC
-
Difficulty Level:Easy
-
Total Repair Time:15 - 30 mins
-
Tools:Nutdriver
5 of 7 people
found this instruction helpful.
Was this instruction helpful to you?
Thank you for voting!
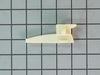
nylon guide was broke off
took drawer out removed broken guide. It had 1 screw removed it put the new guide in place put screw back in. Put drawer back in stove, It works fine.
Parts Used:
-
Lathan from Goodyear, AZ
-
Difficulty Level:Really Easy
-
Total Repair Time:15 - 30 mins
-
Tools:Screw drivers
5 of 7 people
found this instruction helpful.
Was this instruction helpful to you?
Thank you for voting!
Drawer glide broken
took nut driver to remove the old and replaced with new. simple.
Parts Used:
-
TERESA from SALTVILLE, VA
-
Difficulty Level:Very Easy
-
Total Repair Time:15 - 30 mins
-
Tools:Socket set
3 of 3 people
found this instruction helpful.
Was this instruction helpful to you?
Thank you for voting!
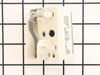
Switch was not turning off range indicator light
Pulled stove out and unplugged. At the rear of the range there were 4 faster. Used a nutdriver piece in an electric drill. Pulled off the cover and located the switch. At the front of the stove, I removed the knob and unscrewed two screws releasing the switch. I undid and replaced each wire connector one-by-one to avoid any wrong connections. Replaced and secured the switch and replace the back panel. All secured, power on and fixed! Easy repair, but something that had been put off for a year!
Also follow the installation videos from PartSelect - very helpful!
Also follow the installation videos from PartSelect - very helpful!
Parts Used:
-
Charles from PORTLAND, OR
-
Difficulty Level:Really Easy
-
Total Repair Time:Less than 15 mins
-
Tools:Nutdriver, Screw drivers
3 of 3 people
found this instruction helpful.
Was this instruction helpful to you?
Thank you for voting!
Incorrect oven temperature due to defective temperature sensor.
-
Anthony from FARMINGVILLE, NY
-
Difficulty Level:Really Easy
-
Total Repair Time:Less than 15 mins
-
Tools:Nutdriver
3 of 3 people
found this instruction helpful.
Was this instruction helpful to you?
Thank you for voting!
replace a drip pan
OK, I put the drip pan under the burner. Without a single problem.
Parts Used:
-
John from Buffalo, NY
-
Difficulty Level:Really Easy
-
Total Repair Time:Less than 15 mins
3 of 4 people
found this instruction helpful.
Was this instruction helpful to you?
Thank you for voting!
burner not work
Fue muy facil desconectar primero la estufa despues quite los tornillos de la parte superior detras de la estufa, desconecte un cable del switch y lo conecte en el nuevo despues el siguiente hasta conectar todos los cables en el nuevo switch. Lo mejor es desconectar uno por uno para mo mesclar los cables , despues removi el switch de la estufa y puse el nuevo , puse las partes de regreso y listo conecte la estufa t revise si funcionava el quemador y listo sin ningun problema.
Parts Used:
-
SILVIA from Midlothian, TX
-
Difficulty Level:Really Easy
-
Total Repair Time:15 - 30 mins
-
Tools:Screw drivers
3 of 4 people
found this instruction helpful.
Was this instruction helpful to you?
Thank you for voting!
Defective switch
Replaced element control switches
Parts Used:
-
Mary from EDENTON, NC
-
Difficulty Level:Easy
-
Total Repair Time:15 - 30 mins
-
Tools:Screw drivers, Socket set
2 of 2 people
found this instruction helpful.
Was this instruction helpful to you?
Thank you for voting!
front lift burner not working and surface light on with everything off
unplugged the range removed 4 screws from back top cover then took the knob off controller removed 2 screws from behind the knob removed 1 wirer at a time and placed it on the new controller in same order the wires came off put everything back to gather did not fix the problem .
Parts Used:
-
kevin from GAYLORD, MI
-
Difficulty Level:Really Easy
-
Total Repair Time:15 - 30 mins
-
Tools:Nutdriver, Screw drivers
2 of 2 people
found this instruction helpful.
Was this instruction helpful to you?
Thank you for voting!
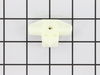
Drawer support broke
Remove drawer by pulling out and lifting up so drawer will slide out of range. Use 1/4 inch Nutdriver or socket - remove the screw that holds the drawer support to the body of the range. Remove support and install new one with screw Pay attention to the way the support fits. There are two holes one for the screw and the other for the plastic prong on the bottom of the support. The prong fits in the bottom hole and the screw in the above hole.
Parts Used:
-
Charles from BOULDER, WY
-
Difficulty Level:Really Easy
-
Total Repair Time:Less than 15 mins
-
Tools:Nutdriver
2 of 2 people
found this instruction helpful.
Was this instruction helpful to you?
Thank you for voting!
Drawer sticking and not operating smoothly
I was so sick of this drawer and I over heard a buddy telling a story about a website that you can get ANY piece for appliances. I take the drawer out, look up the website (partselect.com) look at the appliance diagram and find the missing piece. Order it, get it, install it. My wife thinks I'm a hero and I think I'm pretty cool too.
Parts Used:
-
Bill from Philadelphia, PA
-
Difficulty Level:Easy
-
Total Repair Time:Less than 15 mins
-
Tools:Screw drivers
3 of 5 people
found this instruction helpful.
Was this instruction helpful to you?
Thank you for voting!
Broken drawer glider
Took off broken part and replaced it with the new part by removing a Phillips head screw, the broken part, replace with new and reinstalling the same screw.
Parts Used:
-
James from RANCHO MIRAGE, CA
-
Difficulty Level:Very Easy
-
Total Repair Time:Less than 15 mins
-
Tools:Screw drivers
2 of 2 people
found this instruction helpful.
Was this instruction helpful to you?
Thank you for voting!