




















JBP52*W1 General Electric Range - Instructions
Keep searches simple. Use keywords, e.g. "leaking", "pump", "broken" or "fit".
Burner wouldn't operate
Took Switch panel off range. Disconnected Infinite switch. Reinstalled infinite switch.. Replaced panel. Repair was very simple and self explainatory.
Knott County Housing Authority Maintenance Personnel
Knott County Housing Authority Maintenance Personnel
Parts Used:

-
Linda from Hindman, KY
-
Difficulty Level:Really Easy
-
Total Repair Time:15 - 30 mins
-
Tools:Nutdriver, Screw drivers
3 of 5 people
found this instruction helpful.
Was this instruction helpful to you?
Thank you for voting!
Up to 1 hour for oven to preheat
Removed 2 nuts holding the baking unit to the oven back, removed 2 nuts holding wires in place, installed new unit following procedure backwards. It takes longer to get the tools,take the oven door off, and take racks out than it does to remove and replace the baking unit.
Parts Used:
-
Joel from Avon, OH
-
Difficulty Level:Really Easy
-
Total Repair Time:15 - 30 mins
-
Tools:Screw drivers, Socket set
2 of 2 people
found this instruction helpful.
Was this instruction helpful to you?
Thank you for voting!
element burned out
Took off the door, took out the two screws in the back of the element. Then pulled the element forward, then removed the two wires. Then put it all back together with the new element.
Parts Used:
-
Jeff from Westport, IN
-
Difficulty Level:Really Easy
-
Total Repair Time:Less than 15 mins
-
Tools:Nutdriver, Screw drivers
2 of 3 people
found this instruction helpful.
Was this instruction helpful to you?
Thank you for voting!
Broken element / light assembly
-
Robert from Pompano Beach, FL
-
Difficulty Level:Really Easy
-
Total Repair Time:Less than 15 mins
-
Tools:Nutdriver, Pliers
4 of 9 people
found this instruction helpful.
Was this instruction helpful to you?
Thank you for voting!
Oven Heating element broken
Turned off power to the oven at the circuit breaker. Pulled the old heating element from the back lower wall of the oven. Noted the position of the wires (right terminal attached to the red wire, left to the black wire). Removed small bolts holding the element to the wires using pliers. Attached the new element using screw driver. New element came with screws, not bolts. Pushed the element back into place and restored power. Tested to make sure everything worked. Everything works and I ran an oven cleaning cycle. Noticed that indicator light above the temperature selctor is always on now even when oven is in the OFF position. Not sure if that's related to the change or to the oven cleaning cycle I ran. In any case, oven seems to work normally.
Parts Used:
-
James from Hanover, MA
-
Difficulty Level:Really Easy
-
Total Repair Time:Less than 15 mins
-
Tools:Pliers, Screw drivers
2 of 3 people
found this instruction helpful.
Was this instruction helpful to you?
Thank you for voting!
no heat
Unplugged bad surface element and plugged in replacement.
Parts Used:

-
Roderick A from Cherry Hill, NJ
-
Difficulty Level:Really Easy
-
Total Repair Time:Less than 15 mins
2 of 3 people
found this instruction helpful.
Was this instruction helpful to you?
Thank you for voting!
Could not find a replacement part anywhere
The Surface Element on our GE stove made in the mid 70's finally gave up and would not heat. I went to several of the big home improvement stove with not luck in finding the right heating element for our stove so I turned to a local appliance stove that carries GE products, they did sell me an element and asured me it was the correct one, but once again the element was the wrong one. Then with a simple google search for GE replacment parts I found partselect.com. With the detailed description and images with measuring grids I was able to quickly find the correct heating element for me stove. I am very pleased and the stove is back to 100%.
Thanks partselect.com
Thanks partselect.com
Parts Used:
-
Anthony from Bowden, WV
-
Difficulty Level:Really Easy
-
Total Repair Time:Less than 15 mins
2 of 3 people
found this instruction helpful.
Was this instruction helpful to you?
Thank you for voting!
Oven wouldn't hold temp - over/under
Unplugged the range, took old elements out, put new ones in. Couldn't have been easier and for the total cost of about $60; I have a working oven again. A LOT cheaper than a new $600 range!!
Parts Used:
-
Andor from Oxford, OH
-
Difficulty Level:A Bit Difficult
-
Total Repair Time:30 - 60 mins
-
Tools:Screw drivers, Socket set
2 of 3 people
found this instruction helpful.
Was this instruction helpful to you?
Thank you for voting!
Halogen element staying on
removed the end caps from the stove panel, unscrewed the back, unscrewed the old switch, CAREFULLY noting which wire went to which terminal, removed the wires.
Reversed the process. took a little longer because I felt compelled to do a thorough cleaning while I was there.
Reversed the process. took a little longer because I felt compelled to do a thorough cleaning while I was there.
Parts Used:
-
Arthur from Indian Harbour Beach, FL
-
Difficulty Level:Easy
-
Total Repair Time:30 - 60 mins
-
Tools:Pliers, Screw drivers
2 of 4 people
found this instruction helpful.
Was this instruction helpful to you?
Thank you for voting!
Old Reliable
This range is about 30 years old and I was thrilled to still be able to get the bake element, which burned out about a month ago. I was doing research to buy a new stove when a cousin, from out of town, called to say they were going to visit the following week. No time now to get a new one installed. "partselect.com" was the fastest way. THANK YOU!
First off, I want you to know I'm an obese 56-year female without tools. But, I knew where to borrow those.
I first shut the power off to the range. I then disconnected the 2 screws that hold the element and pulled it out to reveal the 2 screws which connected the wires. I unscrewed those and removed the bake element. I double checked the stove model and bake element part # at the GE website and ordered it from "Partselect.com". It came in about 3 days. I then reversed the order of the above and it was done.
Here are some challenges I encountered..
1) The oven door was in the way making it uncomfortabe to get to the back of the stove.
2) Those $#%& screws are so short I kept dropping them.
3) The wires in the back bend easily. Be careful.
That's about it. It was a pill but not a real problem. It sure beat buying a new range before I've decided on which one to buy.
First off, I want you to know I'm an obese 56-year female without tools. But, I knew where to borrow those.
I first shut the power off to the range. I then disconnected the 2 screws that hold the element and pulled it out to reveal the 2 screws which connected the wires. I unscrewed those and removed the bake element. I double checked the stove model and bake element part # at the GE website and ordered it from "Partselect.com". It came in about 3 days. I then reversed the order of the above and it was done.
Here are some challenges I encountered..
1) The oven door was in the way making it uncomfortabe to get to the back of the stove.
2) Those $#%& screws are so short I kept dropping them.
3) The wires in the back bend easily. Be careful.
That's about it. It was a pill but not a real problem. It sure beat buying a new range before I've decided on which one to buy.
Parts Used:
-
Laura from Crofton, MD
-
Difficulty Level:A Bit Difficult
-
Total Repair Time:15 - 30 mins
-
Tools:Wrench set
1 person
found this instruction helpful.
Was this instruction helpful to you?
Thank you for voting!
Oven lower Bake Element exploded
First observed the situation to determine if I should try and repair. I decided I could and should. Got the element and proceeded. I first turned the power off at the circuit breaker to cut the electrical power to the stove then I removed the two screws that holds the unit in place and then pulled unit out to where I could see the wire connection; removed the two screws on the wire connection and replaced the old element with the new element. reinserted the unit back into position and replaced the two screws that holds the unit in the stove. Turned power back on and tested the oven for any problems. Stove is working great.
Parts Used:
-
Fred from Renton, WA
-
Difficulty Level:Really Easy
-
Total Repair Time:15 - 30 mins
-
Tools:Nutdriver, Socket set
1 person
found this instruction helpful.
Was this instruction helpful to you?
Thank you for voting!
Range element was intermittent - bad contact at wire
Drilled out the screw on one wire as it was corroded to the metal socket. Sanded both wire terminations. Installed wires into terminal block. Reassembled all loose parts and installed into burner slot. Worked perfectly.
Parts Used:
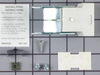
-
Ron from Carrollton, TX
-
Difficulty Level:Really Easy
-
Total Repair Time:15 - 30 mins
-
Tools:Pliers, Screw drivers
2 of 4 people
found this instruction helpful.
Was this instruction helpful to you?
Thank you for voting!
bake element burned out
took cover off back of stove. Removed two screws and wires that were attached to the element. Removed old element and installed new element. An easy repair.
Parts Used:
-
Dave from Maryville, OH
-
Difficulty Level:Easy
-
Total Repair Time:15 - 30 mins
-
Tools:Nutdriver, Screw drivers
1 person
found this instruction helpful.
Was this instruction helpful to you?
Thank you for voting!
The bottom bake element burned out.
1. Cut power off. 2. Remove old element, make sure you do not lose the screws, pull the connecting posts out and we used strings on posts so they could not get lost in the wall. 3. We then replaced the new element with little of no problems, it took approximately 30-45 minutes for the whole process.
Parts Used:
-
Pauline from DECATUR, GA
-
Difficulty Level:Really Easy
-
Total Repair Time:30 - 60 mins
-
Tools:Screw drivers
1 person
found this instruction helpful.
Was this instruction helpful to you?
Thank you for voting!
BASE OF BULB BROKE OFF & WELDED TO SOCKET
PULL RANGE OUT FROM WALL & ALSO REMOVED OVEN DOOR BY SLIDING UP. WORKING FROM INSIDE OVEN & ALSO BEHIND I REPLACED PART . ALWAYS " UNPLUG " RANGE BEFORE YOU START.
Parts Used:
-
NEIL from ROCKY POINT, NY
-
Difficulty Level:Easy
-
Total Repair Time:30 - 60 mins
-
Tools:Nutdriver, Pliers
1 person
found this instruction helpful.
Was this instruction helpful to you?
Thank you for voting!