




















JB905TH3WW General Electric Range - Instructions
Keep searches simple. Use keywords, e.g. "leaking", "pump", "broken" or "fit".
MYy wife left the oven racks in and used oven cleaner.
-
CIRILO from WHITING, NJ
-
Difficulty Level:Really Easy
-
Total Repair Time:Less than 15 mins
4 of 5 people
found this instruction helpful.
Was this instruction helpful to you?
Thank you for voting!
top oven heating element
I first turned off power, then I removed the old top oven heating element, I connected the new element to power supply then placed the element back into holders.
Parts Used:
-
marlene from Pilgrim, KY
-
Difficulty Level:Really Easy
-
Total Repair Time:15 - 30 mins
-
Tools:Nutdriver, Screw drivers
4 of 5 people
found this instruction helpful.
Was this instruction helpful to you?
Thank you for voting!
The front right outer element was defective.
My cooktop is a stand alone unit mounted in a counter top not associated with an oven.
-Removed power to the cook top. Breaker off.
-Lifted the cook top straight up from the counter top and placed two 24 inch board strips to support it above the counter top. This was very easy by pushing up from the bottom of the cook top. This is a two person job preferably.
-Removed the six phillip screws below the glass surface edge. 3 in the front, three in the back.
-Remove knobs and remove the glass top by lifting straight up.
-Record the wire positions on the element on paper and remove the connections.
-The element is mounted on two spring loaded studs that have spring clips as a retainer. Remove the two clips by pulling straight up with a plier or needlenose.
-The replacement element did not come equipped with the two mounting ears that the original had. I removed the two ears from the defective element and installed them on the new element. Very easy. Two phillips screws. The elements have perferations in the correct areas to accommodate this.
-Placed the new element in position and reinstalled the spring clips.
-Install the wiring terminals in the correct positions.
-Reinstalled the glass surface and the six phillips screws. Reinstall the knobs.
-Lower the cook top back into its counter top position.
-Return power to the cook top.
-Installation complete. Very simple!
-Removed power to the cook top. Breaker off.
-Lifted the cook top straight up from the counter top and placed two 24 inch board strips to support it above the counter top. This was very easy by pushing up from the bottom of the cook top. This is a two person job preferably.
-Removed the six phillip screws below the glass surface edge. 3 in the front, three in the back.
-Remove knobs and remove the glass top by lifting straight up.
-Record the wire positions on the element on paper and remove the connections.
-The element is mounted on two spring loaded studs that have spring clips as a retainer. Remove the two clips by pulling straight up with a plier or needlenose.
-The replacement element did not come equipped with the two mounting ears that the original had. I removed the two ears from the defective element and installed them on the new element. Very easy. Two phillips screws. The elements have perferations in the correct areas to accommodate this.
-Placed the new element in position and reinstalled the spring clips.
-Install the wiring terminals in the correct positions.
-Reinstalled the glass surface and the six phillips screws. Reinstall the knobs.
-Lower the cook top back into its counter top position.
-Return power to the cook top.
-Installation complete. Very simple!
Parts Used:
-
Peter from Abbeville, LA
-
Difficulty Level:Really Easy
-
Total Repair Time:15 - 30 mins
-
Tools:Pliers, Screw drivers
4 of 5 people
found this instruction helpful.
Was this instruction helpful to you?
Thank you for voting!
Oven would not heat up
Changed the lower heating element. Simple, simple, simple. I first went on YouTube and watched a couple of videos. Reassurance is a good thing. Okay here we go. 1) Pull the oven out from the wall 2) UNPLUG 3) remove the racks in the oven 4) Unscrew the (2) screws holding the element to the back wall of the oven. 5) There are two (2) connections that you simply pull off. Remove the element. 6) Throw the old heating element away and connect the NEW element where the OLD one was. 7) Put the old screws back in. Plug the oven back in and test. VOILA!!! you are now a repairman.
Parts Used:
-
Myron from SCOTTSDALE, AZ
-
Difficulty Level:Very Easy
-
Total Repair Time:15 - 30 mins
-
Tools:Socket set
3 of 3 people
found this instruction helpful.
Was this instruction helpful to you?
Thank you for voting!
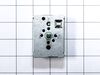
Installed a new switch
Took off cover plate and removed screws from housing to switch. Connected each wire from old switch to new one. No problems.
Parts Used:
-
Vilas from Hanover Township, PA
-
Difficulty Level:Really Easy
-
Total Repair Time:15 - 30 mins
-
Tools:Screw drivers, Wrench set
3 of 3 people
found this instruction helpful.
Was this instruction helpful to you?
Thank you for voting!
Small front burner on our glass top stove died.
Robert did not do the repairs. I did! 70 year old housewife. I watched a Utube video and thought I could certainly handle that. Ordered my part from your site. It came in two days. Burnet was replaced in under 20 minutes by me! Anyone can do this. Super easy, parts just plug in.
Parts Used:

-
Robert from FLEMING ISLE, FL
-
Difficulty Level:Really Easy
-
Total Repair Time:15 - 30 mins
-
Tools:Screw drivers
3 of 3 people
found this instruction helpful.
Was this instruction helpful to you?
Thank you for voting!
Inside burner would no longer heat
I went online and ordered the part after reading other people's repair experiences, confident that I could do it because the part was quite pricey. First, be sure you're circuit breaker to your range is off. Next, open the oven door and locate and remove two screws with a socket, that are just under the top surface which will allow you to lift up the glass top which is actually hinged...no need to pull the range out. Securely prop up the glass surface area and the burners are exposed. With a marker, mark where each color wire goes on the burner you are going to remove and also mark where the two holding brackets are. This way you can reference the locations to connect to the new one. Carefully remove the wires and brackets and install new burner with brackets and connections. Close up the top, replace two screws, turn on breaker, and if there were no other faulty components,it'll work great. P.S Be gentle getting the very snug wires off. Good Luck
Parts Used:
-
John from CHARLESTOWN, NH
-
Difficulty Level:Easy
-
Total Repair Time:15 - 30 mins
-
Tools:Screw drivers, Socket set
3 of 3 people
found this instruction helpful.
Was this instruction helpful to you?
Thank you for voting!
The dual burnner had somthing drop on it and it went out
I pulled out the range from the wall unplugged it from the wall then i opened the oven door and removed the two small screws on the front off the range and lifted the glass top and supported it with a 1/2" X 18inc wooden dowel, then i removed the two burner retaining screws with a small Phillips screw driver and removed the wires from the burner,
then i replaced the burner with the new one and reconnected the wires and placed the burner in to the two retaining clips and then tightened the two screws then i removed the wooden dowel and installed the two screws on the front bottom side on the range then i plugged in the range in and tested the burner then put the range back against the wall.
then i replaced the burner with the new one and reconnected the wires and placed the burner in to the two retaining clips and then tightened the two screws then i removed the wooden dowel and installed the two screws on the front bottom side on the range then i plugged in the range in and tested the burner then put the range back against the wall.
Parts Used:
-
Thad from Layton, UT
-
Difficulty Level:A Bit Difficult
-
Total Repair Time:15 - 30 mins
-
Tools:Screw drivers
3 of 3 people
found this instruction helpful.
Was this instruction helpful to you?
Thank you for voting!
Grease spilled on old gasket----gasket hardened
Simply pulled old gasket from door and pushed new gasket clips into existing holes and tucked in ends at bottom of door.
Parts Used:
-
Delores from Rocksprings, TX
-
Difficulty Level:Really Easy
-
Total Repair Time:Less than 15 mins
5 of 9 people
found this instruction helpful.
Was this instruction helpful to you?
Thank you for voting!
Incorrect oven temperature due to defective temperature sensor.

-
Anthony from FARMINGVILLE, NY
-
Difficulty Level:Really Easy
-
Total Repair Time:Less than 15 mins
-
Tools:Nutdriver
3 of 3 people
found this instruction helpful.
Was this instruction helpful to you?
Thank you for voting!
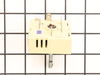
Control awitch was bad
Just note the wire colors and match them where they go on the new control, remove and replace 7 screws and a zip tie and I was done.
Parts Used:
-
Gary from CLEARWATER, FL
-
Difficulty Level:Easy
-
Total Repair Time:Less than 15 mins
-
Tools:Nutdriver, Pliers, Screw drivers
3 of 3 people
found this instruction helpful.
Was this instruction helpful to you?
Thank you for voting!
old oven racks were ruined from self-cleaning oven
My exact model number did not appear in the listings, nor were the oven rack measurements clearly stated in items offered. I sent an email to customer service, received an immediate response with the correct answer (re: which part would fit my oven), ordered this item, and had a shipment arrival within days. The racks are a perfect fit, and they look great. The price is less than any other site I investigated.
Parts Used:
-
Joan from Holt, MI
-
Difficulty Level:Really Easy
-
Total Repair Time:Less than 15 mins
4 of 6 people
found this instruction helpful.
Was this instruction helpful to you?
Thank you for voting!
Heating element burnt out
I am a 62 year old woman with NO experience fixing appliances However I didn't have the money for a repairman so I ordered the part and googled "Hiw to change a heating element in a GE range". All the instructions were there and now my oven is working perfectly. I even posted on Facebook for my female friends to encourage them to do repairs themselves. What a GREAT feeling.
Parts Used:
-
Margie from MYRTLE BEACH, SC
-
Difficulty Level:Really Easy
-
Total Repair Time:30 - 60 mins
-
Tools:Screw drivers
3 of 3 people
found this instruction helpful.
Was this instruction helpful to you?
Thank you for voting!
drwer slide under stove broke off.
recieved part the next day. looked different but I followed instructions and the part worked perfect.
Parts Used:

-
paul from sewell, NJ
-
Difficulty Level:Really Easy
-
Total Repair Time:Less than 15 mins
-
Tools:Screw drivers
3 of 4 people
found this instruction helpful.
Was this instruction helpful to you?
Thank you for voting!
Did not have a problem, just need an extra oven rack.
Placing the order was very easy. Shipping was fast and excellent packaging. Thank you very much!
Parts Used:
-
Catherine from Bethel, CT
-
Difficulty Level:Really Easy
-
Total Repair Time:Less than 15 mins
3 of 4 people
found this instruction helpful.
Was this instruction helpful to you?
Thank you for voting!