




















JB905SH4SS General Electric Range - Instructions
Keep searches simple. Use keywords, e.g. "leaking", "pump", "broken" or "fit".
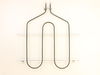
replace broiler element
First, UNPLUG OVEN. Then, remove oven door and place stove on work bench! JUST KIDDING!! Honestly, the repair would be easy if that were possible.The hardest part is kneeling, standing, hunching over, twisting your body holding flashlight in your mouth, etc...THEN, trying to re-attach wires screws etc. The repair is straight forward. unscrew all screws holding element in, pull element out about 6 inches, detach wires, and re-attach. Simple right? Maybe if you're 1 foot 2 inches tall or have 6 foot arms
Parts Used:
-
Sean from WEST PALM BCH, FL
-
Difficulty Level:A Bit Difficult
-
Total Repair Time:30 - 60 mins
6 of 6 people
found this instruction helpful.
Was this instruction helpful to you?
Thank you for voting!
The oven did not get up to or hold the correct temperature
This should have been a very easy fix. But, as I tried to pull out the old temperature sensor, the wire would not come out. I was afraid to pull too hard because I did not want to break the wire. So, I coxed it out easily until I could see the plastic connector. Then, the old wire pulled free from the connector leaving the end of the connector inside the back of the oven. I then had to fish the end of the wire around with the piece of wire through the very small hole in the back of the oven. Once I got it close to the hole, I was able to grab the connector with some needle nose plyers. Connecting the new sensor and reinstalling everything was easy and the oven now works just fine.
Parts Used:

-
Robert from ARROYO GRANDE, CA
-
Difficulty Level:Really Easy
-
Total Repair Time:30 - 60 mins
-
Tools:Pliers, Screw drivers
6 of 6 people
found this instruction helpful.
Was this instruction helpful to you?
Thank you for voting!
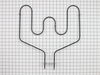
Old coil burned out
After reading all the repair stories I knew that their wasn't any extra wire when the old element is removed. Well, even with that knowlage one of the wires came loose and slipped back in. Fortunately I was able to remove a panel in back and push it back through. I was afraid I would have to take off the whole back but instead there is a panel covering the wire running down the center of the oven. After removing 5 screws with the same nut driver as the one for the coils I had it done in minutes. I had no problem and I am NOT a 'do it yourselfer'. Oh, did I mention I ordered the part on Friday and received it on Saturday standard shipping? Pays to live the next state over from the place shipping it.
Parts Used:
-
Matthew from Cynthiana, KY
-
Difficulty Level:Easy
-
Total Repair Time:15 - 30 mins
-
Tools:Nutdriver
5 of 5 people
found this instruction helpful.
Was this instruction helpful to you?
Thank you for voting!
Baking element cut on fire
In this case I had to pull the range out to disconnect the power and also to remove the plate covering the electrical connectors. This was the only way to reconnect the elements terminals since the wires were too short to do it inside the oven. Undo the 2 screws holding the element in place from inside the oven to remove and install the new one before connecting the terminals from the back. Put back the rear cover and reconnect the power.
Parts Used:
-
Hedayat from LONGWOOD, FL
-
Difficulty Level:Easy
-
Total Repair Time:15 - 30 mins
-
Tools:Nutdriver, Pliers
5 of 5 people
found this instruction helpful.
Was this instruction helpful to you?
Thank you for voting!
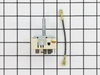
Right front burner had no heat control. (High heat when on "Low")
Pull range out of the "hole", and spin so that back of range is accessible. Remove cover over top "control area" on back of range. (Four screws that happen to be the same size as the magnetic socket that holds the interchangeable tip on a cordless screw gun. Simply remove this tip, and use the tip holder as a magnetic nut driver!). Remove the knob by pulling gently straight off. Remove black plastic retaining nut under where knob was. Inside are two small screws that hold the switch in place. Remove these screws with a magnetic screwdriver (If you drop these screws and lose them, you'll have a hard time finding them. Very small!!). Carefully follow enclosed instructions to move the wires from the old switch to the new switch. Put back together in reverse order.
Parts Used:
-
John from Ocoee, FL
-
Difficulty Level:Easy
-
Total Repair Time:15 - 30 mins
-
Tools:Nutdriver, Screw drivers
7 of 11 people
found this instruction helpful.
Was this instruction helpful to you?
Thank you for voting!
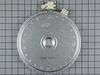
Outer ring of burner did not work
1- opened oven door
2- unscrewed 2 screws underneath top with a socket wrench
3- unscrewed clips that held burner
4-used needle nose pliers to pull off wire clips off old burner
5- placed wires onto new burner
6- opened clips to make it easier to reinsert burner
7-reattached burner
8-Replaced top
The hardest part was unscrewing the 2 screws that held the top in place due to the position of the screws
2- unscrewed 2 screws underneath top with a socket wrench
3- unscrewed clips that held burner
4-used needle nose pliers to pull off wire clips off old burner
5- placed wires onto new burner
6- opened clips to make it easier to reinsert burner
7-reattached burner
8-Replaced top
The hardest part was unscrewing the 2 screws that held the top in place due to the position of the screws
Parts Used:
-
Barry from Bradenton, FL
-
Difficulty Level:Really Easy
-
Total Repair Time:Less than 15 mins
-
Tools:Pliers, Screw drivers, Socket set
5 of 5 people
found this instruction helpful.
Was this instruction helpful to you?
Thank you for voting!
Oven in accurate temp too low.
Open the oven , remove one screw holding the sensor remove the sensor and replace the sensor.
Parts Used:
-
Joseph from LIBERTY HILL, TX
-
Difficulty Level:Really Easy
-
Total Repair Time:Less than 15 mins
-
Tools:Nutdriver
6 of 8 people
found this instruction helpful.
Was this instruction helpful to you?
Thank you for voting!
When inspecting the back of my oven I noticed the cable had been pushed under (my guess from the mouse I found electrocuted where the power lines come in) and was touching one of the element prongs which burned the covering.
Not counting unplugging it and taking off the 3 back panels of the oven (< 5 min.) It took < 2min. to change out. Unclipped cable in back, unscrewed one screw inside of oven at top between the two elements and pulled cable through to front, reversed to attach new sensor. Buttoned up the back, plugged back in and was good to go.
Parts Used:
-
Mary from Bolton, MA
-
Difficulty Level:Really Easy
-
Total Repair Time:Less than 15 mins
-
Tools:Socket set
6 of 8 people
found this instruction helpful.
Was this instruction helpful to you?
Thank you for voting!
Burned out oven element
I unscrewed and removed the old element from inside the oven, but unfortunately there wasn't enough extra wire to pull through and attach the new element from the front, so I had to move the oven away from the wall, remove the back panel, and connect the new element from the rear. Very self-explanatory.
The new element had some kind of spray or coating on it that caused some smoke for a few minutes, but then it worked fine.
The new element had some kind of spray or coating on it that caused some smoke for a few minutes, but then it worked fine.
Parts Used:
-
Jeremy from Savoy, IL
-
Difficulty Level:Really Easy
-
Total Repair Time:Less than 15 mins
-
Tools:Socket set
6 of 9 people
found this instruction helpful.
Was this instruction helpful to you?
Thank you for voting!
Broiler shorted out looked like a 4th of july sparkler.
Ordered on Tues got part on Thurs used a nut driver removed 2 screws holding element in top of oven,then removed the 3 screws holding the element and thermostat to rear of oven pull about 3 inches of slack, removed the blade plugs from element placed them on the new element and assembled it. Took abou 30Min. Easier if you remove the oven door!
Parts Used:
-
Warren from Killeen, TX
-
Difficulty Level:Really Easy
-
Total Repair Time:15 - 30 mins
-
Tools:Nutdriver
5 of 6 people
found this instruction helpful.
Was this instruction helpful to you?
Thank you for voting!
GE oven showed "F2" error code and was over-heating
I am not the handiest person in the world, and this repair was easy even for me. If you suspect that the temperature sensor is the problem, do yourself a favor and buy this inexpensive replacement part and install it yourself prior to calling a professional who will charge a service fee just for checking it out. Pull your oven out from the wall so you can access the back. Unscrew the small nuts on the back to remove the sheet metal cover. Find the wire that goes to the sensor and unplug the plastic coupling. In the oven, unscrew the one nut that secures the sensor to the back wall of the oven. Pull the broken sensor out and replace it with the new sensor. Feed the wire through to the back and plug the new sensor into the same wire that was just disconnected. Reinstall all of the nuts. Do a "test cook" on some frozen food to ensure that the temperature seems correct (i.e., does it cook as expected in the recommended amount of time). The actual repair takes less than five minutes. I put "30-60 minutes" to account for unplugging the oven, pulling it out, removing the screws, replacing the screws, pushing it back in, and testing the temperature.
Parts Used:
-
Kyle from AURORA, CO
-
Difficulty Level:Really Easy
-
Total Repair Time:30 - 60 mins
-
Tools:Nutdriver
5 of 6 people
found this instruction helpful.
Was this instruction helpful to you?
Thank you for voting!
F2 fault code kept appearing on oven
Removed the oven door and shelves. Moved the oven out from wall, so that I could access the rear panel. Unplugged the oven. Removed the five (5) screws holding the rear panel in place and removed the panel. Disconnected the sensor at the connector. Removed the screw holding the sensor in place inside the oven and removed the sensor. Theaded the sensor wire through the rear of the oven wall. Installed the sensor and screw to hold it in place. Snapped the connector from the sensor to the mating connector at the rear of the oven. Installed the rear panel. Installed the five (5) screws to hold the panel. Plugged the oven back in and slide the oven back to the wall. Installed the oven shelves and the oven door.
Parts Used:
-
emmett from rocky mount, NC
-
Difficulty Level:Easy
-
Total Repair Time:15 - 30 mins
-
Tools:Nutdriver
5 of 7 people
found this instruction helpful.
Was this instruction helpful to you?
Thank you for voting!
The broil element was burned through
First thing I unplugged the range. Then I unscrewed 4 screws in the back of the stove to take the back cover off. Then inside the oven, I unscrewed three screws to lossen the element. Then disconnected the two wires from the element.
Then replaced the old element with the new one going exactly backward as mentioned above finishing with plugging the range.
Then replaced the old element with the new one going exactly backward as mentioned above finishing with plugging the range.
Parts Used:
-
Reza from Scottsdale, AZ
-
Difficulty Level:Easy
-
Total Repair Time:15 - 30 mins
-
Tools:Wrench set
4 of 4 people
found this instruction helpful.
Was this instruction helpful to you?
Thank you for voting!
temp sensor in oven was failing.
I picked the least expensive and most likely issue with our oven that was not indicating a correct oven temperature. I am sure with a 15+ year appliance that the circuitry is on its way out but wanted to give this a try to avoid a new appliance purchase. Oven pre-heat setting takes much longer to finish with the age of the oven. However, after the new sensor the oven will maintain a more even temperature for the cycle.
Removal of the sensor from the inside of the oven is a bit awkward since it is located between the broiler elements at the back but a nut driver was the correct tool and worked fine. A bit stuck with the heating of the connection but pretty simple to replace. Must remove the back first to uncouple the connector. Simplest part of the repair.
At best a temporary fix for a an appliance this old.
Removal of the sensor from the inside of the oven is a bit awkward since it is located between the broiler elements at the back but a nut driver was the correct tool and worked fine. A bit stuck with the heating of the connection but pretty simple to replace. Must remove the back first to uncouple the connector. Simplest part of the repair.
At best a temporary fix for a an appliance this old.
Parts Used:
-
Chad from FRANKLIN, NC
-
Difficulty Level:Easy
-
Total Repair Time:15 - 30 mins
-
Tools:Nutdriver
4 of 4 people
found this instruction helpful.
Was this instruction helpful to you?
Thank you for voting!
Interior glass cracked due to heat
First we confirmed that the part delivered was the correct piece needed. We unscrewed the interior panel of the door and separated the insulation from the two pieces so the old glass frame could be removed. The rope type gasket gave us some trouble as it was difficult to stage the insulation, glass frame and rope at one time. Once we got the pieces in place it was a breeze to screw the panel back in just in time to make pies for our Thanksgiving dinner.
Parts Used:
-
suzanne from brighton, MI
-
Difficulty Level:A Bit Difficult
-
Total Repair Time:30 - 60 mins
-
Tools:Screw drivers
5 of 7 people
found this instruction helpful.
Was this instruction helpful to you?
Thank you for voting!