




















JB905SH2SS General Electric Range - Instructions
Keep searches simple. Use keywords, e.g. "leaking", "pump", "broken" or "fit".
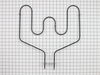
Bake element melted.
Would have helped it I knew the push on terminals of the bake element were visible and accessible to slide the terminals on from the back side of the stove in the beginning. There is not enough slack in the the terminal wires to connect them from the oven side, so you will have to open the back panel to retrieve a wire anyway. SO, CONNECT THE BAKE ELEMENT TO THE OVEN WALL FIRST ! Then, open the back panel of the stove and simply slide the terminals on the exposed slide terminals of the bake element.
Parts Used:
-
Allen from HENRICO, NC
-
Difficulty Level:Really Easy
-
Total Repair Time:30 - 60 mins
-
Tools:Nutdriver, Pliers
2 of 2 people
found this instruction helpful.
Was this instruction helpful to you?
Thank you for voting!
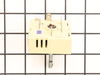
knob thermostat burnt out
it went well as compared to getting a new ~~800$ cooktop and ~~150 to install, I took a shot for 30$ bucks and it worked great!! problem solved and great support ! !! thanks for all your help
Parts Used:
-
John from CENTERPORT, NY
-
Difficulty Level:Really Easy
-
Total Repair Time:30 - 60 mins
-
Tools:Pliers
2 of 2 people
found this instruction helpful.
Was this instruction helpful to you?
Thank you for voting!
Replace Infiniti Switch
Turn off breaker, disconnect electrical wiring, remove cooktop from courter top, turn over , remove switch.
Parts Used:
-
Ezekiel from FLORISSANT, MO
-
Difficulty Level:Very Easy
-
Total Repair Time:30 - 60 mins
-
Tools:Nutdriver, Pliers, Screw drivers, Wrench set
2 of 2 people
found this instruction helpful.
Was this instruction helpful to you?
Thank you for voting!
Stove was not getting enough power.
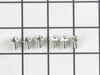
My stove didn't seem to be getting enough power for the oven to heat up and the burners to get hot enough. When I checked the connection of the electric cord I found that one of the 3 terminals that the plug connects to was broken off. When the new part came I removed the old part by first disconnecting the 3 wires [black,white(ground),red] and then using a small but long 1/4 socket (that I found at Lowes)I removed the 2 screws that held the old part to the stove and the green screw under it holding the flat copper piece that also connects under the white ground wire of the part. I mounted the new piece on with the 2 1/4 screws. The new part comes with a piece of copper that is for grounding the part to the stove. When I compared it to the old part it was a little different. I first screwed the copper piece onto the stove (under the part) with the green screw then I screwed the white wire over the copper piece to the center terminal(you have to make the hole of the copper piece line up to the screw hole). I connected the other 2 wires and then connected the electric cord to the new terminal block and then put the back cover back on the stove and plugged it in. The clock came on I turned on the four burners they all got hot and red. I turned on the oven the element on the bottom got red I then turned on the broiler the top element got red. My stove is fixed.
Parts Used:
-
Nathan from Wells, ME
-
Difficulty Level:A Bit Difficult
-
Total Repair Time:15 - 30 mins
-
Tools:Nutdriver, Pliers, Screw drivers, Socket set
2 of 2 people
found this instruction helpful.
Was this instruction helpful to you?
Thank you for voting!
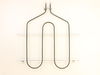
element burned out
couldn't get exact fit--out of production. mounting bracket at back of range for new element too small. took bracket off old element. cut down bracket on new element with tin snips, drilled holes thru it and old bracket and screwed together. at this point the new element was to long & touched oven door. removed spacers that came with new element (used old support to attached to roof of oven) and pried elements apart (which made element wider & shorter). working good.
Parts Used:
-
raleigh from gresham, OR
-
Difficulty Level:A Bit Difficult
-
Total Repair Time:30 - 60 mins
-
Tools:Nutdriver, Pliers, Screw drivers
2 of 2 people
found this instruction helpful.
Was this instruction helpful to you?
Thank you for voting!
My large burner had "burnt out" and would not turn on
I removed the screws from the underside of the stovetop, lifted up the top, propped it up to keep it from falling (using a large book), and removed the old burner by unscrewing it from the top and removing the wire connections. I then screwed the new burner into the top, and attached the wires back to the burner, dropped the top down (gently and carefully, of course), and screwed the top back down to the rest of the stove. It was fairly quick and painless. Although, putting the stove back into his position was not easy, but that was no fault of the stove!!
Parts Used:
-
Michael from Orlando, FL
-
Difficulty Level:Easy
-
Total Repair Time:30 - 60 mins
-
Tools:Pliers, Screw drivers
2 of 2 people
found this instruction helpful.
Was this instruction helpful to you?
Thank you for voting!
No Instructions
Lots of jiggling until I found the screws to remove. After finally getting the top off the base there was the Instructions on a pamphlet taped to the bottom. The key tho get the top off is to remove the face and remove the proper screws( they are identifiable)unplug the electric plug 2 screws on the back sides and poof it is free!
Parts Used:
-
Richard from FAYETTEVILLE, GA
-
Difficulty Level:Difficult
-
Total Repair Time:More than 2 hours
-
Tools:Nutdriver, Pliers, Wrench (Adjustable)
2 of 2 people
found this instruction helpful.
Was this instruction helpful to you?
Thank you for voting!
inner coil of burner no good..supposed to last forever!??
Remove two screws hold cook top down: prop it open with piece of wood. (TURN OFF POWER TO RANGE FIRST!). Carefully make diagram of where wires go: remove and replace.. piece of cake!
Parts Used:
-
D. Scott from Melbourne Village, FL
-
Difficulty Level:Easy
-
Total Repair Time:30 - 60 mins
-
Tools:Nutdriver, Pliers, Screw drivers
2 of 3 people
found this instruction helpful.
Was this instruction helpful to you?
Thank you for voting!
Broil (top) element burned out.
Unplugged the power supply. Took off the cover on the back of the unit. Unplugged the wires to the broiler element. Removed the bolts(4) holding the element inside the oven. Removed the temprature sensor from element and took it out. Put it all back the way it came out. Worked great. Took 25 minutes.
Parts Used:
-
Dee from McKinney, TX
-
Difficulty Level:Easy
-
Total Repair Time:15 - 30 mins
-
Tools:Nutdriver
2 of 3 people
found this instruction helpful.
Was this instruction helpful to you?
Thank you for voting!
Broiler element burned out in the oven.
The only hard thing was contorting my old beat up body and joints long enuff to reconnect the 2 wires and oven heat sensor and put in 6 screws with a 1/4" nut driver. I did remover the oven door and that made it much easier for me.
Parts Used:
-
Emmett from Buffalo, TX
-
Difficulty Level:Really Easy
-
Total Repair Time:30 - 60 mins
-
Tools:Nutdriver, Screw drivers
2 of 3 people
found this instruction helpful.
Was this instruction helpful to you?
Thank you for voting!
Cleaned oven with shelves inside...
I too made the mistake of cleaning the oven with the shelves in place. It doesn't really harm them...but they turn a tarnished brown color...they look dirty. These replacement shelves were a perfect match. Pricing was reasonable, communication was terrific and shipping was super fast. Happy camper here :-)
Parts Used:
-
Carol from Roanoke, VA
-
Difficulty Level:Really Easy
-
Total Repair Time:Less than 15 mins
3 of 6 people
found this instruction helpful.
Was this instruction helpful to you?
Thank you for voting!
Bake element brokeand caught fire
Ordered the bake element part from partselect.com. When the part arrived I removed the 2 6mm screws from the element, I used two clips to hold the wires in place so that they didn't receed back into the stove. I installed the bake element, installed the two scews ans was done. It took all of 10minutes.
Lily in Florida
Lily in Florida
Parts Used:
-
Lillian from coral springs, FL
-
Difficulty Level:Really Easy
-
Total Repair Time:Less than 15 mins
-
Tools:Nutdriver
2 of 3 people
found this instruction helpful.
Was this instruction helpful to you?
Thank you for voting!
Broken rear drawer support
Installed the new brackets at the back of the drawer with the 2 screws provided. The new rear mount design is much better than than the old side mount.
Parts Used:

-
Jesse from Knob Noster, MO
-
Difficulty Level:Really Easy
-
Total Repair Time:Less than 15 mins
-
Tools:Nutdriver
2 of 3 people
found this instruction helpful.
Was this instruction helpful to you?
Thank you for voting!
The broiler had shorted out.
I had my husband fix it! Very easy for me.
It didn't take him long. The most difficult part was getting to the screws. He had to practically climb into the oven.
The parts were shipped promptly and the whole process was relatively painless!
It didn't take him long. The most difficult part was getting to the screws. He had to practically climb into the oven.
The parts were shipped promptly and the whole process was relatively painless!
Parts Used:
-
Marjorie from Salem, IN
-
Difficulty Level:Really Easy
-
Total Repair Time:15 - 30 mins
-
Tools:Socket set
2 of 3 people
found this instruction helpful.
Was this instruction helpful to you?
Thank you for voting!
Inside Oven door cracked
-
Deborah from Fort Worth, TX
-
Difficulty Level:Really Easy
-
Total Repair Time:15 - 30 mins
-
Tools:Nutdriver
2 of 3 people
found this instruction helpful.
Was this instruction helpful to you?
Thank you for voting!