




















JB905BH4BB General Electric Range - Instructions
Keep searches simple. Use keywords, e.g. "leaking", "pump", "broken" or "fit".
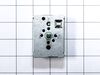
Eye on stove would intermittently heat on high even when low was selected.
Disconnected breaker. Removed knobs, plastic retaining nuts mounted to each switch shaft. Removed four 1/4 inch hex head screws on front panel and two screws securing defective switch. Removed bad switch, and replaced with new part. Took photo of wiring before removing old part. Referred to photo to ensure correct wiring of new part. Reassembled front panel in reverse order of disassembly. Turned breaker to on, and tested new switch. All worked well.
Parts Used:
-
Nellie from ATHENS, AL
-
Difficulty Level:Very Easy
-
Total Repair Time:Less than 15 mins
-
Tools:Nutdriver, Screw drivers, Wrench (Adjustable)
7 of 7 people
found this instruction helpful.
Was this instruction helpful to you?
Thank you for voting!
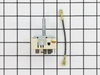
The burner light was on - burner control spun freely
Looked up the part, ordered it, and it was there in 3 days. It was slightly different than the old control, but a very well-written set of instuctions detailed which wires to move to which terminal. The entire repair took about 30 minutes, including moving the range out, replacing the control, and push the range back in place. Works perfectly.
Parts Used:
-
Richard from Indianapolis, IN
-
Difficulty Level:Easy
-
Total Repair Time:15 - 30 mins
-
Tools:Nutdriver, Pliers, Screw drivers, Wrench (Adjustable)
11 of 19 people
found this instruction helpful.
Was this instruction helpful to you?
Thank you for voting!
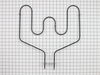
Element burst into flames, then oven wouldn't heat properly
First I shut off power to the unit. Then I removed the oven shelves. Next, I removed the two screws that hold the element in place using a socket ratchet. Then I carefully pulled the element out a few inches. I had some clothes pins with me because I read how some people had problems with the wire leads slipping back into the unit insulation. When the terminals and wire leads were exposed, I clamped the clothes pins on the wires between the leads and the oven wall so the wires could not be pulled back into the wall. Then I disconnected the wires from the old element. Next, I connected the new element to the wires, removed the clothes pins and gently nudge the element terminals back into the oven wall. Then I put the screws back to secure the element. Finally, I turn the power on and set the oven to 400 degrees. When I saw the element get red hot in a couple of minutes, I knew it was fixed. I've used it several times since then.
Parts Used:
-
Gregory from Bethlehem, PA
-
Difficulty Level:Easy
-
Total Repair Time:15 - 30 mins
-
Tools:Socket set
7 of 8 people
found this instruction helpful.
Was this instruction helpful to you?
Thank you for voting!
Oven is off 10 degrees
I changed out the sensor and still same problem. Change out Thermosat and still same problem.
I call the help number and emailed the help but I got nothing but have to many calls because of the virus situation.
Still need help.
I’m an electrician and I don’t want to call a service technician and pay that big bill.
Can anyone there help me out, if so please call.
Ike Stanton
678-525-6644
I call the help number and emailed the help but I got nothing but have to many calls because of the virus situation.
Still need help.
I’m an electrician and I don’t want to call a service technician and pay that big bill.
Can anyone there help me out, if so please call.
Ike Stanton
678-525-6644
Parts Used:

-
Ike from LOGANVILLE, GA
-
Difficulty Level:Very Difficult
-
Total Repair Time:30 - 60 mins
-
Tools:Screw drivers
7 of 8 people
found this instruction helpful.
Was this instruction helpful to you?
Thank you for voting!
Rotary switch for the dual control burner failed
Removed range from cabinets then approximately 6 sheet metal screws from the front of the range and two 1/4" sheet metal screws from the side to remove the front and top of the range. Lifted the cook top removed the two screws from the rotary switch and followed the directions included with switch to connect the wires. In reverse order reassembeled the range.
Quick & Easy
Quick & Easy
Parts Used:
-
Robert from Belvidere, NJ
-
Difficulty Level:Really Easy
-
Total Repair Time:15 - 30 mins
-
Tools:Screw drivers, Socket set
8 of 11 people
found this instruction helpful.
Was this instruction helpful to you?
Thank you for voting!
Bake element started on fire.
Used a pliers to remove old bake element (2 nuts that none of our socket set would fit). Removed the back panel with screwdriver. Unattached bake element from wires. Then removed old element and put new element in, pulled new element wires through back and reattached to range. Screwed back in the oven with the pliers. Closed up the back panel with the screws.
Parts Used:
-
Maria from Lakeville, MN
-
Difficulty Level:Easy
-
Total Repair Time:Less than 15 mins
-
Tools:Pliers, Screw drivers
7 of 8 people
found this instruction helpful.
Was this instruction helpful to you?
Thank you for voting!
left front burner would not turn on
Removed panel to gain access, removed wires from switch from burner that was not operating and attached them to switch for burner that was working. Burner worked, problem identified. Replaced bad switch with new switch. Problem solved.
Parts Used:
-
manuel from key west, FL
-
Difficulty Level:Easy
-
Total Repair Time:Less than 15 mins
-
Tools:Wrench (Adjustable)
7 of 8 people
found this instruction helpful.
Was this instruction helpful to you?
Thank you for voting!
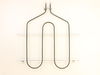
Element burned out
TURNED OFF CIRCUIT BREAKER FIRST. Pulled Stove from wall, Removed 5 screws to remove back plate. Unplugged 2 spade electrical connections. Unpluged temp. sensor plug. Opened oven door and removed 2 screws holding element to top of oven. removed screw holding temp probe to element. Installed the elment in the reverse order starting with the temp probe. when finished with install, I tested the unit before covering the back. I used a oven temp tester to make sure that when the element went out that the temp probe was not damaged. Everything checked out fine and I finished installing the back cover and putting stove in place. Cleaned up area and JOB DONE.
Parts Used:
-
Larry from Keystone Heights, FL
-
Difficulty Level:Easy
-
Total Repair Time:Less than 15 mins
-
Tools:Screw drivers
7 of 8 people
found this instruction helpful.
Was this instruction helpful to you?
Thank you for voting!
A piece of the Bake Element broke off
I unplugged the stove then took the oven racks out. Then I took a nutdriver and took out the 2 screws that held the Bake Element in place. Pulled the 2 prong's out of the oven and removed the wires from the tips. They pulled right off.
Took out the new Bake Element and reversed the process. Attached the 2 wires put the 2 prong's back into the holes and screwed the 2 holding screws back in. Plugged the Stove back in and turned her on. Doing it myself saved me $150.00.
Took out the new Bake Element and reversed the process. Attached the 2 wires put the 2 prong's back into the holes and screwed the 2 holding screws back in. Plugged the Stove back in and turned her on. Doing it myself saved me $150.00.
Parts Used:
-
Keith from Charlotte, NC
-
Difficulty Level:Easy
-
Total Repair Time:Less than 15 mins
-
Tools:Nutdriver
6 of 6 people
found this instruction helpful.
Was this instruction helpful to you?
Thank you for voting!
bake element burned out.
Turn off power to oven,remove two screws holding element in place,pull element forward approx. 1" and unplug wires,remove element. Install new element in reverse order of above.
Parts Used:
-
harold from spearman, TX
-
Difficulty Level:Really Easy
-
Total Repair Time:Less than 15 mins
-
Tools:Nutdriver, Pliers
6 of 6 people
found this instruction helpful.
Was this instruction helpful to you?
Thank you for voting!
Bake element broke into pieces
Disconnect electric at panel box. Pull oven out. Remove 5 screws from rear panel. Pull off the 2 clips at the tips of the old element which is located about 2/3 down the back side of the oven. Remove broken element from inside the oven and slide new element in place. Push 2 clips firmly on the ends of the new element. Replace back cover. Turn power on. Test oven. Slide oven back in place.
Parts Used:
-
Rita from LYMAN, SC
-
Difficulty Level:Very Easy
-
Total Repair Time:Less than 15 mins
-
Tools:Nutdriver
6 of 6 people
found this instruction helpful.
Was this instruction helpful to you?
Thank you for voting!
F2 error; over heating, unknown reason
-
Tim from LEAVENWORTH, WA
-
Difficulty Level:Very Easy
-
Total Repair Time:15 - 30 mins
-
Tools:Nutdriver, Screw drivers
6 of 6 people
found this instruction helpful.
Was this instruction helpful to you?
Thank you for voting!
Had to replace the broiler element
Removed the old element with a nut diver and put the new one in. Very simple instalation.
Amazingly the part arrived in just two days...
My T-Bone steaks are cooked just the way I like them again.
MikeS, Birdsboro, PA
Amazingly the part arrived in just two days...
My T-Bone steaks are cooked just the way I like them again.
MikeS, Birdsboro, PA
Parts Used:
-
Mike from Birdsboro, PA
-
Difficulty Level:Really Easy
-
Total Repair Time:15 - 30 mins
-
Tools:Nutdriver
6 of 6 people
found this instruction helpful.
Was this instruction helpful to you?
Thank you for voting!
Oven temperature would not go above 240 degrees
Pulled the oven out and unplugged it. Removed five screws and the back cover. Disconnected the electrical connection. Removed one screw and pulled the sensor out. Installed the sensor and screw. Made the electrical connection on the back, replaced the cover and five screws. Plugged the electrical cord back in and tested the oven temperature compared to the setting. Worked great. My wife then made a small batch of muffins to test it out and they were good.
Parts Used:
-
Glenn from Grapevine, TX
-
Difficulty Level:Really Easy
-
Total Repair Time:15 - 30 mins
-
Tools:Nutdriver
7 of 9 people
found this instruction helpful.
Was this instruction helpful to you?
Thank you for voting!
The oven did not get up to or hold the correct temperature
This should have been a very easy fix. But, as I tried to pull out the old temperature sensor, the wire would not come out. I was afraid to pull too hard because I did not want to break the wire. So, I coxed it out easily until I could see the plastic connector. Then, the old wire pulled free from the connector leaving the end of the connector inside the back of the oven. I then had to fish the end of the wire around with the piece of wire through the very small hole in the back of the oven. Once I got it close to the hole, I was able to grab the connector with some needle nose plyers. Connecting the new sensor and reinstalling everything was easy and the oven now works just fine.
Parts Used:
-
Robert from ARROYO GRANDE, CA
-
Difficulty Level:Really Easy
-
Total Repair Time:30 - 60 mins
-
Tools:Pliers, Screw drivers
6 of 6 people
found this instruction helpful.
Was this instruction helpful to you?
Thank you for voting!