




















JB650ED1ES General Electric Range - Instructions
Keep searches simple. Use keywords, e.g. "leaking", "pump", "broken" or "fit".
Our bottom drawer support broke and the bottom drawer was canted
Simply removed drawer and lined up the newsupports. Made sure the guide pin was lined up and installed with single screw
Parts Used:

-
Robert from Woodinville, WA
-
Difficulty Level:Really Easy
-
Total Repair Time:Less than 15 mins
-
Tools:Screw drivers
Was this instruction helpful to you?
Thank you for voting!
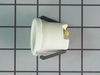
Oven light wire broken, damaged socket
Remove light bail, glass cover held by two nut screws. Pull socket, removed clips in back, replaced wire connectors, placed new socket in, then glass cover and bail. Wire connected in back, cover plate replaced.
Parts Used:
-
Patricia from Brandenburg, KY
-
Difficulty Level:Really Easy
-
Total Repair Time:Less than 15 mins
-
Tools:Nutdriver, Pliers
Was this instruction helpful to you?
Thank you for voting!
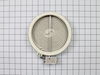
Burner not operational.
Disconnected power supply. Removed damaged element by releasing retainer clips and unplugging wire contacts. Replaced with new element.
Parts Used:
-
Gerald from Philadelphia, PA
-
Difficulty Level:Really Easy
-
Total Repair Time:Less than 15 mins
-
Tools:Screw drivers
Was this instruction helpful to you?
Thank you for voting!
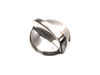
Center Of Knob Broken
-
Wayne from Blakely, GA
-
Difficulty Level:Really Easy
-
Total Repair Time:Less than 15 mins
Was this instruction helpful to you?
Thank you for voting!
Stove drawer rear guides broken
-
Robert from Shakopee, MN
-
Difficulty Level:Really Easy
-
Total Repair Time:Less than 15 mins
-
Tools:Nutdriver
Was this instruction helpful to you?
Thank you for voting!
Range lower drawer would not stay on track.
-
Richard from Newark, DE
-
Difficulty Level:Really Easy
-
Total Repair Time:Less than 15 mins
-
Tools:Nutdriver
Was this instruction helpful to you?
Thank you for voting!
Broken drawer support
Followed the example picture on the part bag. Anyone could do this, incredibly easy. Took about 4 minutes to install both sides.
Parts Used:
-
Mario from Deer Park, WA
-
Difficulty Level:Really Easy
-
Total Repair Time:Less than 15 mins
-
Tools:Nutdriver
Was this instruction helpful to you?
Thank you for voting!
dead mice in insulation, chewed wire on latch switch
-
Don from Flagstaff, AZ
-
Difficulty Level:A Bit Difficult
-
Total Repair Time:1- 2 hours
-
Tools:Nutdriver, Pliers, Wrench set
Was this instruction helpful to you?
Thank you for voting!
Oven slow to heat up
Removed oven door. Removed 2 screws from heat sensor on rear upper wall of oven. Pulled unit out to access rear of unit. Removed six screws on shield on back of unit. Dis connected heat sensor wire and pulled old sensor through from inside of oven. Feed wire of new sensor through from inside and plug in. Everything in reverse. I also had the gas(propane) company come out and check the pressure coming out of the "low pres." regulator. It was low, they changed the regulator.
Parts Used:

-
Joe from Harkers Is., NC
-
Difficulty Level:Easy
-
Total Repair Time:15 - 30 mins
-
Tools:Nutdriver
Was this instruction helpful to you?
Thank you for voting!
The oven temperature could not be controlled
Disconnect the range from the mains. Open the door. Remove the single screw holding the temperature sensor - this is located on the back wall on center and is screwed to the broiler mounting plate. Remove the four screws holding the boiler element and allow it to hang down on the wire; this exposes a space to feed the wire through later. Now move to the back of the range and remove the six screws that hold the central cover plate. Now push the insulation to up out of the way and you can disconnect the temperature sensor, pull it out through front, insert the new one and connect it. Reassemble in the reverse order. Mine worked perfectly!
Parts Used:
-
Keith from Annapolis, MD
-
Difficulty Level:Easy
-
Total Repair Time:15 - 30 mins
-
Tools:Nutdriver, Socket set
Was this instruction helpful to you?
Thank you for voting!
broken light socket
The only tool needed was a nutdriver to remove the lamp socket. I needed my head mounted light to see what I was doing, and everything went smoothly from there. Simple job.
Parts Used:
-
James from Monterey, TN
-
Difficulty Level:Easy
-
Total Repair Time:15 - 30 mins
-
Tools:Nutdriver
Was this instruction helpful to you?
Thank you for voting!
F2 reading
-
lynn from sunnyside, NY
-
Difficulty Level:Really Easy
-
Total Repair Time:15 - 30 mins
-
Tools:Nutdriver, Pliers
Was this instruction helpful to you?
Thank you for voting!
f-2 or f-3
remove two bolts in on sensor and slip thru back un plug and reverse to put in
Parts Used:
-
daniel from gap, PA
-
Difficulty Level:Easy
-
Total Repair Time:15 - 30 mins
-
Tools:Nutdriver, Screw drivers
Was this instruction helpful to you?
Thank you for voting!
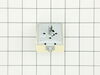
Dual Burner was not turning off or turning on by itself
Pulled the top back panel off, pulled off burner control knob, removed 2 screws which released switch, removed 5 wires from switch and connected them to new switch (pulled off faily easily). Reconnected the 2 screws to range and pushed knob back on. Replaced panel and reconnect the electric. Now works as it should.
Parts Used:
-
Michael from North Miami Beach, FL
-
Difficulty Level:Easy
-
Total Repair Time:15 - 30 mins
-
Tools:Nutdriver, Screw drivers
Was this instruction helpful to you?
Thank you for voting!
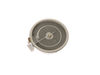
The middle of the element quit working.
Took the old burner out, tranferred the wires from old to new. Installed the new burner. Works fine.
Parts Used:
-
Ruth Ann from New Columbia, PA
-
Difficulty Level:Easy
-
Total Repair Time:15 - 30 mins
-
Tools:Nutdriver, Screw drivers
Was this instruction helpful to you?
Thank you for voting!