




















JB400SP8SS General Electric Range - Instructions
Keep searches simple. Use keywords, e.g. "leaking", "pump", "broken" or "fit".
clock, over control, oven light , timer did not work
remove rear panel cover, removered four screws that held control panel, disconnected colored wires, removed circuit control board, reinstall new board and connected color coded wire to the correct spot on the board, plugged in 220 volt cord, switch on circuit breaker, everything worked normal again
Parts Used:
-
Robert from Austin, AR
-
Difficulty Level:Really Easy
-
Total Repair Time:Less than 15 mins
-
Tools:Nutdriver
Was this instruction helpful to you?
Thank you for voting!
Orange light "Hot Stovetop" lense broke off.
Parts arrived in record time and the right parts. The detailed diagram was so helpful in finding exactly the part I needed to order. Was so easy my girlfriend with no mechanical or electrical experience completely helped me through the entire project. She secured the electrical breaker to the range, and I had the top back to the oven removed. I showed her how the little white box simply slides off the lens cover, then replaced the new one in the holes and slide it back on. Secured the back and she turned on the breaker back on...and all lights work. Thanks for making this project easy, simple and quick.
Parts Used:
-
John from Woodbridge, VA
-
Difficulty Level:Really Easy
-
Total Repair Time:Less than 15 mins
-
Tools:Pliers, Screw drivers
Was this instruction helpful to you?
Thank you for voting!
Old Element Cotrols were sparking due some type of Electrical Short
Unplugged the stove, removed the back control cover, removed the Element Control Knob on front, removed the two screws holding the control in place, pull one wire of old control and connected to the new control - one at a time to ensure proper placement, re-attached the screws, control knob, back cover, plugged in stove, and repairs were completed in less then 15 minutes for both controls.
Parts Used:
-
Steven from Boerne, TX
-
Difficulty Level:Easy
-
Total Repair Time:Less than 15 mins
-
Tools:Pliers, Screw drivers
Was this instruction helpful to you?
Thank you for voting!
Stove drawer rear guides broken

-
Robert from Shakopee, MN
-
Difficulty Level:Really Easy
-
Total Repair Time:Less than 15 mins
-
Tools:Nutdriver
Was this instruction helpful to you?
Thank you for voting!
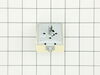
Dual burner on range stopped working.
Changed out the burner with a new replacement and it still didn't work. The socket on the old burner had a burn mark on it. The infinite switch operated sloppy not crisp like the other burners.Ordered a replacement online. Moved the range away from wall and cabinet and shut off electric at panel box. Removed upper back panel. removed switch knob and 2 screws holding switch. Compared electrical connections of both switches and saw that they were different. Read instructions which were included with new switch and found diagram for connecting old lead to new lead correctly. After all leads were connected, remounted new switch powered up and tested OK.
Parts Used:
-
Robert from Estero, FL
-
Difficulty Level:Easy
-
Total Repair Time:Less than 15 mins
-
Tools:Nutdriver, Pliers, Screw drivers
Was this instruction helpful to you?
Thank you for voting!
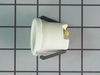
Oven light wire broken, damaged socket
Remove light bail, glass cover held by two nut screws. Pull socket, removed clips in back, replaced wire connectors, placed new socket in, then glass cover and bail. Wire connected in back, cover plate replaced.
Parts Used:
-
Patricia from Brandenburg, KY
-
Difficulty Level:Really Easy
-
Total Repair Time:Less than 15 mins
-
Tools:Nutdriver, Pliers
Was this instruction helpful to you?
Thank you for voting!
burner control
installed new burner control w/knob. about 30 min. stove back in place. working fine
Parts Used:

-
hugh from sun city center, FL
-
Difficulty Level:Really Easy
-
Total Repair Time:Less than 15 mins
-
Tools:Nutdriver, Screw drivers
Was this instruction helpful to you?
Thank you for voting!
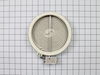
Burner not operational.
Disconnected power supply. Removed damaged element by releasing retainer clips and unplugging wire contacts. Replaced with new element.
Parts Used:
-
Gerald from Philadelphia, PA
-
Difficulty Level:Really Easy
-
Total Repair Time:Less than 15 mins
-
Tools:Screw drivers
Was this instruction helpful to you?
Thank you for voting!
Range lower drawer would not stay on track.
-
Richard from Newark, DE
-
Difficulty Level:Really Easy
-
Total Repair Time:Less than 15 mins
-
Tools:Nutdriver
Was this instruction helpful to you?
Thank you for voting!
Broken drawer support
Followed the example picture on the part bag. Anyone could do this, incredibly easy. Took about 4 minutes to install both sides.
Parts Used:
-
Mario from Deer Park, WA
-
Difficulty Level:Really Easy
-
Total Repair Time:Less than 15 mins
-
Tools:Nutdriver
Was this instruction helpful to you?
Thank you for voting!
Switch Burned Out
Unplugged range popped the switch out the front and one wire came off and fell down in there but was able to get it out with a pair of needle nose pliers and then snapped the switch back in after putting the wires back on
Parts Used:

-
Jerome from Fyffe, AL
-
Difficulty Level:Easy
-
Total Repair Time:Less than 15 mins
-
Tools:Pliers, Screw drivers
Was this instruction helpful to you?
Thank you for voting!