




















JB3000R3BB General Electric Range - Instructions
Keep searches simple. Use keywords, e.g. "leaking", "pump", "broken" or "fit".
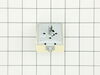
Left front burner would only heat on high setting.
Identified part and part # using schematic found on GE website, contacted PartSelect and confirmed part number, ordered and paid for part. Two days later I recieved part. Unplugged stove, removed two screws on bottom side of front panel and two on top back of same panel, pulled panel forward, pulled the control knob off, removed two small screws that hold the control switch in place, situated new control switch next to bad switch and removed one wire at the time from the bad switch and connected to the same terminal on the new switch. Put everything back together and Bingo, works like a new one. Thanks PartSelect for the friendly, personal phone service, the fast shipment and competitive pricing on my part.
Parts Used:
-
Morris from Ardmore, TN
-
Difficulty Level:Really Easy
-
Total Repair Time:Less than 15 mins
-
Tools:Screw drivers, Wrench (Adjustable)
Was this instruction helpful to you?
Thank you for voting!
f-2 or f-3
remove two bolts in on sensor and slip thru back un plug and reverse to put in
Parts Used:

-
daniel from gap, PA
-
Difficulty Level:Easy
-
Total Repair Time:15 - 30 mins
-
Tools:Nutdriver, Screw drivers
Was this instruction helpful to you?
Thank you for voting!
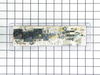
Mother board was blown
-
Kenneth from Bradenton, FL
-
Difficulty Level:Easy
-
Total Repair Time:15 - 30 mins
Was this instruction helpful to you?
Thank you for voting!
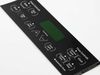
needed to replace control
removed back, and although wires are color coded I removed one at a time from old to new control. for bolts hold control in place placed new face on control and put new control in place, replced back
Parts Used:
-
lowell from baraboo, WI
-
Difficulty Level:Easy
-
Total Repair Time:15 - 30 mins
-
Tools:Nutdriver, Pliers
Was this instruction helpful to you?
Thank you for voting!
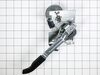
Broken handle on the door lock.
Removed two screws and lifted up the top of the stove to replace the broken handle with the new one.
Parts Used:
-
Kenneth from Spirit Lake, ID
-
Difficulty Level:Really Easy
-
Total Repair Time:15 - 30 mins
-
Tools:Screw drivers, Socket set
Was this instruction helpful to you?
Thank you for voting!
Range top burners work, but Oven would not. Click flashed and made a clicking noise when trying to turn on the oven, but shut off
My Range had the issue I mentioned here. I put off the repairs for a long time, but Thanksgiving was around the corner and we needed a working oven. I had made a previous call to repair man and was quoted $75.00 for a service call to come and check the issue. Before calling a repair man back, I decided to pull the rear cover off the range to see how complicated it would be to repair. I removed the rear cover and found that everything was connected to this "Oven Electronic Control" except for the top elements (explaining why they still worked and the oven didn't). This made it seem that this part would surely have to be causing the issue. I did a search on Google and found this company and the part that I needed. The cost of the part was less than the service call for a repair man would have been. I ordered the part and paid for next day delivery. The part shipped on Monday and arrived on Tuesday. For the installation, I had to identify the wiring because the connector layout was a little different. When I looked closely I found that the terminals were numbered the same as the old part. I replaced wire for wire, put it all back together and tried it out. It worked like a champ. I was thrilled to have been able to find the part with schematics on this web site and it was the correct part and fixed the problem. I was also thrilled that I saved a couple hundred dollars fixing it myself and that it was so easy. I would highly recommend this company for the ease of use of finding the part on their web site, the reasonable price and their prompt processing and delivery.
Parts Used:
-
James from Hope Mills, NC
-
Difficulty Level:Really Easy
-
Total Repair Time:15 - 30 mins
-
Tools:Nutdriver, Pliers, Screw drivers
Was this instruction helpful to you?
Thank you for voting!
Self clean function not working correct, door will not unlock after cool down
Self cleaning would not work, once oven heated Up and cooled down. Door would not open. Called tech out and. He. Said switch in handle assembly was bad and would cost around 110 dollars. Ordered part , which I would like to add, the service was great and fast. Installed Part in 15 min and stove works great again . Self clean works fine
Parts Used:
-
Mike from Brooksville, FL
-
Difficulty Level:Really Easy
-
Total Repair Time:15 - 30 mins
-
Tools:Nutdriver
Was this instruction helpful to you?
Thank you for voting!
F2 reading
-
lynn from sunnyside, NY
-
Difficulty Level:Really Easy
-
Total Repair Time:15 - 30 mins
-
Tools:Nutdriver, Pliers
Was this instruction helpful to you?
Thank you for voting!
Part rusted ... Looked bad.
-
Joseph from Powell, OH
-
Difficulty Level:Easy
-
Total Repair Time:15 - 30 mins
-
Tools:Nutdriver
Was this instruction helpful to you?
Thank you for voting!
Oven slow to heat up
Removed oven door. Removed 2 screws from heat sensor on rear upper wall of oven. Pulled unit out to access rear of unit. Removed six screws on shield on back of unit. Dis connected heat sensor wire and pulled old sensor through from inside of oven. Feed wire of new sensor through from inside and plug in. Everything in reverse. I also had the gas(propane) company come out and check the pressure coming out of the "low pres." regulator. It was low, they changed the regulator.
Parts Used:
-
Joe from Harkers Is., NC
-
Difficulty Level:Easy
-
Total Repair Time:15 - 30 mins
-
Tools:Nutdriver
Was this instruction helpful to you?
Thank you for voting!
The oven temperature could not be controlled
Disconnect the range from the mains. Open the door. Remove the single screw holding the temperature sensor - this is located on the back wall on center and is screwed to the broiler mounting plate. Remove the four screws holding the boiler element and allow it to hang down on the wire; this exposes a space to feed the wire through later. Now move to the back of the range and remove the six screws that hold the central cover plate. Now push the insulation to up out of the way and you can disconnect the temperature sensor, pull it out through front, insert the new one and connect it. Reassemble in the reverse order. Mine worked perfectly!
Parts Used:
-
Keith from Annapolis, MD
-
Difficulty Level:Easy
-
Total Repair Time:15 - 30 mins
-
Tools:Nutdriver, Socket set
Was this instruction helpful to you?
Thank you for voting!
Dual burner on range stopped working.
Changed out the burner with a new replacement and it still didn't work. The socket on the old burner had a burn mark on it. The infinite switch operated sloppy not crisp like the other burners.Ordered a replacement online. Moved the range away from wall and cabinet and shut off electric at panel box. Removed upper back panel. removed switch knob and 2 screws holding switch. Compared electrical connections of both switches and saw that they were different. Read instructions which were included with new switch and found diagram for connecting old lead to new lead correctly. After all leads were connected, remounted new switch powered up and tested OK.
Parts Used:
-
Robert from Estero, FL
-
Difficulty Level:Easy
-
Total Repair Time:Less than 15 mins
-
Tools:Nutdriver, Pliers, Screw drivers
Was this instruction helpful to you?
Thank you for voting!
Oven light wire broken, damaged socket
Remove light bail, glass cover held by two nut screws. Pull socket, removed clips in back, replaced wire connectors, placed new socket in, then glass cover and bail. Wire connected in back, cover plate replaced.
Parts Used:
-
Patricia from Brandenburg, KY
-
Difficulty Level:Really Easy
-
Total Repair Time:Less than 15 mins
-
Tools:Nutdriver, Pliers
Was this instruction helpful to you?
Thank you for voting!
burner control
installed new burner control w/knob. about 30 min. stove back in place. working fine
Parts Used:

-
hugh from sun city center, FL
-
Difficulty Level:Really Easy
-
Total Repair Time:Less than 15 mins
-
Tools:Nutdriver, Screw drivers
Was this instruction helpful to you?
Thank you for voting!
Orange light "Hot Stovetop" lense broke off.
Parts arrived in record time and the right parts. The detailed diagram was so helpful in finding exactly the part I needed to order. Was so easy my girlfriend with no mechanical or electrical experience completely helped me through the entire project. She secured the electrical breaker to the range, and I had the top back to the oven removed. I showed her how the little white box simply slides off the lens cover, then replaced the new one in the holes and slide it back on. Secured the back and she turned on the breaker back on...and all lights work. Thanks for making this project easy, simple and quick.
Parts Used:
-
John from Woodbridge, VA
-
Difficulty Level:Really Easy
-
Total Repair Time:Less than 15 mins
-
Tools:Pliers, Screw drivers
Was this instruction helpful to you?
Thank you for voting!