




















JB250RK3SS General Electric Range - Instructions
Keep searches simple. Use keywords, e.g. "leaking", "pump", "broken" or "fit".
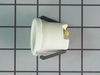
BASE OF BULB BROKE OFF & WELDED TO SOCKET
PULL RANGE OUT FROM WALL & ALSO REMOVED OVEN DOOR BY SLIDING UP. WORKING FROM INSIDE OVEN & ALSO BEHIND I REPLACED PART . ALWAYS " UNPLUG " RANGE BEFORE YOU START.
Parts Used:
-
NEIL from ROCKY POINT, NY
-
Difficulty Level:Easy
-
Total Repair Time:30 - 60 mins
-
Tools:Nutdriver, Pliers
1 person
found this instruction helpful.
Was this instruction helpful to you?
Thank you for voting!
The light socket cup could no longer hold the bracket that holds the light cover in place.
I watched a video of a similar model to familiarize myself with the required steps needed. I opened the back and disconnected the power cord and ground wires connected to the removable socket I then removed the lightbulb and removable socket from the oven interior side. I then removed the defective light socket cup and replaced it with the part I purchased. After replacing the removable socket and lightbulb, the bracket holding the light cover functioned perfectly with the new light socket cup. Final steps were to reconnect the power and ground wires to the removable socket. I then replaced the back cover over the light socket cup area. One word of advise. Be very careful when removing and reconnecting the cables to the removable light socket.
Parts Used:

-
Roger from ALPENA, MI
-
Difficulty Level:Really Easy
-
Total Repair Time:30 - 60 mins
-
Tools:Socket set
1 person
found this instruction helpful.
Was this instruction helpful to you?
Thank you for voting!
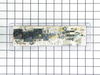
Oven board went out
One wire at at time then used my razor blade to get front off stuck right back on
Parts Used:
-
Jackie from TICKFAW, LA
-
Difficulty Level:Very Easy
-
Total Repair Time:15 - 30 mins
-
Tools:Pliers
1 person
found this instruction helpful.
Was this instruction helpful to you?
Thank you for voting!
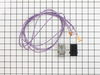
Old Terminal Block was arcing.
Cut Wires to old terminal block and wired in new Terminal Block
Parts Used:
-
Robert from HOUSTON, TX
-
Difficulty Level:Really Easy
-
Total Repair Time:15 - 30 mins
-
Tools:Screw drivers
1 person
found this instruction helpful.
Was this instruction helpful to you?
Thank you for voting!
Oven door wouldn't close properly
Watched video on you tube. Removing/reinstalling all of the screws/bolts took longer than the actual repair.. Took 23 minutes total from turning power off, repairing and turning back on. Super easy!
Parts Used:

-
Lynn from N CHESTERFLD, VA
-
Difficulty Level:Really Easy
-
Total Repair Time:15 - 30 mins
1 person
found this instruction helpful.
Was this instruction helpful to you?
Thank you for voting!
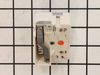
Surface element switch failed
Top front sloping sheet metal panel with all controls and plastic end caps has to come off. Need 2 people, one to hold it while other replaces switch. Problem was getting screw holes on bottom ends lined up and cuts from sheet metal edges. Ten minutes to get it apart, 40 to get it back together. New switch works fine.
Parts Used:
-
William W. from Seattle, WA
-
Difficulty Level:A Bit Difficult
-
Total Repair Time:30 - 60 mins
-
Tools:Screw drivers
1 of 2 people
found this instruction helpful.
Was this instruction helpful to you?
Thank you for voting!
Change bulb

-
Louis from LEAGUE CITY, TX
-
Difficulty Level:Really Easy
-
Total Repair Time:30 - 60 mins
-
Tools:Nutdriver
3 of 8 people
found this instruction helpful.
Was this instruction helpful to you?
Thank you for voting!
electric burner shorted out and fried the switch
Removed two screws holding the housing in place and loosened two more on the back it order to free it. Switch was held i place with two screws, removed those. Transfered wires one by one on the new switch, which was identical OEM part, and replaced the screws. VERY simple.
Parts Used:
-
David from Greenwood, IN
-
Difficulty Level:Really Easy
-
Total Repair Time:Less than 15 mins
-
Tools:Nutdriver, Screw drivers
1 of 2 people
found this instruction helpful.
Was this instruction helpful to you?
Thank you for voting!
dropped & broke the oven light bulb cover
-
joseph from san jose, CA
-
Difficulty Level:Really Easy
-
Total Repair Time:Less than 15 mins
1 of 2 people
found this instruction helpful.
Was this instruction helpful to you?
Thank you for voting!
Vent Tube Baked on Mouse Urine Smell
Mice took over trailer, after eliminating mice, and cleaning oven and range thoroughly, I noticed that the only place the mouse urine smell was still coming from was the vent tube. Noticed soiling around tube where it went through and into oven. I removed the center rack, layed some foil to catch any debris that may fall from the tube when it is removed. I removed old vent tube simply by removing the two nut screws on the roof of the oven. I had to pry it out a little bit. I then cut out and soiled insulation with razor knife, I inserted the new vent tube from the inside, and replace 1/4 nut screws and tighten.
Parts Used:

-
Danny from FLORENCE, MA
-
Difficulty Level:Really Easy
-
Total Repair Time:15 - 30 mins
-
Tools:Nutdriver
1 of 2 people
found this instruction helpful.
Was this instruction helpful to you?
Thank you for voting!
Oven will not heat
As many people have encountered, my oven would not heat but the igniter would be bright orange and glow! Over time, the igniter wears and degrades causing oxidation to the surface. This cause the igniter to fail and operate at a lower current level, below 2.8 amps! Normal igniters operator over 3.0 to 3.1 amps. When is happens, a low current igniter does not have enough input to the control valve to tell the valve to open to allow gas to flow over the igniter to light the oven, thus heat the oven! This has got to be the NUMBER one reason for an oven not heating!
Parts Used:

-
Joseph from Homosassa, FL
-
Difficulty Level:Easy
-
Total Repair Time:15 - 30 mins
-
Tools:Pliers, Screw drivers
1 of 3 people
found this instruction helpful.
Was this instruction helpful to you?
Thank you for voting!
Water dumped over in in my overhead microwave, which dripped down on, & shorted out a burner switch.
My husband had already removed the back plate form the stove and detached the wires from the old burner switch because it was keeping the burner on. He unscrewed the old switch and removed it. He then popped in the new switch, attached the wires to the correct contacts, and put the back plate back on. We plugged in the stove, and that burner works good as new.
Parts Used:
-
Deanna from Buckeye, AZ
-
Difficulty Level:Really Easy
-
Total Repair Time:Less than 15 mins
-
Tools:Pliers, Screw drivers
1 of 3 people
found this instruction helpful.
Was this instruction helpful to you?
Thank you for voting!
Surface burner element was burnt out.
-
marliese from bowie, MD
-
Difficulty Level:Really Easy
-
Total Repair Time:Less than 15 mins
1 of 3 people
found this instruction helpful.
Was this instruction helpful to you?
Thank you for voting!
Obsolete appliance parts missing
Thank goodness for PartSelect.com
When we moved into our home the microwave and electric range are obsolete appliances and were missing parts. PartSelect.com has pictures of parts on one inch grid pattern so I was able to select the hard to find parts that would fit perfectly and they did.
When we moved into our home the microwave and electric range are obsolete appliances and were missing parts. PartSelect.com has pictures of parts on one inch grid pattern so I was able to select the hard to find parts that would fit perfectly and they did.
Parts Used:
-
Darrell from Cape Coral, FL
-
Difficulty Level:Really Easy
-
Total Repair Time:Less than 15 mins
1 of 3 people
found this instruction helpful.
Was this instruction helpful to you?
Thank you for voting!
Light burnt out.
Turned the wire protector to the side. Turned out the old bulb and replaced it with the new. Turned the wire protector back in place and I'm like new.
Parts Used:
-
Roscoe G from ROCHESTER, NY
-
Difficulty Level:Very Easy
-
Total Repair Time:Less than 15 mins
2 of 6 people
found this instruction helpful.
Was this instruction helpful to you?
Thank you for voting!