




















JB250RF1SS General Electric Range - Instructions
Keep searches simple. Use keywords, e.g. "leaking", "pump", "broken" or "fit".
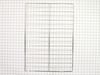
previous owner self cleaned and left oven racks in the oven
-
Judith from San Antonio, FL
-
Difficulty Level:Really Easy
-
Total Repair Time:Less than 15 mins
3 of 3 people
found this instruction helpful.
Was this instruction helpful to you?
Thank you for voting!
Incorrect oven temperature due to defective temperature sensor.

-
Anthony from FARMINGVILLE, NY
-
Difficulty Level:Really Easy
-
Total Repair Time:Less than 15 mins
-
Tools:Nutdriver
3 of 3 people
found this instruction helpful.
Was this instruction helpful to you?
Thank you for voting!
drwer slide under stove broke off.
recieved part the next day. looked different but I followed instructions and the part worked perfect.
Parts Used:

-
paul from sewell, NJ
-
Difficulty Level:Really Easy
-
Total Repair Time:Less than 15 mins
-
Tools:Screw drivers
3 of 4 people
found this instruction helpful.
Was this instruction helpful to you?
Thank you for voting!
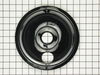
aged burner bowls
I just removed the range elements and old bowls, placed the new bowls into the range top, and inserted the heating elements. What surprised me was the quickness in filling the order. I had the new parts the next day! Great!
Parts Used:
-
Louis from Sandwich, MA
-
Difficulty Level:Really Easy
-
Total Repair Time:Less than 15 mins
3 of 4 people
found this instruction helpful.
Was this instruction helpful to you?
Thank you for voting!
old drip pans rusted
I unplugged the burner, lifted the old drip pan out, put new drip pan in, plugged burner in. The stove looks brand new and it took less than 2 minutes.
Parts Used:
-
noreen from torrington, CT
-
Difficulty Level:Really Easy
-
Total Repair Time:Less than 15 mins
3 of 4 people
found this instruction helpful.
Was this instruction helpful to you?
Thank you for voting!
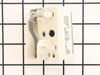
burner not work
Fue muy facil desconectar primero la estufa despues quite los tornillos de la parte superior detras de la estufa, desconecte un cable del switch y lo conecte en el nuevo despues el siguiente hasta conectar todos los cables en el nuevo switch. Lo mejor es desconectar uno por uno para mo mesclar los cables , despues removi el switch de la estufa y puse el nuevo , puse las partes de regreso y listo conecte la estufa t revise si funcionava el quemador y listo sin ningun problema.
Parts Used:
-
SILVIA from Midlothian, TX
-
Difficulty Level:Really Easy
-
Total Repair Time:15 - 30 mins
-
Tools:Screw drivers
3 of 4 people
found this instruction helpful.
Was this instruction helpful to you?
Thank you for voting!
Latch would remain in the locked position once the oven finished self cleaning.
Found instructions on you tube. Easy as I,2, 3. Total of eight screws to remove, then unplug and replace the handle. First kill the power to your range before starting the repair.
Parts Used:

-
Reginald from Bessemer, AL
-
Difficulty Level:Really Easy
-
Total Repair Time:15 - 30 mins
-
Tools:Nutdriver, Pliers
2 of 2 people
found this instruction helpful.
Was this instruction helpful to you?
Thank you for voting!
front lift burner not working and surface light on with everything off
unplugged the range removed 4 screws from back top cover then took the knob off controller removed 2 screws from behind the knob removed 1 wirer at a time and placed it on the new controller in same order the wires came off put everything back to gather did not fix the problem .
Parts Used:
-
kevin from GAYLORD, MI
-
Difficulty Level:Really Easy
-
Total Repair Time:15 - 30 mins
-
Tools:Nutdriver, Screw drivers
2 of 2 people
found this instruction helpful.
Was this instruction helpful to you?
Thank you for voting!
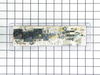
Just didn't work no pwr to it
Killed braker first, removed four screws from back, then unplugged all the wiring, then removed four screw that hold the unit on stove, pealed off the face decal, put that on the new on and just reversed the take off press.
Parts Used:
-
Jerry from HOPEWELL, VA
-
Difficulty Level:Really Easy
-
Total Repair Time:15 - 30 mins
-
Tools:Nutdriver, Screw drivers
2 of 2 people
found this instruction helpful.
Was this instruction helpful to you?
Thank you for voting!
Defective switch
Replaced element control switches
Parts Used:
-
Mary from EDENTON, NC
-
Difficulty Level:Easy
-
Total Repair Time:15 - 30 mins
-
Tools:Screw drivers, Socket set
2 of 2 people
found this instruction helpful.
Was this instruction helpful to you?
Thank you for voting!
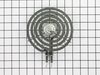
Porcelain melted on burner
-
Catherine from PICKENS, SC
-
Difficulty Level:Very Easy
-
Total Repair Time:Less than 15 mins
2 of 2 people
found this instruction helpful.
Was this instruction helpful to you?
Thank you for voting!
lights blown out

-
Gerald from WINTERVILLE, GA
-
Difficulty Level:Very Easy
-
Total Repair Time:Less than 15 mins
6 of 14 people
found this instruction helpful.
Was this instruction helpful to you?
Thank you for voting!
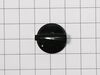
Broke a knob
-
Tammy from ZELIENOPLE, PA
-
Difficulty Level:Very Easy
-
Total Repair Time:Less than 15 mins
2 of 2 people
found this instruction helpful.
Was this instruction helpful to you?
Thank you for voting!
just needed new GE burner bowls
Only instructions I have has nothing to do with installation. But I'd like to suggest that you find a better shipping method. Placed my order on Feb. 7, received message later same day that it'd shipped. I didn't receive it until Feb. 16th -- very poor delivery service.
Parts Used:
-
Jacqueline from E WENATCHEE, WA
-
Difficulty Level:Very Easy
-
Total Repair Time:Less than 15 mins
2 of 2 people
found this instruction helpful.
Was this instruction helpful to you?
Thank you for voting!
Oven temp wouldn't regulate.
-
Ronald from Crumpler, NC
-
Difficulty Level:Very Easy
-
Total Repair Time:15 - 30 mins
-
Tools:Nutdriver, Pliers, Screw drivers
2 of 2 people
found this instruction helpful.
Was this instruction helpful to you?
Thank you for voting!