




















IUD8555DX1 Whirlpool Dishwasher - Instructions
Keep searches simple. Use keywords, e.g. "leaking", "pump", "broken" or "fit".
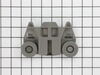
One of the rollers broke of on the lower dish rack
-
Barbara from BETHESDA, MD
-
Difficulty Level:Very Easy
-
Total Repair Time:Less than 15 mins
16 of 29 people
found this instruction helpful.
Was this instruction helpful to you?
Thank you for voting!
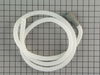
Unwanted water.
A Mouse friend had seen fit to chew through the original drain line. I used my Model Number, and was able to order the correct part . It arrived the next day. The job itself is fairly straight forward. You will need to access the rear of the machine. This may include shutting off, and disconnecting the water supply line. (Adjustable wrench). Mine is under the sink, on the "Hot" side. You may also need to un-plug the unit. (recommended) . A pair of (Pliers) will be needed for the spring clamp.
Parts Used:
-
David from PITTSBURGH, PA
-
Difficulty Level:Easy
-
Total Repair Time:30 - 60 mins
-
Tools:Pliers, Screw drivers, Wrench (Adjustable)
10 of 11 people
found this instruction helpful.
Was this instruction helpful to you?
Thank you for voting!
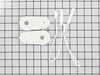
Broken link to door assembly
Actually, the repair was very simple because of the you tube video demonstrating the repair. This made the repair very easy. I repair/replaced both springs and links
Parts Used:

-
Terence from Bridgewater, NH
-
Difficulty Level:Really Easy
-
Total Repair Time:30 - 60 mins
-
Tools:Nutdriver, Screw drivers
10 of 11 people
found this instruction helpful.
Was this instruction helpful to you?
Thank you for voting!
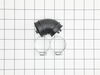
rat got under dishwasher and chewed water lines, grommet
saw big hole in first (main) hose - got replacement at local hardware thinking it was the only problem - it wasn't - turned on the water and noticed another leak so ordered hose from parts select - fast delivery - installed 2nd hose but still a leak so ordered grommet from parts select - again prompt delivery - installed it and voila no more leak -
also checked for rat entry points, plugged those and put down bait - bait wasn't being taken under dishwasher even tho rat reappeared so put a snap trap in back - no luck so far - teachable moment: might have been cheaper to just get another dishwasher as parts are expensive and its difficult to tell extent of damage - luckily i only needed 3 parts = $150
also checked for rat entry points, plugged those and put down bait - bait wasn't being taken under dishwasher even tho rat reappeared so put a snap trap in back - no luck so far - teachable moment: might have been cheaper to just get another dishwasher as parts are expensive and its difficult to tell extent of damage - luckily i only needed 3 parts = $150
Parts Used:
-
sharon from LAS VEGAS, NV
-
Difficulty Level:Easy
-
Total Repair Time:1- 2 hours
-
Tools:Pliers, Screw drivers
10 of 11 people
found this instruction helpful.
Was this instruction helpful to you?
Thank you for voting!
water leaking from this appliance onto the floor
removed old gasket, installed new.
No Leaks!!
Saved the cost of a new dishwashers
No Leaks!!
Saved the cost of a new dishwashers
Parts Used:
-
Raymond from AVONDALE, AZ
-
Difficulty Level:Really Easy
-
Total Repair Time:Less than 15 mins
10 of 12 people
found this instruction helpful.
Was this instruction helpful to you?
Thank you for voting!
Lower rack was rusting, staining dishes.
-
Hugh from ESCONDIDO, CA
-
Difficulty Level:Really Easy
-
Total Repair Time:Less than 15 mins
11 of 16 people
found this instruction helpful.
Was this instruction helpful to you?
Thank you for voting!
Lower dish rack needed replaced
Removed new from box and installed rollers as instructed that's all there was , very easy.
Parts Used:
-
Lester from HARLINGEN, TX
-
Difficulty Level:Really Easy
-
Total Repair Time:30 - 60 mins
-
Tools:Screw drivers
9 of 10 people
found this instruction helpful.
Was this instruction helpful to you?
Thank you for voting!
door spring cable broken
You need to pull the unit out to get access to the spring connected to the rear leg frame. Use the everything in the kit. The rollers are upgraded and will guid the cable better.
Parts Used:
-
garret from Fair Haven, NJ
-
Difficulty Level:A Bit Difficult
-
Total Repair Time:30 - 60 mins
-
Tools:Pliers, Screw drivers
8 of 8 people
found this instruction helpful.
Was this instruction helpful to you?
Thank you for voting!
all rollers fell off. lower rack was hard to move when full
Purchase 4 roller wheel assemblies and installed them with only a screw driver to open the tangs. quick and easy and rack rolls smoothly inside the dishwasher. Rather expensive $58 per roller assembly and hopefully these last the lifetime of the dishwasher.
Parts Used:
-
mike from WESTERVILLE, OH
-
Difficulty Level:Really Easy
-
Total Repair Time:Less than 15 mins
-
Tools:Screw drivers
8 of 8 people
found this instruction helpful.
Was this instruction helpful to you?
Thank you for voting!
I had cleaned the filter on my dishwasher and neglected to reattach the lower spray arm. It went through the next wash/dry cycle resting on a coil and was burned and deformed beyond being able to use it.
The new lower spray arm fit right into place. All set, and I will always check to see if it is sitting properly!
Parts Used:

-
Wendy from LINCOLN, MA
-
Difficulty Level:Very Easy
-
Total Repair Time:Less than 15 mins
8 of 8 people
found this instruction helpful.
Was this instruction helpful to you?
Thank you for voting!
High pitched noise when the washer filled at the beginning of the cycle.
Watched the video, it went as advertised. Easy repair and the noise is gone.
Parts Used:
-
Robert from E GRAND FORKS, MN
-
Difficulty Level:Really Easy
-
Total Repair Time:15 - 30 mins
-
Tools:Nutdriver, Pliers, Screw drivers
8 of 8 people
found this instruction helpful.
Was this instruction helpful to you?
Thank you for voting!
Broken bottom rack
Removed old rack and and removed old rollers and installed old rollers on new rack as they work better than the new rollers sent with new rack
Parts Used:
-
Charles from CONVOY, OH
-
Difficulty Level:Very Easy
-
Total Repair Time:Less than 15 mins
-
Tools:Screw drivers
8 of 9 people
found this instruction helpful.
Was this instruction helpful to you?
Thank you for voting!
Door would not latch shut
Following a utube video made it easy. Removed the outer cover of the door to expose latch. Two screws remove the latch, pay attention to how it was positioned and put the new one on and then replace the panel. But first turn off the electricity to the unit at the fuse box.
Parts Used:
-
RONALD from PRESCOTT, AZ
-
Difficulty Level:Really Easy
-
Total Repair Time:30 - 60 mins
7 of 7 people
found this instruction helpful.
Was this instruction helpful to you?
Thank you for voting!
Dishwasher would not drain
After bailing out the unit, filled filter hole with a moderate amount of Dawn dish washing detergent. Ran dishwasher twice to remove all Dawn from the unit. Had to bailout the water (and suds) from the washer both times. After the dishwasher finally drained I inserted the new filter..
Parts Used:
-
Edward F from CINCINNATI, OH
-
Difficulty Level:Really Easy
-
Total Repair Time:30 - 60 mins
8 of 11 people
found this instruction helpful.
Was this instruction helpful to you?
Thank you for voting!
Dishwasher was leaking but I couldn't determine exact cause, so I tried replacing the gasket which is common cause of leaks.
Removed old gasket, cleaned track thoroughly, then followed instructions from video on Part Select order form. Instructions very clear and precise. Getting the new gasket was a little tedious at the corners but take your time and work the gasket with your fingers as shown on the video.
Parts Used:
-
Dale from DOWNINGTOWN, PA
-
Difficulty Level:A Bit Difficult
-
Total Repair Time:30 - 60 mins
7 of 8 people
found this instruction helpful.
Was this instruction helpful to you?
Thank you for voting!