




















IPT144301 Inglis Refrigerator - Instructions
Keep searches simple. Use keywords, e.g. "leaking", "pump", "broken" or "fit".
Freezer made lots of Ice and Refrigerator didn't cool
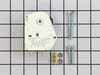
The Defrost Timer is located in Refrigerator section (not the freezer) where your temperture guages are. Move panel and replace the non working Defrost Timer with the new one. It took my husband about 30-40 mins to fix. This was about 2 weeks ago and my Freezer and Refrigerator are working like new. I bought this Kenmore Reftigerator brand new in 1996 and I lost the manuel to it. Thanks to my daughter who found the Defrost Timer on the Internet, I thought I was going to have to buy a new one. This was real easy to fix. The instructions that came with the part was easy to understand and very self explanatory. It also had very good diagrams to follow.
Parts Used:
-
Cecelia from Garden City, TX
-
Difficulty Level:Really Easy
-
Total Repair Time:30 - 60 mins
-
Tools:Screw drivers
4 of 10 people
found this instruction helpful.
Was this instruction helpful to you?
Thank you for voting!
Freezer no longer frost free.
Reviewed Youtube video as a reference. Unplugged refrigerator. Removed old defrost timer. Matched the color of the wiring harness to the diagram that came with the part. Attach new part to wiring harness.
Parts Used:
-
anthony from NORCROSS, GA
-
Difficulty Level:Really Easy
-
Total Repair Time:15 - 30 mins
-
Tools:Nutdriver, Screw drivers
1 person
found this instruction helpful.
Was this instruction helpful to you?
Thank you for voting!
Connection leaked as tube entered freezer
Followed video and had one problen, the metal pipe would not release as shown,so I used a hacksaw between the plastic and metal pipe, removing the metal pipe from inside as the video shows. Good instructions.
Parts Used:
-
Robert from MERRIMACK, NH
-
Difficulty Level:Very Easy
-
Total Repair Time:15 - 30 mins
1 person
found this instruction helpful.
Was this instruction helpful to you?
Thank you for voting!
Warm refrigerater
-
charles from REDDING, CA
-
Difficulty Level:Really Easy
-
Total Repair Time:15 - 30 mins
-
Tools:Nutdriver, Screw drivers
1 person
found this instruction helpful.
Was this instruction helpful to you?
Thank you for voting!
door hinge broke.

-
Bernard from DONALDSONVLLE, LA
-
Difficulty Level:Really Easy
-
Total Repair Time:15 - 30 mins
-
Tools:Nutdriver, Screw drivers
2 of 4 people
found this instruction helpful.
Was this instruction helpful to you?
Thank you for voting!
compressor not running
Removed the access panel on back of unit located the Run Capacitor on the compressor and removed the bad one and put the new one on and pugged refrigerator back in and it started up and works fine now
Parts Used:

-
Doug from Lancaster, CA
-
Difficulty Level:Really Easy
-
Total Repair Time:15 - 30 mins
1 person
found this instruction helpful.
Was this instruction helpful to you?
Thank you for voting!
compressor clicks on for about 5 seconds and then shuts off, evaporator fan is running but no cooling in the fridge.
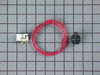
Disconnect power. Remove back panel on the refrigerator. Relay and overload is a modular unit attached to the compressor. Disconnect module from compressor, install new unit. While you're in there clean the condenser coils with a vacuum and clean the fan and condensate pan. Reassemble, and you're chillin. Total time approx. 15 min.
Parts Used:
-
Scott from Jay, ME
-
Difficulty Level:Really Easy
-
Total Repair Time:Less than 15 mins
-
Tools:Nutdriver
1 person
found this instruction helpful.
Was this instruction helpful to you?
Thank you for voting!
3 screws
Ice maker fit perfectly over 2 top screws. I tightened them and put the one on the bottom. I was done in less than 10minutes. Everything fit perfectly as expected. Couldn't have been eaiser. Parts Select is my go to online store.
Parts Used:

-
Michael from SALINA, KS
-
Difficulty Level:Very Easy
-
Total Repair Time:Less than 15 mins
-
Tools:Nutdriver
1 person
found this instruction helpful.
Was this instruction helpful to you?
Thank you for voting!
Light rocker switch broke and refrigerator light couldn't go on.
I just popped out the old switch with a flat head screwdriver. Removed the connections and then installed new switch by reversing steps. Popped in back in and the light went on.
Parts Used:

-
Cathy from HOPATCONG, NJ
-
Difficulty Level:Very Easy
-
Total Repair Time:Less than 15 mins
2 of 4 people
found this instruction helpful.
Was this instruction helpful to you?
Thank you for voting!
Freezer occasionally had a temperature alarm.Clicking noise also.
Was told capacitor was problem 90% of the time.Capacior was not the problem.Bad start relay.
Parts Used:
-
Barry from FORD CITY, PA
-
Difficulty Level:Really Easy
-
Total Repair Time:Less than 15 mins
1 person
found this instruction helpful.
Was this instruction helpful to you?
Thank you for voting!
No cold
-
Jacqueline from LEXINGTON PK, MD
-
Difficulty Level:Very Easy
-
Total Repair Time:Less than 15 mins
-
Tools:Nutdriver, Pliers
1 person
found this instruction helpful.
Was this instruction helpful to you?
Thank you for voting!
Plugged it in.
Not so good that was not the problem. Fan is not seized and all the lights work and display is not on but lights up as well. No start once plugged back in after 15 minutes of being unplugged. Nothing same no change.
Parts Used:
-
Adam from GLOVERSVILLE, NY
-
Difficulty Level:Really Easy
-
Total Repair Time:Less than 15 mins
-
Tools:Nutdriver
1 person
found this instruction helpful.
Was this instruction helpful to you?
Thank you for voting!
freezer and refrigerator compartments not cold enough
Used the suggested problem list here to narrow down that the repair was most likely the run capacitor. Poped the new one in and I now have better control of my compartment ranges. I have a temperature gauge in each compartment. Check them every opening of the doors.
Parts Used:
-
Michael from Colorado Springs, CO
-
Difficulty Level:Really Easy
-
Total Repair Time:Less than 15 mins
-
Tools:Nutdriver
1 person
found this instruction helpful.
Was this instruction helpful to you?
Thank you for voting!
Freezer Cold - Refrigerator Warm
After searching online to diagnose the issue with my refrigerator being warm and the freezer being cold and not shutting off to defrost I decided to get the defrost timer kit. The kit arrived within 2 day. With the directions included, after unplugging the appliance for safety, I installed it relatively quickly with only a screwdriver . I then plugged it back in and it immediately went to defrost. I thought, wow I have it fixed. Well unbeknownst to me it still didn't cool in the fridge area. After doing more internet research I found a suggestion to unplug the fridge for 24 hours to unthaw ice that may be lodged between the freezer and fridge that is blocking the distribution of cold air into the fridge. After doing this, it now works like a charm.
Parts Used:
-
William from Fairfield Glade, TN
-
Difficulty Level:Easy
-
Total Repair Time:Less than 15 mins
-
Tools:Screw drivers
3 of 7 people
found this instruction helpful.
Was this instruction helpful to you?
Thank you for voting!
The Light Socket Burned Out.
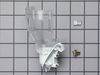
I pulled the socket out and unplugged the wires. I replaced the light socket by plugging in the wires and snapping the light socket into place. A very simple fix.
Parts Used:
-
MATTHEW from STOCKTON, CA
-
Difficulty Level:Really Easy
-
Total Repair Time:Less than 15 mins
5 of 13 people
found this instruction helpful.
Was this instruction helpful to you?
Thank you for voting!