




















HTDP120ED5WW Hotpoint Dryer - Instructions
Keep searches simple. Use keywords, e.g. "leaking", "pump", "broken" or "fit".
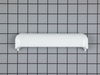
Plastic Door Handle Cracked
Old handle popped out by pulling back and out. Inserted new handle by pushing in and forward. Easy!
Parts Used:
-
richard from pleasant grove, AL
-
Difficulty Level:Really Easy
-
Total Repair Time:Less than 15 mins
-
Tools:Screw drivers
2 of 2 people
found this instruction helpful.
Was this instruction helpful to you?
Thank you for voting!
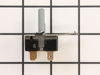
start switch was defective
First thing I did was find out the model and serial #'s of the dryer. I went to a major store to see if they had the part, found out that it had to be ordered and mailed to me. I decided to do it myself, I found your website and I ordered the part. I saved $10.00 by doing this. The part was very easy to remove and install. I just had to remove a small clamp that held the part on to the machine and make sure the 3 wires were secured after I installed the new part. Thank you!
Parts Used:
-
Emerenciana from Lakeworth, FL
-
Difficulty Level:Really Easy
-
Total Repair Time:Less than 15 mins
4 of 8 people
found this instruction helpful.
Was this instruction helpful to you?
Thank you for voting!
Wouldn't Start
Followed the directions in the video. The only problem was there was no mention of needing a star bit set in addition to a Philips screwdriver in order to get the back splash detached from the dryer. This is probably because the machine was 11 years old. It would have been more helpful to have a note that machines prior to a certain age would need that tool. Otherwise it was a easy job even for a 75 year old grandmother.
Parts Used:
-
Sue from FOLSOM, CA
-
Difficulty Level:Easy
-
Total Repair Time:15 - 30 mins
-
Tools:Screw drivers
2 of 2 people
found this instruction helpful.
Was this instruction helpful to you?
Thank you for voting!
Bottom part of handle was loose
Opened up the package and took off existing door handle. The new one snapped right into place. This took all of 10 seconds!
Parts Used:
-
Rick from Nora Springs, IA
-
Difficulty Level:Really Easy
-
Total Repair Time:Less than 15 mins
2 of 2 people
found this instruction helpful.
Was this instruction helpful to you?
Thank you for voting!
a lot
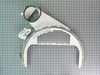
started with replacing the belt and tension pulley which I purchased from another source. I found your videos on line and they are great. easy to follow. Realized I needed the bottom vent assembly and your prices were better than my local supplier. It was easy to replace thanks to your video. It was nice that you included it in the final order status. The only problems. Did not know the duct felt seal was included with the new duct assembly. I ordered the wrong bearing slides, web site showed both green and white for my model. I now realize I should replace the upper bearing housing. Can I return the unused parts, unopened and have that put as a credit to my next order? Thanks
Parts Used:
-
Craig from HOPKINS, MI
-
Difficulty Level:Very Easy
-
Total Repair Time:15 - 30 mins
-
Tools:Pliers, Screw drivers
2 of 3 people
found this instruction helpful.
Was this instruction helpful to you?
Thank you for voting!
Previous nob cracked
The shaft of the previous nob had cracked and even super glue would not hold it together. The dryer timer could no longer be set without it. Slipped it off and slipped on the new one and it worked perfectly.
Parts Used:

-
Gabrielle from CONYERS, GA
-
Difficulty Level:Very Easy
-
Total Repair Time:Less than 15 mins
2 of 3 people
found this instruction helpful.
Was this instruction helpful to you?
Thank you for voting!
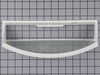
Purchased a used dryer & lint filter had holes due to rust
On my GE Dryer the lint filter is located inside the door at the bottom. The filter can just be pulled out by hand & a new one pushed into place
Parts Used:
-
Barry from WARRIOR, AL
-
Difficulty Level:Very Easy
-
Total Repair Time:Less than 15 mins
2 of 3 people
found this instruction helpful.
Was this instruction helpful to you?
Thank you for voting!
evidently the pulley spring on video was very very very weak
the pulley spring took so much pressure to hold it down it took 3 men and a boy to hold it and place it in position to to get the belt on. Also there is not enough room to get your arms and hands in without getting some small cuts.Ultimately I removed the screws in the back of the dryer and spread the side of the dryer out to gain proper access. It was an easy repair if the spring would not have been so strong.
Parts Used:
-
tim from NEW PRT RCHY, FL
-
Difficulty Level:A Bit Difficult
-
Total Repair Time:1- 2 hours
-
Tools:Pliers, Screw drivers
2 of 3 people
found this instruction helpful.
Was this instruction helpful to you?
Thank you for voting!
Replace the front slides and glides on the dryer
To get to the slides, needed to take off the front panel, the top and then can loosen the front of the dryer. Pull it out enough to get to the slides and replace them.
Parts Used:


-
Robert from DECATUR, GA
-
Difficulty Level:A Bit Difficult
-
Total Repair Time:30 - 60 mins
-
Tools:Screw drivers, Socket set, Wrench (Adjustable)
3 of 6 people
found this instruction helpful.
Was this instruction helpful to you?
Thank you for voting!
Broken piece
Snap out the broken part. Snap in the new part. Use caution with the wires, but don’t have to disconnect them.
Parts Used:
-
Kevin from GALES FERRY, CT
-
Difficulty Level:Really Easy
-
Total Repair Time:Less than 15 mins
-
Tools:Screw drivers
2 of 3 people
found this instruction helpful.
Was this instruction helpful to you?
Thank you for voting!
belt broke on dryer
-
rodney from VANCEBORO, NC
-
Difficulty Level:A Bit Difficult
-
Total Repair Time:30 - 60 mins
-
Tools:Screw drivers
2 of 3 people
found this instruction helpful.
Was this instruction helpful to you?
Thank you for voting!
Dryer Not Starting
First I replaced the timer, but dryer still did not start. took apart dryer, jumper out door and componet near motor to see what problem was and to be able to run dryer while opened up. Actually motor had seized up just enough to not allow motor to start rotating. Lubricated motor shaft and rotated motor for oil to work its way in. Tried starting again and motor started. Buttoned dryer back up and reconnected wires to appropriate places and started dryer again and again.Worked for 4 loads of laundry and still working for 3 loads on Wednesday. Working fine
Parts Used:
-
Scott from Poughkeepsie, NY
-
Difficulty Level:A Bit Difficult
-
Total Repair Time:30 - 60 mins
-
Tools:Screw drivers
2 of 3 people
found this instruction helpful.
Was this instruction helpful to you?
Thank you for voting!
old screen was not sealing properly
-
Thomas from Wake Forest, NC
-
Difficulty Level:Really Easy
-
Total Repair Time:Less than 15 mins
2 of 3 people
found this instruction helpful.
Was this instruction helpful to you?
Thank you for voting!
Dryer didn't turn on
The part came today…and I installed it in 10 minutes. The only time consuming part was locating a torx screwdriver which was needed to remove the panel.
Lifted the panel, extracted the existing switch and
disconnected the wires and used a flathhead screwdriver to lift off the existing switch. Reconnected the new piece, and voila my dryer worked!
Your site is great!
Lifted the panel, extracted the existing switch and
disconnected the wires and used a flathhead screwdriver to lift off the existing switch. Reconnected the new piece, and voila my dryer worked!
Your site is great!
Parts Used:
-
Rachel from Monsey, NY
-
Difficulty Level:Really Easy
-
Total Repair Time:Less than 15 mins
-
Tools:Screw drivers
2 of 4 people
found this instruction helpful.
Was this instruction helpful to you?
Thank you for voting!
Original terminal grounding block melted for unknown reason.
Unscrewed the old, screwed in the new making sure wires matched up same as before. Reset my breaker and works like new again.
Parts Used:
-
Manuel, J from MCALESTER, OK
-
Difficulty Level:Very Easy
-
Total Repair Time:15 - 30 mins
-
Tools:Screw drivers
1 person
found this instruction helpful.
Was this instruction helpful to you?
Thank you for voting!