




















HTAP1100F1WW General Electric Washer - Instructions
Keep searches simple. Use keywords, e.g. "leaking", "pump", "broken" or "fit".
Very noisy in spin mode
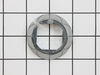
a) remove front panel by depressing the 2 clips at the top in line with the lid b) remove the lid switch and 2 screws holding top on and remove top by tilting up SLIGHTLY and sliding to left. c) Remove agitator and by pulling straight up on it and remove adapter underneath d)remove 4 bolts holding 4 rubber straps to top of tub assembly, readily visible when top is removed. e) unplug motor wiring and disconnect pump and bleach hoses from tub f)while lifting up on tub, push down on each of the 4 suspension rods and disconnect them at bottom of tub ( this is the most difficult part, and to make it easier disconnect the rear rods first) g) tilt tub forward and remove tub assembly h) NOW, for the big nut that holds the spin basket in-- #1, it is LEFT HAND THREAD, so you will turn it to the right to remove it. #2, it is VERY TIGHT and requires a 1&11/16" spanner wrench (which I did not have) for removal. Instead, I used a 1&11/16 socket, an extension and an air impact wrench to remove and replace the nut. Assembly is reverse of removal and remember, that nut is ALUMINUM so be careful with that impact wrench when tightening it back up!I replaced the nut and split ring and cleaned the whole area thoroughly, and it greatly reduced the noise in spin mode. I did not replace the metal housing on the bottom of the spin basket, because it was $50 bucks. this probably would have eliminated all the noise, but my repair only cost $19 in parts, including shipping ,and the parts arrived in 1 day.
Parts Used:

-
James from Colora, MD
-
Difficulty Level:Really Easy
-
Total Repair Time:More than 2 hours
-
Tools:Screw drivers, Socket set, Wrench set
6 of 9 people
found this instruction helpful.
Was this instruction helpful to you?
Thank you for voting!
Leak
-
Tom from VERMILLION, SD
-
Difficulty Level:Really Easy
-
Total Repair Time:More than 2 hours
-
Tools:Nutdriver, Socket set
4 of 4 people
found this instruction helpful.
Was this instruction helpful to you?
Thank you for voting!
Washer screeching during spin cycle.
Followed video to take washer apart. I used the Shaft & Drive Assembly to tap out bearing as it was stuck. BTW the screeching was because the Shaft & Drive Assembly ball bearing retainer cage was in pieces. Replaced tub bearing and installed new Shaft & Drive Assembly. Washer now runs like new. Get the spanner wrench to remove existing nut and purchase a new nut.
Parts Used:

-
Steven from DURHAM, NC
-
Difficulty Level:A Bit Difficult
-
Total Repair Time:1- 2 hours
-
Tools:Pliers, Screw drivers, Socket set
4 of 4 people
found this instruction helpful.
Was this instruction helpful to you?
Thank you for voting!
Washer wouldn't spin, repairman said replace transmission.
Pretty much the entire machine has to come apart to replace a transmission. The thing to know that no one mentioned is that the hub nut is reverse threaded - that means righty loosey.
Even if I had known, I tried it both ways and I doubt I could have gotten it off without the chisel as the others also had to do. Split ring was also frozen in place by hard water and soap scum so had to break that cheesey piece of aluminum off also. If you are taking apart your washer, I advise ordering these 2 parts so you will have them after you destroy the old ones trying to get to the part you need to fix.
Thanks to parts select for the exploded diagram!
Even if I had known, I tried it both ways and I doubt I could have gotten it off without the chisel as the others also had to do. Split ring was also frozen in place by hard water and soap scum so had to break that cheesey piece of aluminum off also. If you are taking apart your washer, I advise ordering these 2 parts so you will have them after you destroy the old ones trying to get to the part you need to fix.
Thanks to parts select for the exploded diagram!
Parts Used:
-
Justine from Cardiff, CA
-
Difficulty Level:Difficult
-
Total Repair Time:1- 2 hours
-
Tools:Nutdriver, Pliers, Screw drivers, Socket set, Wrench (Adjustable), Wrench set
5 of 7 people
found this instruction helpful.
Was this instruction helpful to you?
Thank you for voting!
Discharge Hose was eaten through by a rodent
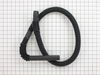
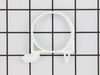
R&R Leaking/Damaged Hose and replaced it with the new one. One thing to be aware of is that after removing screws from the discharge hose upon removing the damaged one there was some water that did not expel from the unit so there was about a cup of water that came out. After removing the leaking hose you will need to remove the retaining plastic piece so that it can be placed on the replacement hose. Or if you ordered one put it on the hose so that it can retain the end of the hose in the washer. The anti-siphon clip is located about half way up the back of the washer it simply clips in place.
Parts Used:
-
Timothy Rathman from CHETEK, WI
-
Difficulty Level:Really Easy
-
Total Repair Time:30 - 60 mins
-
Tools:Pliers, Screw drivers
5 of 7 people
found this instruction helpful.
Was this instruction helpful to you?
Thank you for voting!
Washer sometimes over-fills with water, may even overflow
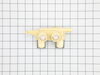
I followed partselect repair videos to see how to pop off the front panel and also remove the top control panel. Lay the control panel on top of the washer and leave everything connected. With power disconnected I first checked the fill tube and fill sensor by pulling the rubber tube off the bottom of the drum and blowing in the tube - you can hear the sensor click on and off. It requires more pressure if you set the water level switch to a larger load. This behavior told me the tube and sensor were working but this must be an airtight system to be reliable. To test for slow air leaks I blew in the tube to cause the switch to click, then clamped the rubber tube shut with a C-clamp. I left it overnight and no leaks - the switch was still activated in the morning, as I could hear it click when I released the C-clamp. I then suspected the fill valve, so I plugged in the power cord, set the washer for a load and started it. The water started filling and I unplugged the power cord, which should cause the fill valve to shut off immediately. It did not - it kept on filling with water, but in this case eventually shut off after 60-90 seconds. Since it did not shut off immediately when power was removed I knew the fill valve was sticking. I ordered the fill valve from partselect and received it in a couple days. Replacement was easy - shut off water, remove the hoses, and then 3 screws and two electrical connectors to swap out the valve. Then 3 screws to put the control panel back on and snap the front panel back in place. Done. Since replacing the fill valve the washer has been working perfectly.
Parts Used:
-
Robert from FORT MILL, SC
-
Difficulty Level:Easy
-
Total Repair Time:30 - 60 mins
-
Tools:Nutdriver
4 of 4 people
found this instruction helpful.
Was this instruction helpful to you?
Thank you for voting!
Hot water leaking while washer was off.
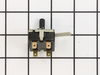
Turned off the both the hot and cold water. Removed the hoses from the back of the control panel. Removed 3 panel screws to expose the inside of the component parts. Removed the 2 screws holding the valve. Installed the new valve. Then I pulled off the knob for the temperature control. To remove the switch, you need to press the tab that locks in the switch and turn the switch counter clockwise to remove the switch from the panel. Reverse the operation to reinstall the new switch. Pay close attention to the 4 wires that clip to the switch to get them in proper order. Reinstall the control panel and and reattach the hoses.
Parts Used:
-
Bradford from SARASOTA, FL
-
Difficulty Level:Really Easy
-
Total Repair Time:15 - 30 mins
-
Tools:Nutdriver, Screw drivers
4 of 4 people
found this instruction helpful.
Was this instruction helpful to you?
Thank you for voting!
Machine will do everything and stop at the last spin, will not spin at the end.
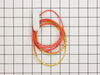
I researched what could be the problem in the internet and follow the instructions from a GE technician, I chose the problem from a list and followed the video the technician played on how to do it yourself. This time was the lid switch which is found visible under the lid opening usually right middle flush with the opening. When I got the new lid, only the switch gets bad so I cut the cable enough to replace the old one, pulled out and cut and connected the new one. If there is not enough cable use the spatula to push the clips on the front panel on the top both side about 5 inches from the corner and pull panel out front and now you can see the wires better and make the connection.
Parts Used:
-
Nelson from LARGO, FL
-
Difficulty Level:Very Easy
-
Total Repair Time:15 - 30 mins
-
Tools:Pliers
4 of 5 people
found this instruction helpful.
Was this instruction helpful to you?
Thank you for voting!
The unit was moving all over the place
I watched the video from the web site and the one that came with my invoice. This made it very easy to fix.I got the tools that I needed and went to town on the repair.
Parts Used:
-
Ronald from NIAGARA FALLS, NY
-
Difficulty Level:Really Easy
-
Total Repair Time:15 - 30 mins
-
Tools:Screw drivers
4 of 5 people
found this instruction helpful.
Was this instruction helpful to you?
Thank you for voting!
No hot water to washer
Unplug machine, verified the hot water line to the washer was clear. Used screwdriver to remove top panel from washer. Removed faulty (rusted) temperature switch from seating. Then removed each of the wires from the old switch with needlenose pliers and placed them on the proper area of the new switch. Placed the switch back on the panel and screwed the cover back on. Then plugged the unit back in an tested the hot, cold and warm settings. Easy fix.
Parts Used:
-
ernest from RIVER EDGE, NJ
-
Difficulty Level:Really Easy
-
Total Repair Time:15 - 30 mins
-
Tools:Pliers, Screw drivers
4 of 5 people
found this instruction helpful.
Was this instruction helpful to you?
Thank you for voting!
Washer wouldn't spin
I followed the video from the website to install the lid switch. Worked like a charm. Great instructions. You do need to supply your own butt splice connectors .
Parts Used:
-
Don from BREMERTON, WA
-
Difficulty Level:Really Easy
-
Total Repair Time:30 - 60 mins
-
Tools:Nutdriver
4 of 5 people
found this instruction helpful.
Was this instruction helpful to you?
Thank you for voting!
broken agitator
I pulled on the bottom edges of the agitator, like the video said, until my fingers were numb. Finally, after I got aggravated, I beat the old agitator into a hundred pieces with a hammer and chisel. Then I slid the new agitator into place and gently tapped on the top of it. It snapped into place and has worked like a new one every since.
Parts Used:
-
Randy from CHIPLEY, FL
-
Difficulty Level:Difficult
-
Total Repair Time:30 - 60 mins
4 of 5 people
found this instruction helpful.
Was this instruction helpful to you?
Thank you for voting!
Very loud noise when washer was in spin cycle
Followed video on You tube that showed step by step how to compete repair.
The machine used in video was brand new and there was no corrosion on any parts so disassembly was much easier in video than on 9 year old machine.
Also reinstalling drive belt was a little tedious but overall job very straightforward and resulted in positive improvements in performance and greatly reduced noise levels.
The machine used in video was brand new and there was no corrosion on any parts so disassembly was much easier in video than on 9 year old machine.
Also reinstalling drive belt was a little tedious but overall job very straightforward and resulted in positive improvements in performance and greatly reduced noise levels.
Parts Used:
-
Michael from Manahawkin, NJ
-
Difficulty Level:Easy
-
Total Repair Time:1- 2 hours
-
Tools:Nutdriver, Pliers, Screw drivers, Socket set
4 of 5 people
found this instruction helpful.
Was this instruction helpful to you?
Thank you for voting!
loud squeal on spin cycle Bad tub bearing.
First buy the tub nut wrench. I can't over emphasize that! $12 at amazon. With out it getting the inner tub out will be the worst part of the job. And you will have to buy a new nut. I had trouble getting the old bearing out of the outer tub. I had to drive it out with a punch. The only other problem I had was after getting everything back together the new tub seal leaked. When I installed it if fit very loose on the OD. I ordered a new seal hoping it would fit tighter but it didn't so I coated the the seat of the tub and the OD of the seal with gasket shellac. That solved the problem. Working great.
Parts Used:
-
Dan from Mendota, IL
-
Difficulty Level:A Bit Difficult
-
Total Repair Time:More than 2 hours
-
Tools:Pliers, Screw drivers, Socket set
4 of 5 people
found this instruction helpful.
Was this instruction helpful to you?
Thank you for voting!
water leak in hose
First I located the trouble. I noticed that it was water leaking and figured it had to be a hose. I took the front panel off of the washer and after noticing that the drain hose had a slight hole in it, realized that I could fix it and save myself a repair call. I undid the two hose clamps and removed the hose. I went to a local repair shop that could not guarantee the right part. I went online and found Parts Select.com. I entered minimal information and the picture of the item that I was looking for, the Drain Inlet Hose, was staring at me! Within 3 business days and less than 20 dollars spent, I repaired my washing machine. The total time spent to repair after I received the hose took about 10 minutes. I will definitely use parts select .com and recommend to all my friends and family. Thank you.
Parts Used:
-
Steven from Holbrook, NY
-
Difficulty Level:A Bit Difficult
-
Total Repair Time:15 - 30 mins
-
Tools:Nutdriver, Pliers, Screw drivers
4 of 5 people
found this instruction helpful.
Was this instruction helpful to you?
Thank you for voting!