




















GX5FHDXVD00 Whirlpool Refrigerator - Instructions
Keep searches simple. Use keywords, e.g. "leaking", "pump", "broken" or "fit".
Broken guide rail
This took 30 seconds. Lift out shelf glass, remove broken pieces, snap new part into place.
Parts Used:

-
Adam from Los Angeles, CA
-
Difficulty Level:Really Easy
-
Total Repair Time:Less than 15 mins
6 of 7 people
found this instruction helpful.
Was this instruction helpful to you?
Thank you for voting!
All three lights are not working...lights are off but refrigerator still cooling. Also, the control box not lit up to show the temparture for freezer and refrigerator
Used a screw driver to pull old switch. Pulled one wire at a time, only two wires. After wires instlled to new switch push new one back in place where the old one was.
Parts Used:

-
Antonio from San Antonio, TX
-
Difficulty Level:Really Easy
-
Total Repair Time:Less than 15 mins
-
Tools:Screw drivers
7 of 10 people
found this instruction helpful.
Was this instruction helpful to you?
Thank you for voting!
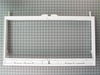
center rail for crisper broke when unit was about 6mo. old. Subsequently, the crisper frame broke from use without a center rail for about a year and a half.
It was a very simple operation to replace the parts and required essentially no tools, just a small screwdriver to pry up a tab for removal of the chanel on the front edge of the frame. This chanel had to be removed from the old crisper frame and installed in the new one. In addition the crisper control" had to be popped out of the old frame and into the new frame. Most of my time was spent cleaning.
Parts Used:
-
russell from wesley chapel, FL
-
Difficulty Level:Easy
-
Total Repair Time:15 - 30 mins
6 of 8 people
found this instruction helpful.
Was this instruction helpful to you?
Thank you for voting!
Icemaker would not fill with water.
Removed screw under ice maker. Tilted ice maker up to remove unit from upper two screws. Disconnected plug at rear of freezer. Attached wiring harness, baler arm and cover from old to new ice maker. Reinstalled in reverse order. Had ice within one hour. Very easy fix.
Parts Used:

-
Linford from Cedarville, NJ
-
Difficulty Level:Really Easy
-
Total Repair Time:15 - 30 mins
-
Tools:Screw drivers
7 of 11 people
found this instruction helpful.
Was this instruction helpful to you?
Thank you for voting!
My old icemaker lost some of the nonstick surface and the ice didn't want to come out
I unhooked the wire harness from the ref. and took out three screws and pulled the old unit out. I than changed a few parts from the old icemaker to the new and reattached the new ice maker to the ref. and plugged the wire back in. everything is working fine. No problems. Also I was very happy with the ordering process. Thank you!!
Parts Used:
-
Thomas from Ruth, MI
-
Difficulty Level:Easy
-
Total Repair Time:15 - 30 mins
-
Tools:Screw drivers
6 of 8 people
found this instruction helpful.
Was this instruction helpful to you?
Thank you for voting!
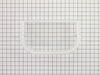
The door bin on a friend's refrigerator had a crack in it that quickly grew to a much bigger crack.
You just take the old door bin out by sliding it up and replace with the new bin by sliding it down in the door.
Parts Used:
-
Janet from Bend, OR
-
Difficulty Level:Really Easy
-
Total Repair Time:Less than 15 mins
6 of 8 people
found this instruction helpful.
Was this instruction helpful to you?
Thank you for voting!
Drawer glide broke

-
James from Woodridge, IL
-
Difficulty Level:Really Easy
-
Total Repair Time:Less than 15 mins
-
Tools:Screw drivers
7 of 11 people
found this instruction helpful.
Was this instruction helpful to you?
Thank you for voting!
Ice maker just stpooed making ice
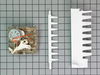
The troubleshooting time takes about 20 to 30 minutes. After checking out the solenoid (valve water), the water line, and the electronic board (emitter/receiver) are working fine. The only thing left is the ice module. I called Partselect and talked to a sale rep to make sure I get the right part, and the lady was so helpful by sendind the picture of the part so I can review before ordering it. I received the part in 3 days ( normal shipping) and did the folowings:
1) Unplugged the power cord from refrigerator.
2) Removed the ice module by removed a 1/4" screw from under the right side of the icemaker that retains the icemaker and a “U” plastic clamp and then pull out the whole unit it from the track.
3) Unplugged the cable connected to the ice maker.
4) Using the phillips screw driver to remove the 3 screws. Carefully pulled out the ice module and installed the new ice module.
5) Put the ice maker back to the freezer, plug the cable back to the ice maker and put the clamp and tighten the nut.
6) Plugged the power cable back to the wall.
The first ice I got in an hour and a full bucket of ice in less than 24 hours. I spent less than $80 for the whole thing. Thank you so much Partselect for the great service and the stories posted, it really helped me to get it done.
1) Unplugged the power cord from refrigerator.
2) Removed the ice module by removed a 1/4" screw from under the right side of the icemaker that retains the icemaker and a “U” plastic clamp and then pull out the whole unit it from the track.
3) Unplugged the cable connected to the ice maker.
4) Using the phillips screw driver to remove the 3 screws. Carefully pulled out the ice module and installed the new ice module.
5) Put the ice maker back to the freezer, plug the cable back to the ice maker and put the clamp and tighten the nut.
6) Plugged the power cable back to the wall.
The first ice I got in an hour and a full bucket of ice in less than 24 hours. I spent less than $80 for the whole thing. Thank you so much Partselect for the great service and the stories posted, it really helped me to get it done.
Parts Used:
-
Cuong from Camarillo, CA
-
Difficulty Level:Easy
-
Total Repair Time:Less than 15 mins
-
Tools:Nutdriver, Screw drivers
5 of 5 people
found this instruction helpful.
Was this instruction helpful to you?
Thank you for voting!
The Switch Broke...Absolutely Fell Apart.
I simply removed the old switch using 2 small screwdrivers and the old switch case popped out. I then upluged the wires from the old switch and reversed the process. Didn't take longer than 5 minutes begining to end! Thank you for the great service! Duncan quaid
Parts Used:
-
Duncan from Metairie, LA
-
Difficulty Level:Really Easy
-
Total Repair Time:Less than 15 mins
-
Tools:Screw drivers
5 of 5 people
found this instruction helpful.
Was this instruction helpful to you?
Thank you for voting!
The ice maker stopped making ice.
I did a few tests with the old ice maker and determined that it was the ice maker itself that was faulty. The replacement part I ordered exceeded my expectations in the time it took to get the part. I reused the arm, wire harness and clamps from the old icemaker. Then it was a simple install into the bottom freezer compartment, turning on the water supply and bingo...lots of ice cubes.
Parts Used:
-
Thomas from Cupertino, CA
-
Difficulty Level:Easy
-
Total Repair Time:15 - 30 mins
-
Tools:Nutdriver
5 of 5 people
found this instruction helpful.
Was this instruction helpful to you?
Thank you for voting!
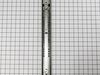
Broken black plastic spring mechanism inside freezer rail
Remove rail and removed broken black plastic spring mechanism with new one and then replace rail.
Parts Used:
-
Ronald from WESTERVILLE, OH
-
Difficulty Level:Really Easy
-
Total Repair Time:30 - 60 mins
-
Tools:Nutdriver, Screw drivers
7 of 12 people
found this instruction helpful.
Was this instruction helpful to you?
Thank you for voting!
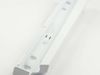
The freezer door wouldn't stay closed
Replaced the rail and slide baskets. Also readjusted the basket. This was extremely easy and saved me close to $500
Parts Used:

-
Nicole from BUFFALO, NY
-
Difficulty Level:Really Easy
-
Total Repair Time:30 - 60 mins
-
Tools:Screw drivers
7 of 13 people
found this instruction helpful.
Was this instruction helpful to you?
Thank you for voting!
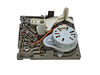
Bad module on icemaker
First shut off water supply and unplug power. Unscrew icemaker assembly from side wall with 3 screws. Remove front cap and you can clearly see module. Unscrew and remove module ( only three screws). Install new module and revers procedure to finish up. Ice was ready in just a few hours. Video provided by this site was right on and left no questions.
Parts Used:
-
Randy from LAFAYETTE, LA
-
Difficulty Level:Really Easy
-
Total Repair Time:30 - 60 mins
-
Tools:Screw drivers
4 of 4 people
found this instruction helpful.
Was this instruction helpful to you?
Thank you for voting!
Frost on the edges of the freezer and all around the freezer door
I was getting small sections of ice and a snow like build - up around the freezer door. I thought that the door was not sealing tight enough and that the cold air was leaking out. The original door gasket appeared to not have any flexibility anymore and was getting hard. I ordered a new door gasket from PartsSelect. When the gasket arrived it was in a large enough box and that saved me some time as the gasket was not "crushed" to the point where there were a lot of kinks in the gasket. I used a hair dryer on low to warm the gasket and stretch it out some. The freezer door required me loosening four small screws and lifting the door off. I placed the door on an old blanket so not to scratch the finish. It was easy to remove the old gasket and after doing so I cleaned the track where the new gasket was to go with isopropyl alcohol, Once cleaned, I placed the gasket over the channel in the door where the old gasket had been and started installing the new gasket. I started at the corners and you can feel the gasket snap into place. Once the four corners were done I started at the top and installed the gasket the rest of the way. You can feel it snap into place. as you work your way around the gasket channel. Once the gasket was in place I placed the door on the four small grooves where the door had been and tightened up the screws. I made sure that no white from the inside of the freezer door was showing after the gasket was in place and that the gasket had some "spring" to it. The door was back on, the gasket was tight and it appeared to be a good seal. Around 12 hours later I checked the freezer and there was no more ice or "snow" on the edges of the freezer. While the gasket was not inexpensive, it is a genuine OEM piece, and the gasket is a lot cheaper than a new refrigerator!
I hope this was helpful...
I hope this was helpful...
Parts Used:

-
Robert from EVERETT, WA
-
Difficulty Level:Really Easy
-
Total Repair Time:30 - 60 mins
-
Tools:Screw drivers
4 of 4 people
found this instruction helpful.
Was this instruction helpful to you?
Thank you for voting!
Thought motor was bad freezer cold fridge hot
Ordered new fan motor
Got part took fridge apart
Result was the motor was running
The fan blade had come off the motor
Replaced the motor anyway and reinstalled the fan, working well
Got part took fridge apart
Result was the motor was running
The fan blade had come off the motor
Replaced the motor anyway and reinstalled the fan, working well
Parts Used:

-
Wayne from PENNINGTON, NJ
-
Difficulty Level:Really Easy
-
Total Repair Time:30 - 60 mins
4 of 4 people
found this instruction helpful.
Was this instruction helpful to you?
Thank you for voting!