




















GX5FHDXVD00 Whirlpool Refrigerator - Instructions
Keep searches simple. Use keywords, e.g. "leaking", "pump", "broken" or "fit".
Ice Magic Plus stopped making ice
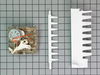
First I removed the icemaker from the freezer by removing two horizontal screws holding it to the side wall, and one vertical screw holding the front to a bracket coming off the side wall. Then I used a flat screwdriver to unlock the electrical plug. (After doing this, I realized that this wasn't necessary at all, and this part could have been changed just as easily without removing the icemaker.) On the front, there is a white cover with Ice Maker Plus. Use a flat screwdriver to unlock the tangs and remove the cover. There are three screws in the corners that once removed, will allow the motor assy. to be gently pulled straight out. On the back of the part, you will see many gold lands that the timer touches. I don't think there was anything wrong with my motor. I had two spots where the gold plating was worn off, so I suspect it was not making contact, and the whole process would stop. Slide the new part in place making sure the teeth on the gears line up (not a big deal), and secure with the screws. Install cover and you're done. Mine has been making ice like it was brand new.
Parts Used:
-
George from Hammond, LA
-
Difficulty Level:Really Easy
-
Total Repair Time:Less than 15 mins
-
Tools:Screw drivers
25 of 35 people
found this instruction helpful.
Was this instruction helpful to you?
Thank you for voting!
Noisy Control
Remove cover inside frig at rearwall top with screw driver. Remove phillips screws holding unit in place. Unclip connectors ,and replace in reverse order.
Parts Used:

-
Nicholas from Agawam, MA
-
Difficulty Level:Easy
-
Total Repair Time:15 - 30 mins
-
Tools:Screw drivers
20 of 23 people
found this instruction helpful.
Was this instruction helpful to you?
Thank you for voting!
ice would not fall from ice maker
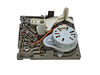
I ran all the ice maker module tests that I could find online, I tried cleaning the contacts inside the ice maker control module, nothing worked...so I finally decided to purchase a new control module. I had already had the module out and taken apart a few times, so the new one was very easy to install. Just removed the entire icemaker from the fridge, removed a few screws, took off the old module, put on the new one, replaced the screws, re-installed the icemaker in the fridge (it just slides in and out similar to a shelf). And 30 minutes later I heard the first batch of ice cubes drop! And by morning the bucket was nearly full. After two weeks of no ice and trying to fix it myself - the family was glad to have ice again (it was July in NC!). In retrospect, I should have followed the advice I found online and ordered the new part sooner and saved all of those frustrating hours of trying to "fix" the part myself.
Parts Used:
-
Greg from Cary, NC
-
Difficulty Level:Really Easy
-
Total Repair Time:15 - 30 mins
-
Tools:Screw drivers
22 of 30 people
found this instruction helpful.
Was this instruction helpful to you?
Thank you for voting!
replace plastic wheels on refridgerator
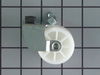
I used board levers to do one side at a time.Kinda tricky, but you can hoist up fridge high enough to replace wheels. take your time think it out and be safe . Make sure you use saftey boards to support load to protect yourself==good luck A small mirror may help to see how the rollers alien in the supports.
Parts Used:
-
robert from oak forest, IL
-
Difficulty Level:A Bit Difficult
-
Total Repair Time:1- 2 hours
-
Tools:Socket set
24 of 36 people
found this instruction helpful.
Was this instruction helpful to you?
Thank you for voting!
Ice Maker broke at the begining of summer !!!!!!
The new Ice Maker Assembly arived in less than 24 hours. I was amazed that it came so fast.
I had already removed the old ice maker in order to get the modle number.
I just took two parts off of the old ice maker and quickly snapped them into place on the new ice maker. Then attached it to the refrigerator in less than 10 minutes. With in a few hours I had ice again !!!!!
I would definatly use partselect.com again.
I had already removed the old ice maker in order to get the modle number.
I just took two parts off of the old ice maker and quickly snapped them into place on the new ice maker. Then attached it to the refrigerator in less than 10 minutes. With in a few hours I had ice again !!!!!
I would definatly use partselect.com again.
Parts Used:

-
Darrell from Pepperell, MA
-
Difficulty Level:Really Easy
-
Total Repair Time:Less than 15 mins
-
Tools:Nutdriver
20 of 24 people
found this instruction helpful.
Was this instruction helpful to you?
Thank you for voting!
Crisper Glass Shattered While Cleaning
Since it was apparent the crisper glass is fragile I was very careful to not stress it. I opened the box then took a large board almost as big and slid it on. I carried both items to the fridge and with both doors open slid the glass into place. I am 65 yrs. Old and have owned many refrigerators but this is a first. They don't build them like they use to. .
Parts Used:

-
Thomas from San Diego, CA
-
Difficulty Level:Really Easy
-
Total Repair Time:Less than 15 mins
19 of 22 people
found this instruction helpful.
Was this instruction helpful to you?
Thank you for voting!
very noisy intermittently
Inside the food section above the top shelf behind the light in the back, remove the lid from the cover in lifting from the lower edge no tools necessary here. Remove two screws with Phillips screw driver remove entire housing inclusive Styrofoam insert. Unplug damper Control Unit. Remove two screws and remove damper control unit and replace in reverse order. Finally that refrigerator is quiet, I should have done this long time ago. Unbelievable this is the second part I have to replace on this expensive refrigerator.
Parts Used:
-
klaus from san diego, CA
-
Difficulty Level:Really Easy
-
Total Repair Time:Less than 15 mins
-
Tools:Screw drivers
20 of 25 people
found this instruction helpful.
Was this instruction helpful to you?
Thank you for voting!
Refrigerator wouldn't get cold enough.
Freezer would get cold at bottom and some of the refrigerator. Took of freezer back panel and located freezer fan. Took a meter and saw power was getting to it, but not working. Removed fan and replaced with new on, working like a charm. Cold air was not circulating enough throughout the unit because fan was not working. It was not the thermostat or adapter control.
Parts Used:

-
Ty from Wentzville, MO
-
Difficulty Level:Easy
-
Total Repair Time:15 - 30 mins
-
Tools:Screw drivers
20 of 26 people
found this instruction helpful.
Was this instruction helpful to you?
Thank you for voting!
Door was not closing with any positive feel and would often pop open when left door was shut.
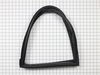
Popped out old gasket and popped in nwe one. This is where things get interersting, the new gasket
Does work as well as the one I replaced. I think the maganet is not strong enough. If anyone has had the same problem please let me know. This model ( Maytag- French door ) has been a lemon.
Does work as well as the one I replaced. I think the maganet is not strong enough. If anyone has had the same problem please let me know. This model ( Maytag- French door ) has been a lemon.
Parts Used:
-
Edwin from Shreveport, LA
-
Difficulty Level:Really Easy
-
Total Repair Time:Less than 15 mins
25 of 41 people
found this instruction helpful.
Was this instruction helpful to you?
Thank you for voting!
compressor didnt turn on

-
gerardo from el monte, CA
-
Difficulty Level:Really Easy
-
Total Repair Time:Less than 15 mins
-
Tools:Screw drivers
24 of 41 people
found this instruction helpful.
Was this instruction helpful to you?
Thank you for voting!
Refrigerator & Freezer both stopped cooling
Simply move the appliance for access to the back side. Removed the lower metal access panel, locate the compressor ( black round object ) parts are on the left bottom of the compressor. Simply unplug the parts, and replace with new parts.The hard part was, getting my 72 year old body in position to do the job. As far as getting the right part, a young lady in Nova Scoita is the one to ask for help !! Ordered parts one day, and they were in my hands the next morning!!
Parts Used:
-
Clyde from ARAB, AL
-
Difficulty Level:A Bit Difficult
-
Total Repair Time:15 - 30 mins
-
Tools:Nutdriver
16 of 18 people
found this instruction helpful.
Was this instruction helpful to you?
Thank you for voting!
Heater on Ice Maker stopped working.
Repair was easy and producing ice within five hours.
Parts Used:
-
Andy from Lorena, TX
-
Difficulty Level:Easy
-
Total Repair Time:15 - 30 mins
-
Tools:Screw drivers, Socket set
17 of 22 people
found this instruction helpful.
Was this instruction helpful to you?
Thank you for voting!
Our refrigerator was too cold as the thermistor seems to have gone
It was great. We replaced the thermistor A little difficult to get to the thermistor but once we found it five minutes. My refrigerator seems happy but we will monitor it and see.
Parts Used:
-
Ellen from SUN CITY WEST, AZ
-
Difficulty Level:Really Easy
-
Total Repair Time:15 - 30 mins
-
Tools:Screw drivers
19 of 29 people
found this instruction helpful.
Was this instruction helpful to you?
Thank you for voting!
Following a brief power outage, it stopped producing ice. Harvester was at 6:00 with fingers frozen in ice cubes. Would make a batch if I freed the harvester and jumped the t-stat, but would quit again.
Unplugged refrigerator. Used nut driver to remove small bolt retaining wire cover on right side of ice maker. Removed wire cover, used flat head screw driver to depress side-rail clips. Ice maker slid out, unplugged. Timer module cover pops off easily. Three screws removed the timer module. Installation was reverse of removal. Had ice in less than an hour, bin was full by next morning. If you have a screw driver and know what it's for, this job should come easily.
Parts Used:
-
Joe from Pryor, OK
-
Difficulty Level:Really Easy
-
Total Repair Time:Less than 15 mins
-
Tools:Nutdriver, Screw drivers
18 of 26 people
found this instruction helpful.
Was this instruction helpful to you?
Thank you for voting!
Ice stripper broken on ice maker
I unplugged the fridge. Loosened the 2 top screws on the ice maker and removed the lower screw. I disconnected the wiring harness and removed the Ice maker. I removed the plastic timer cover in front. I then loosened the screws on the face of the ice maker and removed the broken ice stripper and replaced it with a new one. Re-tightened the screws on the face, installed the timer cover, plugged in the wiring harness, re-attached the ice maker. Plugged the fridge back in and walla, it was making ice in 30 minutes!
Parts Used:

-
Kenneth from New Braunfels, TX
-
Difficulty Level:Really Easy
-
Total Repair Time:Less than 15 mins
-
Tools:Screw drivers
17 of 24 people
found this instruction helpful.
Was this instruction helpful to you?
Thank you for voting!