




















GTUP240EM5WW General Electric Washer Dryer Combo - Instructions
Keep searches simple. Use keywords, e.g. "leaking", "pump", "broken" or "fit".
Dishwasher would not start
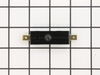
Took the back off/there were six phillips head screws. Took the protective cover off the Interlock Switches and found the problem. One of the buttons was jambed and would not move. I pulled the switch up and pulled the connecting wires. This took a little bit of doing as the connectors have been set for over 8 years. I used a pair of needle nose pliers. I reconnected the new switch and punched both switches and the washer started. It was an easy repair after that, putting everything back in reverse order.
Parts Used:
-
Howard A. from Little Elm, TX
-
Difficulty Level:A Bit Difficult
-
Total Repair Time:30 - 60 mins
-
Tools:Pliers, Screw drivers
Was this instruction helpful to you?
Thank you for voting!
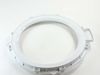
Broken tub cover
-
Al from Highland, MI
-
Difficulty Level:A Bit Difficult
-
Total Repair Time:30 - 60 mins
-
Tools:Nutdriver, Pliers, Screw drivers
Was this instruction helpful to you?
Thank you for voting!
squeeky noise
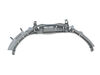
Removed front panel and top of dryer. Pried of bearing bracket,it came of easier than I expected.Mounted the 2 white and two gray bearing strips onto the bearing bracket and reinstaled onto the front panel. When I ordered the new bearing bracket i asumed the bearing strips would come with it, to my amazement they did not. I called partselect and with the help of the representative ordered the bearings. To my pleasent surprise the parts arived the next day and I was able to complete the repairs.
Parts Used:
-
Frank from Clinton, PA
-
Difficulty Level:Really Easy
-
Total Repair Time:15 - 30 mins
-
Tools:Screw drivers
Was this instruction helpful to you?
Thank you for voting!
The dryer was not heating up
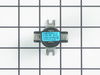
We watched the video of how to take the dryer apart and how to install the thermostat...after watching the video it was pretty easy
Parts Used:
-
Betty from Oakville, IN
-
Difficulty Level:Really Easy
-
Total Repair Time:15 - 30 mins
-
Tools:Screw drivers
Was this instruction helpful to you?
Thank you for voting!
Making a very loud squeaking noise
At first diagnosed the problem watching you tube videos but I did not open the machine. It took awhile to learn the first step to diagnose the issue is to find out if the squeak comes from the front or back of the machine. Mine was in the front. Once I did this I ordered the glides. When they arrived I opened up the machine and found out both the glides and the plastic piece upon which the drum turns and the glides attach were totally shot. I then ordered up that plastic piece. The repair was a breeze. Opening the machine, installing the pieces and closing up took about half an hour max. My reaction is the engineering behind these pieces is not up to par. Seemingly paper thin plastic can't stand up to the constant turning of the drum. As an ordinary consumer I expect much better. The old adage that they don't build em like they used to applies here. I was surprised by what was under the hood as they say. I almost had bought a new machine, and also consulted a repairmen which led me to believe a new machine would be my best option. However, I gave it a shot after doing some internet research and solved the problem for a fraction of the cost. And while I was in there I cleaned out the stray lint!!
Parts Used:
-
roy from rye brook, NY
-
Difficulty Level:Really Easy
-
Total Repair Time:15 - 30 mins
-
Tools:Pliers, Screw drivers
Was this instruction helpful to you?
Thank you for voting!
Broken lock lid
Replaced with the new part that I ordered from partselect.The washer works good. Thank you.
Parts Used:

-
Doyon Remote Facilities from Sterling, AK
-
Difficulty Level:Really Easy
-
Total Repair Time:15 - 30 mins
Was this instruction helpful to you?
Thank you for voting!
dryer door would not stay closed
-
Dave from Redondo Beach, CA
-
Difficulty Level:Really Easy
-
Total Repair Time:Less than 15 mins
Was this instruction helpful to you?
Thank you for voting!
broken door strike and latch
Parts arrived well in time, exactly what was needed. The latch was a snap-in process. The strike require gentile use of a pliers, and went in quickly. Thanks!
Parts Used:

-
Jonathan from Dultuh, GA
-
Difficulty Level:Really Easy
-
Total Repair Time:Less than 15 mins
-
Tools:Pliers
Was this instruction helpful to you?
Thank you for voting!
The dryer door wouldn't stay closed.
There is a plastic female closure part in the dryer door that wouldn't close tightly around the metal male closure on the dryer. I popped out the plastic square with a screwdriver, popped the new plastic closure in with my thumb. Works great. I never even installed the new metal portion of the latch.
Parts Used:
-
Jean from Waterford, MI
-
Difficulty Level:Really Easy
-
Total Repair Time:Less than 15 mins
-
Tools:Screw drivers
Was this instruction helpful to you?
Thank you for voting!
Belt Was Broken
I watched the installtion video and actually did it faster than the video and yes you do have to be careful of sharp edges I did cut one finger. Other than that no problem I was all back together and using the dryer in less than 15 minutes
Parts Used:
-
john l from cumberland, RI
-
Difficulty Level:Really Easy
-
Total Repair Time:Less than 15 mins
-
Tools:Screw drivers
Was this instruction helpful to you?
Thank you for voting!
Dryer knob broke.
I only had to replace the "plastic" knob on my dryer. This required no tools- just push on to the stem. This part needs to be improved... should be made out of something other than plastic because this gets a lot of wear. I was very pleased with how fast I was able to order & receive my part shipment. I shopped around for this part & your company beat any other price on the market. THANKS!
Parts Used:

-
Deanna from Nokomis, FL
-
Difficulty Level:Really Easy
-
Total Repair Time:Less than 15 mins
Was this instruction helpful to you?
Thank you for voting!
Door would not close
-
Arlie from Ringoes, NJ
-
Difficulty Level:Really Easy
-
Total Repair Time:Less than 15 mins
-
Tools:Pliers
Was this instruction helpful to you?
Thank you for voting!
Dryer door would no longer shut.
Simply popped the old broken part out and popped the new part into place. I wasn't sure if it was the Latch Door or the Door Strike. Once the parts arrived, it was clear the Door Strike was not the issue.
Parts Used:
-
Fawn from Loganville, GA
-
Difficulty Level:Easy
-
Total Repair Time:Less than 15 mins
-
Tools:Screw drivers
Was this instruction helpful to you?
Thank you for voting!
belt broken
watched video and followed instructions. Made my wife very happy not having to buy a new dryer. Thank You, Joe
Parts Used:
-
joseph from hudson, NY
-
Difficulty Level:Easy
-
Total Repair Time:Less than 15 mins
-
Tools:Screw drivers
Was this instruction helpful to you?
Thank you for voting!
The unit would not start.
First I turned off the breaker to the dishwasher. I then removed the bolts that held on the inner cover(note the two small bolts go on the bottom one on each side). I lifted the switch up and disconnected the wire clips from each side. I then put the new switch in place with the wires attached. Then replaced the cover and screwed it into place. Closed the door and flipped the breaker back on and turned the dish washer on and it started up. A very easy replaceable part.
Parts Used:
-
Robert from Riverview, FL
-
Difficulty Level:Really Easy
-
Total Repair Time:Less than 15 mins
-
Tools:Screw drivers
Was this instruction helpful to you?
Thank you for voting!