




















GTUP240EM2WW General Electric Washer Dryer Combo - Instructions
Keep searches simple. Use keywords, e.g. "leaking", "pump", "broken" or "fit".
Dryer would shut off on heat dry after a couple of minutes. I could feel the heat working. It would only continue to run on fluff/no heat
Pulled the drum an found spade clip burned on wire. Hi limit Thermostat crumbled/ broke while pulling spade clip so I trimmed back the wire, cleaned the spade clip and soldered the wire back on. Isolated the other thermostats in the system and tested for resistance. Reassembled dryer.
Parts Used:
-
Dave from Wallingford, CT
-
Difficulty Level:Really Easy
-
Total Repair Time:15 - 30 mins
-
Tools:Pliers, Screw drivers
1 of 2 people
found this instruction helpful.
Was this instruction helpful to you?
Thank you for voting!
Heat thermostat,now replacing the drum bearing with your kit..
By watching your video which was very helpful as I never made this repair before. All worked out fine. Since then I have ordered other parts., (drum bearing kit, door slides and a new belt.) The video on replacing the drum kit is very helpful too. One other fact is prices beat all other sites I looked and when I'm done the dryer will be "rebuilt" I recommend your parts to everyone., they are great quality.
Parts Used:
-
Tony from POTTSVILLE, PA
-
Difficulty Level:Easy
-
Total Repair Time:1- 2 hours
-
Tools:Nutdriver, Pliers, Socket set
1 of 2 people
found this instruction helpful.
Was this instruction helpful to you?
Thank you for voting!
clip on door broke

-
edward from early branch, SC
-
Difficulty Level:Really Easy
-
Total Repair Time:Less than 15 mins
0 of 1 people
found this instruction helpful.
Was this instruction helpful to you?
Thank you for voting!
Dryer would run for 4 minutes and shut off. keep turning it on
Faulty Door switch. Dryer would heat up so I knew it wasn't thermostat or element related.
Parts Used:
-
Jim from Summerdale, PA
-
Difficulty Level:Easy
-
Total Repair Time:15 - 30 mins
-
Tools:Screw drivers
Was this instruction helpful to you?
Thank you for voting!
Would Not Start
Put part in. Put the door cover on & turned on & it worked. Thanks for having the part. So far, so good.
Parts Used:
-
JoAnn from Daytona Beach, FL
-
Difficulty Level:Easy
-
Total Repair Time:15 - 30 mins
-
Tools:Screw drivers
Was this instruction helpful to you?
Thank you for voting!
Dryer makes noise when "Start" is pushed, but stops when you let go.
Dryer would turn on when you pushed the "on" button, but as soon as you let go, it would turn off. Found the plastic door switch cracked (from slamming door closed). Unplugged the dryer. Unscrewed the two screws inside the top of the door to unfasten the top panel. Took the top panel off. Then unscrewed the two screws on the side to unlatch the front panel. Used plyers to take the 3 wires off the switch and slid the switch through the front of the door. Juat remember where the wires go. Then inserted new switch and connected the wires. Vacuumed out the dryer and reassembled. It took about 20 minutes and was easy! If I can do it, you can!!!
Parts Used:
-
Alan from Cumming, GA
-
Difficulty Level:Easy
-
Total Repair Time:15 - 30 mins
-
Tools:Pliers, Screw drivers
Was this instruction helpful to you?
Thank you for voting!
Broken lock lid
Replaced with the new part that I ordered from partselect.The washer works good. Thank you.
Parts Used:

-
Doyon Remote Facilities from Sterling, AK
-
Difficulty Level:Really Easy
-
Total Repair Time:15 - 30 mins
Was this instruction helpful to you?
Thank you for voting!
The dryer was not heating up
We watched the video of how to take the dryer apart and how to install the thermostat...after watching the video it was pretty easy
Parts Used:
-
Betty from Oakville, IN
-
Difficulty Level:Really Easy
-
Total Repair Time:15 - 30 mins
-
Tools:Screw drivers
Was this instruction helpful to you?
Thank you for voting!
dryer door would not stay closed
-
Dave from Redondo Beach, CA
-
Difficulty Level:Really Easy
-
Total Repair Time:Less than 15 mins
Was this instruction helpful to you?
Thank you for voting!
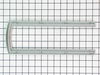
Grid Slide -3 plactic nubs broken slide was loose.
Take old grid slide and pannel off. Clean lint trap wire framework and replace. Make sure this trap frame fits snug against the door, otherwise it puts pressure on the new slide. This is the second time I have replaced this Grid Slide. Slid new pannel into grid frame. Ready to go.
Parts Used:
-
Gene from San Francisco, CA
-
Difficulty Level:Really Easy
-
Total Repair Time:Less than 15 mins
Was this instruction helpful to you?
Thank you for voting!
broken door strike and latch
Parts arrived well in time, exactly what was needed. The latch was a snap-in process. The strike require gentile use of a pliers, and went in quickly. Thanks!
Parts Used:
-
Jonathan from Dultuh, GA
-
Difficulty Level:Really Easy
-
Total Repair Time:Less than 15 mins
-
Tools:Pliers
Was this instruction helpful to you?
Thank you for voting!
The dryer door wouldn't stay closed.
There is a plastic female closure part in the dryer door that wouldn't close tightly around the metal male closure on the dryer. I popped out the plastic square with a screwdriver, popped the new plastic closure in with my thumb. Works great. I never even installed the new metal portion of the latch.
Parts Used:
-
Jean from Waterford, MI
-
Difficulty Level:Really Easy
-
Total Repair Time:Less than 15 mins
-
Tools:Screw drivers
Was this instruction helpful to you?
Thank you for voting!
The lent filter protector broke
-
Teddy from Norwalk, CT
-
Difficulty Level:Easy
-
Total Repair Time:Less than 15 mins
-
Tools:Screw drivers
Was this instruction helpful to you?
Thank you for voting!
Dryer door would no longer shut.
Simply popped the old broken part out and popped the new part into place. I wasn't sure if it was the Latch Door or the Door Strike. Once the parts arrived, it was clear the Door Strike was not the issue.
Parts Used:
-
Fawn from Loganville, GA
-
Difficulty Level:Easy
-
Total Repair Time:Less than 15 mins
-
Tools:Screw drivers
Was this instruction helpful to you?
Thank you for voting!
The unit would not start.
First I turned off the breaker to the dishwasher. I then removed the bolts that held on the inner cover(note the two small bolts go on the bottom one on each side). I lifted the switch up and disconnected the wire clips from each side. I then put the new switch in place with the wires attached. Then replaced the cover and screwed it into place. Closed the door and flipped the breaker back on and turned the dish washer on and it started up. A very easy replaceable part.
Parts Used:
-
Robert from Riverview, FL
-
Difficulty Level:Really Easy
-
Total Repair Time:Less than 15 mins
-
Tools:Screw drivers
Was this instruction helpful to you?
Thank you for voting!