




















GTS18KHPXRWW General Electric Refrigerator - Instructions
Keep searches simple. Use keywords, e.g. "leaking", "pump", "broken" or "fit".
The door activated light switch was missing.
Pulled the two wires out from the access hole in the lower part of the refrigerator. Put them in the spade connectors on the new switch, and pushed the switch into place.
Parts Used:

-
Don from Eugene, OR
-
Difficulty Level:Really Easy
-
Total Repair Time:Less than 15 mins
1 of 3 people
found this instruction helpful.
Was this instruction helpful to you?
Thank you for voting!
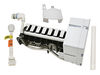
ice maker not calling for water to make ice.
I removed the screws that held the unit in place, and also the screws that held a plate that covered where the unit plugs in. I unplugged the unit, and removed it. Put the new one in, reversing the steps. Turned the new unit on, and had ice in 45 minutes! Summer is coming, I need my ice maker! This is the second unit I have replaced on this refrigerator, the first one was not releasing the cubes. This second one was a different style than the first, but same install process.
Parts Used:
-
Sharon from Medway, MA
-
Difficulty Level:Really Easy
-
Total Repair Time:Less than 15 mins
-
Tools:Nutdriver
1 of 3 people
found this instruction helpful.
Was this instruction helpful to you?
Thank you for voting!
Light burnt out.
Turned the wire protector to the side. Turned out the old bulb and replaced it with the new. Turned the wire protector back in place and I'm like new.
Parts Used:

-
Roscoe G from ROCHESTER, NY
-
Difficulty Level:Very Easy
-
Total Repair Time:Less than 15 mins
2 of 6 people
found this instruction helpful.
Was this instruction helpful to you?
Thank you for voting!
No ice in hopper
Ice hopper had no ice in it. But water in door worked and if I added ice to hopper, it would dispense in door. I added water to ice maker but no ice was made. Replaced ice maker and all it required was to unplug harness and remove two screws with nut driver. Easy!
Parts Used:
-
Steve from Tulare, CA
-
Difficulty Level:Really Easy
-
Total Repair Time:15 - 30 mins
-
Tools:Nutdriver
3 of 9 people
found this instruction helpful.
Was this instruction helpful to you?
Thank you for voting!
Old ice-maker went SOUTH
If a 74 year old guy can install an ice-maker in a 20 + year old fridge in 20, or so, minutes it must have had good pictures and BIG PRINT. Working quite well at this time!
Parts Used:
-
William E. from Centennial, CO
-
Difficulty Level:Really Easy
-
Total Repair Time:15 - 30 mins
-
Tools:Screw drivers
1 of 3 people
found this instruction helpful.
Was this instruction helpful to you?
Thank you for voting!
Ice Maker Leaked Water
Removed Ice Maker (2-Bolts)
Removed Ice Tray Screw Motor (to get to Ice Maker Plug- 4 small screws)
Installed new Ice Maker and reinstalled Ice Maker Screw Motor
Extreamly easy
Removed Ice Tray Screw Motor (to get to Ice Maker Plug- 4 small screws)
Installed new Ice Maker and reinstalled Ice Maker Screw Motor
Extreamly easy
Parts Used:
-
Lynn from Elkton, MD
-
Difficulty Level:Really Easy
-
Total Repair Time:15 - 30 mins
-
Tools:Nutdriver, Screw drivers
1 of 3 people
found this instruction helpful.
Was this instruction helpful to you?
Thank you for voting!
The ice maker needed replacing for a couple of years. Then, a couple of weeks ago, the water supply stopped serving both the ice maker, and the drink dispenser.
I ordered both a new replacement ice maker, and a new solenoid/pump. They were delivered to my house within one day and I had them installed in a matter of an hour. I had to use the power extension cord supplied with the ice maker.
The new "quick connect" hose couplings on the new pump are great.
The new "quick connect" hose couplings on the new pump are great.
Parts Used:
-
Robert from Mahomet, IL
-
Difficulty Level:Easy
-
Total Repair Time:30 - 60 mins
-
Tools:Nutdriver, Screw drivers
1 of 3 people
found this instruction helpful.
Was this instruction helpful to you?
Thank you for voting!
Fan stopped working, Ice maker burned out
Fan Quit So did the Ice Maker. $150.00 worth of parts plus my time. Also the Freezer Floor cracked for some stupid reason.
Parts Used:
-
TODD from PLAINVILLE, CT
-
Difficulty Level:A Bit Difficult
-
Total Repair Time:15 - 30 mins
-
Tools:Nutdriver, Screw drivers
0 of 1 people
found this instruction helpful.
Was this instruction helpful to you?
Thank you for voting!
We can't seem to get the dripping water stopped when the water fills the ice maker. The large hole in the plastic we covered, but it still drips some. So we may try epoxy. An easy job we thought, but we have this water problem.
A friend had no problem getting the new ice maker in. But then the problems started. The ice maker works great. But when the water fills the ice maker it squirts water onto the side of the freezer and ice sickles form. So we watched and decided the hole was too large so used a piece of plastic. That helped to cover the hole. But some water is still entering the freezer and not all going to the ice maker. The only other thing we can think to try is to use epoxy to try to close that place. A simple job has turned into a big headache. I wish they made the ice maker like the original one.
Parts Used:
-
Barbara from Columbus, OH
-
Difficulty Level:Difficult
-
Total Repair Time:1- 2 hours
-
Tools:Screw drivers
2 of 7 people
found this instruction helpful.
Was this instruction helpful to you?
Thank you for voting!
Bad switch for door prevented interior light from coming on
Just as your video described, although due to the age of the fridge, it took a bit longer to remove the defective switch. Your video made this so simple, I can't imagine why we lived with a dark fridge for so long! I was ready to buy a whole new fridge, as repairmen are often nonexistent for small repairs. I am the biggest fan of your company & it's repair video. THANK YOU SO MUCH
Parts Used:
-
Patricia from Sylva, NC
-
Difficulty Level:A Bit Difficult
-
Total Repair Time:15 - 30 mins
-
Tools:Pliers, Screw drivers
0 of 1 people
found this instruction helpful.
Was this instruction helpful to you?
Thank you for voting!
new part was substitute/which was some what different and was hard to get tray back in because power cord would not let it
i did every thing according to instructionwhich was simple but it did not cover how to use the extension electrical plug-in and where to put the extra cord so the tray would go back in
Parts Used:
-
Dudley from North Little Rock, AR
-
Difficulty Level:A Bit Difficult
-
Total Repair Time:30 - 60 mins
-
Tools:Nutdriver, Screw drivers
0 of 1 people
found this instruction helpful.
Was this instruction helpful to you?
Thank you for voting!
replaced the ice maker
I ordered the replacement from you guys, got the new ice maker and the plug had an adapter, but it wouldnt fit in with everything. So I cut the plug off my old ice maker and put it on the new one and it works just fine.
thanks for everthing P.S. i got the ice maker from you for 109.00 and sears wanted 130.00 for it
good stuff good deal.
thanks for everthing P.S. i got the ice maker from you for 109.00 and sears wanted 130.00 for it
good stuff good deal.
Parts Used:
-
Opie from Carrollton, GA
-
Difficulty Level:A Bit Difficult
-
Total Repair Time:30 - 60 mins
-
Tools:Screw drivers
0 of 1 people
found this instruction helpful.
Was this instruction helpful to you?
Thank you for voting!
Take out old ice maker and replace with new
Used the nutdriver to loosen two screws, life out ice maker, disconnect electric plug and put aside. Placed the new icemaker on the loosened screws, plugged in electric connector and tightened screws. Used small level to verify that unit was level.Waited about two hours for first cubes to be released into tray - has been working fine since!
Parts Used:
-
Gerald from Bismarck, ND
-
Difficulty Level:Really Easy
-
Total Repair Time:15 - 30 mins
-
Tools:Nutdriver
0 of 1 people
found this instruction helpful.
Was this instruction helpful to you?
Thank you for voting!
Icemaker quit making ice.
The parts were here the next day. After removing the old ice maker it was a simple installation using the adapter cord furnished. It took about 15 minutes. You have to work with the cord some to get it to fit behind the ice maker, but it does fit. The ice maker started up immediately & works great.
Parts Used:
-
Don from Mattoon, IL
-
Difficulty Level:Easy
-
Total Repair Time:15 - 30 mins
-
Tools:Nutdriver
0 of 1 people
found this instruction helpful.
Was this instruction helpful to you?
Thank you for voting!
Ice maker stopped working; would not fill
It was as easy as the instructions were clear (and they were). Remove 2 screws and two nuts, pop out the old ice maker, pop in the new, plug in and tighten screws/bolts. It worked. I'm happy.
Parts Used:
-
William from Darien, CT
-
Difficulty Level:Really Easy
-
Total Repair Time:15 - 30 mins
-
Tools:Nutdriver, Screw drivers
0 of 1 people
found this instruction helpful.
Was this instruction helpful to you?
Thank you for voting!