




















GSS23GGKNCWW General Electric Refrigerator - Instructions
Keep searches simple. Use keywords, e.g. "leaking", "pump", "broken" or "fit".
drinking water cooler leaked at the seam.
ordered replacement part with the understanding that tubing to the water valve could be easily removed. The tubes were carefully removed with some difficulty, and when the new tubes were inserted one leaked. The tube seat was not snug. Therefore a new water valve was purchased. The installation was successful within about 20 minutes. If I were to do the job again, both the water resevoir and valve would be ordered together.
Parts Used:

-
Alric H from Waynesville, NC
-
Difficulty Level:A Bit Difficult
-
Total Repair Time:15 - 30 mins
-
Tools:Nutdriver, Pliers, Screw drivers
4 of 6 people
found this instruction helpful.
Was this instruction helpful to you?
Thank you for voting!
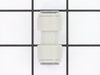
5/16" tubing to chilled water dispenser cracked
Cut out cracked tubing between valve and where tubing enters into refrigerator. Cut new tubing to length and attach to existing using union.
Parts Used:
-
Mark from Indian Trail, NC
-
Difficulty Level:Easy
-
Total Repair Time:15 - 30 mins
-
Tools:Nutdriver
4 of 6 people
found this instruction helpful.
Was this instruction helpful to you?
Thank you for voting!
Refrigerator cannot generate cool air
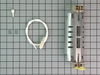
I bought the GE Refrigerator about 4 years ago for about $1500. The defrost Heater failed about one year ago. Then I called local repair guy, he replaced the Defrost Heater and charged me about $250. Now it happened again. I think we should try it to fix it by myself. I found the parts from partselect.com, it costs me $50 with 2-3 days shipping. After it replaced, it works fine again.
Note: Symtom: cannot make cool air, Frozen area with frost on the wall. Regeriator "leaking water" on floor since iced food started to melt...
Solution: open the cover of the wall inside of frozen zone, use hot water to defrost it gradually. removed the failed Defrost Heater and replaced it with new one.
Note: after you defrost the area inside of the wall, your refrigerator will work normally without the Defrost heater without any issue about week while you are waiting for the parts coming.
Note: Symtom: cannot make cool air, Frozen area with frost on the wall. Regeriator "leaking water" on floor since iced food started to melt...
Solution: open the cover of the wall inside of frozen zone, use hot water to defrost it gradually. removed the failed Defrost Heater and replaced it with new one.
Note: after you defrost the area inside of the wall, your refrigerator will work normally without the Defrost heater without any issue about week while you are waiting for the parts coming.
Parts Used:
-
HUAHUI from NEW HYDE PARK, NY
-
Difficulty Level:Easy
-
Total Repair Time:15 - 30 mins
-
Tools:Screw drivers
3 of 3 people
found this instruction helpful.
Was this instruction helpful to you?
Thank you for voting!
freezer coils would freeze
Turned the power of to the fridge took the food out of the freezer put in the fridge took out all the shelves and took off the panel to get to the coils. I used a hair dryer and a shop vac to defrost the coils used the shop vac to suck up the water as the ice melted also put some paper towel in the drip tube so the water would not go to the drip pan. Took off old defrost heater which was a single heater the new on was a double heater fished out the blue wire from the left side of compartment and ran it down the right side plugged both wires into the heater mounted it into place and put everything back. Turned on fridge and it has been working fine ever since. Thanks for the last person that did this I read his review and it really was that easy
Thanks Jerry
Thanks Jerry
Parts Used:
-
Jerry from Grass Lake, MI
-
Difficulty Level:Really Easy
-
Total Repair Time:30 - 60 mins
-
Tools:Nutdriver, Screw drivers
3 of 3 people
found this instruction helpful.
Was this instruction helpful to you?
Thank you for voting!
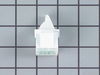
Can of fruit fell from shelf and broke the switch cover.
Removed broken switch with plastic scraper (press tension latch on bottom), moved two wire terminals to the new switch and pressed the new switch into the hole.
Parts Used:
-
James from KNOXVILLE, TN
-
Difficulty Level:Really Easy
-
Total Repair Time:Less than 15 mins
3 of 3 people
found this instruction helpful.
Was this instruction helpful to you?
Thank you for voting!
refriderator not cooling consistetly
1 opened door 2. pryed cover off from cieling 3.cut and stripped wires on 4. sodered wires from old wires to new sensor. 5 insulated conection.6 put cover back on. This did not fix the problem it was the control moduel.
Parts Used:
-
randall from coopersville, MI
-
Difficulty Level:Easy
-
Total Repair Time:Less than 15 mins
-
Tools:Pliers, Screw drivers
4 of 6 people
found this instruction helpful.
Was this instruction helpful to you?
Thank you for voting!
evap coil freezing up every 2 weeks
removed 2 - 1/4" screws and 2 phillip screws to take off the evap cover, then 2 phillip srews to take out the defrost heater assembly, replaced and put everything back together. no problem.
I GOT THE PART SO FAST THAT I WAS SURPRISED TO SEE IT THERE!
I GOT THE PART SO FAST THAT I WAS SURPRISED TO SEE IT THERE!
Parts Used:
-
Rudolph from Arroyo Grande, CA
-
Difficulty Level:Really Easy
-
Total Repair Time:Less than 15 mins
-
Tools:Nutdriver, Screw drivers
3 of 3 people
found this instruction helpful.
Was this instruction helpful to you?
Thank you for voting!
Water dispenser not dispensing water
I went to the internet and found parts select web site. Saw all of the possible fixes for my problem and read all of the other repair stories. My story actually became a journey that is still continuing. I first changed the water filter, but still no water at the dispenser. I next disconnected the coupling at the bottom of the freezer door that carries water to the dispenser and when the dispenser was depressed, water flowed at the coupling, but not at the dispenser. After reconnecting the coupling, I turned the freezer setting to 1 for 4-5 days, but still no water at the dispenser (possibly the line was frozen, but we had recently been away for a week and the water dispenser still supplied water at a freezer setting of 4). Now I am at the point of the journey into replacing parts one at a time to get water. First I ordered the dual water valve for the ice maker and water dispenser. I replaced this valve with instructions from Parts Select and still no water at dispenser. Next I ordered and replaced the switch at the dispenser lever and still no water. Next was the solenoid attached to the ice door, ordered, replaced and still no water at dispenser. I am now at the final part in this repair and that is the $132 circuit board. So I will be ordering this part soon and hopefully that will fix the issue.
Parts Used:
-
David from Georgetown, TX
-
Difficulty Level:Easy
-
Total Repair Time:15 - 30 mins
-
Tools:Pliers, Screw drivers, Wrench (Adjustable)
3 of 3 people
found this instruction helpful.
Was this instruction helpful to you?
Thank you for voting!
The rubber gasket had torn, and super glue only provided a temporary solution.
1. Emptied the crisper pan,
2. Removed it from the refrigerator,
3. Flipped it upside down,
4. Removed the old one by pulling it off,
5. Replaced it with the new OEM part. and
6. Reversed the process.
2. Removed it from the refrigerator,
3. Flipped it upside down,
4. Removed the old one by pulling it off,
5. Replaced it with the new OEM part. and
6. Reversed the process.
Parts Used:
-
Lee from UPPR MARLBORO, MD
-
Difficulty Level:Very Easy
-
Total Repair Time:Less than 15 mins
3 of 3 people
found this instruction helpful.
Was this instruction helpful to you?
Thank you for voting!
The clear insert on on of the shelves on the door brike

-
Lynn from Venice, FL
-
Difficulty Level:Very Easy
-
Total Repair Time:Less than 15 mins
3 of 3 people
found this instruction helpful.
Was this instruction helpful to you?
Thank you for voting!
Water leaking as it enters the frezer ice maker
-
Shock Tech Electric from VICKSBURG, MI
-
Difficulty Level:Really Easy
-
Total Repair Time:Less than 15 mins
-
Tools:Nutdriver
3 of 3 people
found this instruction helpful.
Was this instruction helpful to you?
Thank you for voting!
Fridge shelf dropped on floor broke front shelf insert
Opened package and just snapped in front insert. Took longer to open package than it took to replace broken insert.
Parts Used:
-
Robert from BREWSTER, MA
-
Difficulty Level:Very Easy
-
Total Repair Time:Less than 15 mins
3 of 3 people
found this instruction helpful.
Was this instruction helpful to you?
Thank you for voting!
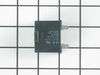
The lights were on inside however the the water/ice dispenser did not work and the fridge and freezer side was not cooling
Simply take off the back panel. Remove the old run capacitor which is attached to the compressor by a white part. It pulls right off. You will have to unplug two wires. I took a pic to ensure I plugged the wires back up the correct way. Then I attached the new capacitor to the white part and put on the sleeve that was included, plugged it back into the compressor and zip tied the excess part of the sleeve. Once done plug fridge back up (always unplug electric devices when doing maintenance) to check before replacing back panel. It may take a few minutes before it kicks on.
Parts Used:
-
Rickey from DUMAS, AR
-
Difficulty Level:Really Easy
-
Total Repair Time:30 - 60 mins
-
Tools:Socket set
4 of 6 people
found this instruction helpful.
Was this instruction helpful to you?
Thank you for voting!
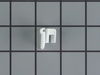
Clear shelf insert badly cracked in GE refrigerator
We just bought a new home and found that one of the clear shelf inserts in a door shelf was pretty much trashed. I was very pleased to be able to find this part at this site . Instead of having to replace the entire shelf I could just put in this part. My only comment is that this clear part is rather difficult to get into the white plastic shelf. I was afraid I was going to break it. But it has to fit snugly. The final result is very nice. Just be aware that these clear shelf inserts do not go in easily.
Parts Used:
-
Robert from CHAMPAIGN, IL
-
Difficulty Level:Really Easy
-
Total Repair Time:30 - 60 mins
3 of 3 people
found this instruction helpful.
Was this instruction helpful to you?
Thank you for voting!
Defrost not working coil iced up
Removed back wall cover over coil. Defrost all ice with a hair dryer. Cut white wires and replaced Temperature Sensor. It has been working for a week and no trouble at this time. If you have this system on your GE refrigerator do this before replacing the motherboard. I must admit I was thinking that was the trouble. Motherboard was replaced after 5 years old now 5 years later my thinking is this a 5 year problem. So try the Temperature Sensor.
Parts Used:
-
charles from SCOTTSDALE, AZ
-
Difficulty Level:Very Easy
-
Total Repair Time:30 - 60 mins
-
Tools:Nutdriver
3 of 3 people
found this instruction helpful.
Was this instruction helpful to you?
Thank you for voting!