




















GSS23GGKGCWW General Electric Refrigerator - Instructions
Keep searches simple. Use keywords, e.g. "leaking", "pump", "broken" or "fit".
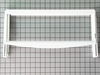
meat drawer broke
the replacement part did not have the 3 screw holes needed to 100% replace the part that broke. however, i realized that the piece that fastens to these 3 screws is the slider cover piece (i dont know its name) that has the rubber gasket was sticking every time i opened the drawer and this was what caused the OEM part to break. anyone who has a GE profile with the meat compartment must know what i am talking about - it sticks and is a bit clunky to open (until the pressure breaks the pin holding the gasket as in my case).
i simply did not place that piece back when i put the replacement part in, and now it slides much more easily. the downside is slightly less seal for the meat compartment, but to me that isnt very important because that compartment does not need to be isolated from the rest of the fridge to do its job.
i simply did not place that piece back when i put the replacement part in, and now it slides much more easily. the downside is slightly less seal for the meat compartment, but to me that isnt very important because that compartment does not need to be isolated from the rest of the fridge to do its job.
Parts Used:
-
david from penn valley, PA
-
Difficulty Level:Easy
-
Total Repair Time:Less than 15 mins
-
Tools:Screw drivers
9 of 15 people
found this instruction helpful.
Was this instruction helpful to you?
Thank you for voting!
Refrigerator door switch went bad
It was very simple! I assessed the situation and gathered my tools for the job. I used a flat head screwdriver, pliers, and electrical tape. I used the flat head screwdriver to release the switch from its location, the pliers to take the electrical terminations apart. I taped the wires individual so that I would not loose them in the door, also not to short them out. I then unpackaged the new switch to install. Pulled the tape off one of the of the terminals while holding the wire, and attached it to the new switchs terminal post. Did the same with the other wire, then snapped the new switch back into place. Immediately had results. I opened and closed the door a few times in amazement that something so annoying such as a light in your fridge could be so easy to fix. Most of all, having a business to rely on to find the part and deliver in a timely fashion. Thank you Partselect.com, you were outstanding!!!
Parts Used:
-
Jeffrey from lake Stevens, WA
-
Difficulty Level:Really Easy
-
Total Repair Time:Less than 15 mins
-
Tools:Pliers, Screw drivers
8 of 12 people
found this instruction helpful.
Was this instruction helpful to you?
Thank you for voting!
Old tray had split hands.

-
Mark from LAKE WORTH, FL
-
Difficulty Level:Very Easy
-
Total Repair Time:Less than 15 mins
6 of 6 people
found this instruction helpful.
Was this instruction helpful to you?
Thank you for voting!
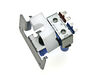
water leak on floor
pulled out refer. found leak at corner lower back, pulled off lower cover. found valve for icemaker leaking. looked in owners/inst guide, pulled up on computer, identified part, called, order overnight part. recieved part & installed, repair complete & successful.
Parts Used:
-
Gerald from Colorado Springs, CO
-
Difficulty Level:Easy
-
Total Repair Time:30 - 60 mins
-
Tools:Nutdriver, Socket set, Wrench set
6 of 7 people
found this instruction helpful.
Was this instruction helpful to you?
Thank you for voting!
Refrigerator water dispenser tube (5/16"OD) broken at the back by valve
Tube was too short so I used the union to attach additional tubing to reach the valve at the lower rear of refrigerator
Parts Used:
-
Peter from Marietta, GA
-
Difficulty Level:Really Easy
-
Total Repair Time:15 - 30 mins
-
Tools:Wrench set
6 of 7 people
found this instruction helpful.
Was this instruction helpful to you?
Thank you for voting!
water dispenser was slowly leaking
Shut off water supply. Unplugged refrigerator. Removed cover. (6 screws -- nutdriver will come in handy). Removed screw securing water valve to frame (again the nutdriver). Unplugged red and white power connectors to solenoids. Using channel locks, loosened nut holding main water supply to valve and removed. Depressed compression fittings to valve and pulled out plastic water lines that supply water dispenser and ice maker. Reconnected main water supply to new part. Pushed both water lines into respective fittings of new part. Reconnected power supply to solenoids. Attached new part to frame with screw. Replaced back cover. Turned water supply back on. Plugged refrig. back in. Problem solved! Savings = $300!
Parts Used:
-
Robert from Huber Heights, OH
-
Difficulty Level:Easy
-
Total Repair Time:30 - 60 mins
-
Tools:Nutdriver, Pliers
6 of 7 people
found this instruction helpful.
Was this instruction helpful to you?
Thank you for voting!
Water Dispenser Not Working
Before replacing the top filter housing, ensure the inlet water valve is operational. Replacing is a straight forward process. Unhook the houses from the inlet water valve in the back of the refrigerator. Remove and replace the top filter housing and ensure you replace the sealant using plumbers putty or sealant dicor butyl putty.
Parts Used:

-
BRUCE from MARGATE, FL
-
Difficulty Level:Really Easy
-
Total Repair Time:Less than 15 mins
-
Tools:Screw drivers
11 of 22 people
found this instruction helpful.
Was this instruction helpful to you?
Thank you for voting!
Freezer Light switch broke
Your instructions were "spot on"! Pried out broken switch with screwdriver-reinstalled new switch. Very easy! Ordered on line on a Wednesday new part arrived on following Saturday-Great service and will definately use again. Highly recommend PartSelect!
Parts Used:
-
Kenneth from Milford, CT
-
Difficulty Level:Really Easy
-
Total Repair Time:Less than 15 mins
-
Tools:Screw drivers
8 of 13 people
found this instruction helpful.
Was this instruction helpful to you?
Thank you for voting!
Original shelf was a split/slide in shelf which I did not like

-
Roberta from Estero, FL
-
Difficulty Level:Really Easy
-
Total Repair Time:Less than 15 mins
8 of 13 people
found this instruction helpful.
Was this instruction helpful to you?
Thank you for voting!
The glass was broken in a move

-
Daniel from pasadena, CA
-
Difficulty Level:Really Easy
-
Total Repair Time:Less than 15 mins
6 of 7 people
found this instruction helpful.
Was this instruction helpful to you?
Thank you for voting!
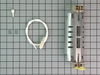
Coils in Freezer over frosted restricting air flow.Warm Frig.
1) Unplug Refrigerator. Remove all shelves and light shield in the freezer.
2)Remove panel covering refrigeration coils inside freezer in back. Two hex head screws w/nut driver.
3)Remove the defrost heater using phillips screw driver. Two screws.
4)Unplug two quick disconnect stakons and wires from heater.
5)Plug the wire coming down the right side into one side of the new heater and plug the shipped white wire into the other quick disconnect spade at the heater.
6)Install the new dual element defrost heater into the same place where the old was. Connections to the right.
7)Route the wire that was on the left across the top of the coils and down the right side.
8)Bring the existing wire from the left side down the right side and the white wire up the right side. Wires should not be tight at all and do not remove the tape at the stakon.
9)Now wires need to be cut (if necessary)and crimped together in the shipped stakon. This stakon looks like a wire nut.
10)Wires should be tucked gently into the styrofoam up and down the right side. Wirenut should be positioned so that water can not collect in it.
11)Replace the panel over the cooling coils.
12)Plug Refigerator back into the wall outlet. Put shelves and light shield back in.
13)My refrigerator is now working without a problem. It's been est two weeks.
Ice maker is also working correctly.
2)Remove panel covering refrigeration coils inside freezer in back. Two hex head screws w/nut driver.
3)Remove the defrost heater using phillips screw driver. Two screws.
4)Unplug two quick disconnect stakons and wires from heater.
5)Plug the wire coming down the right side into one side of the new heater and plug the shipped white wire into the other quick disconnect spade at the heater.
6)Install the new dual element defrost heater into the same place where the old was. Connections to the right.
7)Route the wire that was on the left across the top of the coils and down the right side.
8)Bring the existing wire from the left side down the right side and the white wire up the right side. Wires should not be tight at all and do not remove the tape at the stakon.
9)Now wires need to be cut (if necessary)and crimped together in the shipped stakon. This stakon looks like a wire nut.
10)Wires should be tucked gently into the styrofoam up and down the right side. Wirenut should be positioned so that water can not collect in it.
11)Replace the panel over the cooling coils.
12)Plug Refigerator back into the wall outlet. Put shelves and light shield back in.
13)My refrigerator is now working without a problem. It's been est two weeks.
Ice maker is also working correctly.
Parts Used:
-
Timothy from Hartford, MI
-
Difficulty Level:Easy
-
Total Repair Time:Less than 15 mins
-
Tools:Nutdriver, Screw drivers
7 of 10 people
found this instruction helpful.
Was this instruction helpful to you?
Thank you for voting!
union connector leaking
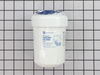
replaced with new connector and it worked great. also replaced the water filter and that was super easy!
Parts Used:
-
Amy from Bryan, TX
-
Difficulty Level:Really Easy
-
Total Repair Time:15 - 30 mins
-
Tools:Pliers
7 of 11 people
found this instruction helpful.
Was this instruction helpful to you?
Thank you for voting!
No water from the dispenser
I pulled-out & unplugged the refrigerator. Removed the screws to gain access through the lower back panel. The water valve is on the left side as I face the back of the fridge. It has one screw holding it to the frame of the fridge. Once it is free, the main water hose is unscrewed and the two out-let lines were pulled-out. If your valve was not ruined prior to this, it is ruined now, as the lines will not re-seat. Then everything is done in reverse order. I did cut 1/2 inch off of the two lines so that they reseat into the new valve. Just push into the valve and they are good.
Parts Used:
-
Anthony from Carmel, IN
-
Difficulty Level:Really Easy
-
Total Repair Time:15 - 30 mins
-
Tools:Screw drivers, Wrench (Adjustable)
5 of 5 people
found this instruction helpful.
Was this instruction helpful to you?
Thank you for voting!
Water will not dispense and the refrigerator drawers were freezing our foods and vegetables.
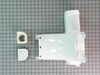
It was a simple remove and replace. The new part fits directly in place of the old part. Its a pain to remove the light but once you get the light out the job is simple. The light must be pried out gently. It is snapped in place toward the air inlet cover and needs to be pried loose. Once the light is out there are 4 screws holding the air inlet cover in place. Remove the 4 screws and unfasten the wiring harness. Once the screws and wiring harness are disconnected remove the old part. Reinstall the new part in reverse order.
Parts Used:
-
Jeff from Manteca, CA
-
Difficulty Level:Easy
-
Total Repair Time:30 - 60 mins
-
Tools:Screw drivers
5 of 5 people
found this instruction helpful.
Was this instruction helpful to you?
Thank you for voting!
Cold water for door - leaked on floor
Pulled new tubing to the tank and put a union about 8 inches down from tank to new tubing. Great repair. Parts not readily available locally.
Parts Used:
-
JOSEPH from SURFSIDE, FL
-
Difficulty Level:Easy
-
Total Repair Time:30 - 60 mins
5 of 5 people
found this instruction helpful.
Was this instruction helpful to you?
Thank you for voting!