




















GSHF9NGYBCWW General Electric Refrigerator - Instructions
Keep searches simple. Use keywords, e.g. "leaking", "pump", "broken" or "fit".
Cracked water tank from freezing
-
Steve from Easton, MO
-
Difficulty Level:Easy
-
Total Repair Time:15 - 30 mins
-
Tools:Nutdriver, Screw drivers
14 of 19 people
found this instruction helpful.
Was this instruction helpful to you?
Thank you for voting!
Internal light switch was sticking
Two tabs hold the switch in place. I used a plastic wedge to remove the switch. Removed and replaced the two connectors held in by friction. Painless.
Parts Used:
-
John from Vallejo, CA
-
Difficulty Level:Really Easy
-
Total Repair Time:Less than 15 mins
-
Tools:Screw drivers
13 of 16 people
found this instruction helpful.
Was this instruction helpful to you?
Thank you for voting!
Interior light needed replaced
Unplugged the appliance for safety. Removed two 1/4" screws that held the assembly in place. Carefully removed the wire guard that retains the glass shield. Unscrewed old light bulb and replaced with new part. Reversed the steps after cleaning glass cover.
Parts Used:

-
Leo from TWIN FALLS, ID
-
Difficulty Level:Really Easy
-
Total Repair Time:Less than 15 mins
-
Tools:Nutdriver
22 of 43 people
found this instruction helpful.
Was this instruction helpful to you?
Thank you for voting!
Broken Switch
Just pop the old one out, careful not to lose the wiring inside the ref wall & popped the new one in.
Parts Used:
-
ron from hermitage, TN
-
Difficulty Level:Really Easy
-
Total Repair Time:Less than 15 mins
12 of 14 people
found this instruction helpful.
Was this instruction helpful to you?
Thank you for voting!
no water from door water dispenser and valve chattered
Removed water filter and turned off water supply. Remove the metal plate at the rear bottom of refrigerator and the metal plate at the top rear of the refrigerator that covers the exit of the filter housing from the refrigerator. Then disconnected the water supply line and water line from the filter housing mount to the valves that control water to the door and ice maker. From inside the refrigerator, removed the two bolts holding the filter housing and then removed the filter housing and tubing. Reversed the procedure to install the new top filter housing mount with tubing.
Parts Used:
-
Arthur from Richmond, VA
-
Difficulty Level:Easy
-
Total Repair Time:15 - 30 mins
-
Tools:Nutdriver, Screw drivers, Wrench set
14 of 20 people
found this instruction helpful.
Was this instruction helpful to you?
Thank you for voting!
Water Leak in vegetable Drawers
shut off water supply to unit, pull the unit out,unplug, unscrew lower back cover, locate valve relay unit (bottom left, black and clear hose coming out of it) undo the quick connect for the clear water hose on the right (black one is for ice).
front of the unit, bottom left, locate the other hose (longer one) running to the freezer door from under the unit, undo quick connect.
Inside unit, remove middle drawers, careful with the glass panels as these just lay on top and are not fixed.
undo the 3 screws for the old tank, pull it out, snake the hoses thru the grommet on the bottom, reverse process...all set!
front of the unit, bottom left, locate the other hose (longer one) running to the freezer door from under the unit, undo quick connect.
Inside unit, remove middle drawers, careful with the glass panels as these just lay on top and are not fixed.
undo the 3 screws for the old tank, pull it out, snake the hoses thru the grommet on the bottom, reverse process...all set!
Parts Used:
-
John from Miami, FL
-
Difficulty Level:Easy
-
Total Repair Time:15 - 30 mins
-
Tools:Nutdriver, Screw drivers
13 of 17 people
found this instruction helpful.
Was this instruction helpful to you?
Thank you for voting!
Light in the refrigerator went out
After I bought what I thought I needed for the repair. I asked a friend to come over and look at it. He changed the
the light socket and put the same light bulb in and it works great. I am returning the light switch but decided to keep the light bulb.
Getting on the internet was so easy. This was really very simple. Thank you for making what I thought would be a big ordeal into something very simple.
Paulette Johnson
the light socket and put the same light bulb in and it works great. I am returning the light switch but decided to keep the light bulb.
Getting on the internet was so easy. This was really very simple. Thank you for making what I thought would be a big ordeal into something very simple.
Paulette Johnson
Parts Used:
-
Paulette B. from Santa Ana, CA
-
Difficulty Level:Really Easy
-
Total Repair Time:15 - 30 mins
13 of 18 people
found this instruction helpful.
Was this instruction helpful to you?
Thank you for voting!
slow water flow in dispenser
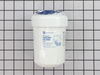
opened refrigerator door located water filter location in right back corner unscrewd 1/2 turn and out it comes without shutting off water it is a snap to do by anyone and shipment was really quick thanks. People do not call a service tech for something this simple even a child tall enough can do it.
Parts Used:
-
dwight from phoenix, AZ
-
Difficulty Level:Really Easy
-
Total Repair Time:Less than 15 mins
14 of 21 people
found this instruction helpful.
Was this instruction helpful to you?
Thank you for voting!
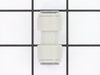
Moving the refrigerator into my new (very old) house we had to remove the doors which resulted in a crimped hose and union
Remove lower front panel, disconnect damaged union from water hose under freezer door, replace with new union, tighten and reattach front panel. No more water coming from under the unit. Ice maker and dispenser features returned to working order!
Parts Used:
-
Laura from Manchester, NH
-
Difficulty Level:Really Easy
-
Total Repair Time:15 - 30 mins
-
Tools:Screw drivers
16 of 28 people
found this instruction helpful.
Was this instruction helpful to you?
Thank you for voting!
Overflowing ice maker creating glacier on back wall
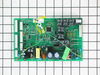
No instructions came with the replacement control board. A notice that this part supercedes the original circuit board part number would have been helpful, although it is noted on the web site IF you drill into the parts list deep enough. Diagrams on the web site gave a general location for the circuit board.
Swap-out of the boards was relatively easy, although some of the connectors were reluctant to separate.
The new control board solved the overflowing ice maker issue.
Swap-out of the boards was relatively easy, although some of the connectors were reluctant to separate.
The new control board solved the overflowing ice maker issue.
Parts Used:
-
Richard from Florence, OR
-
Difficulty Level:Easy
-
Total Repair Time:30 - 60 mins
-
Tools:Nutdriver, Pliers, Screw drivers
14 of 22 people
found this instruction helpful.
Was this instruction helpful to you?
Thank you for voting!
Freezer door would open when food door would close
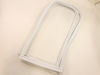
Bought two gaskets for both doors was just going to replace both due to age. Food door gasket was received damaged shipped poorly and I am still waiting on a refund. But went ahead with the repair , since freezer door was the one I was concerned about. Opened Freezer door gasket package and it was dirty and looked old from sitting in warehouse. I had to but it in the tub to make it pliable and I cleaned it also since it was in water already. Installed it pretty simple . Turned out the refrigerator wasn't leveled properly. Didn't realize the refrigerator is suppose to slope to the back . Called up GE and they helped me out. Customer Service from partselect.com and GE were very nice.
Parts Used:
-
Bernard from Bay shore, NY
-
Difficulty Level:Easy
-
Total Repair Time:30 - 60 mins
19 of 39 people
found this instruction helpful.
Was this instruction helpful to you?
Thank you for voting!
replacing ice maker drive dispensing cup
followed instructions already posted on your website, but had a very difficult time getting the dispensing side of the auger assembly to slide out, even after I disengaged the plastic tabs. There is no easy way or place to grab the assembly to pull it out. Finally turned the unit upside down and pounded on the edges of the assembly with a wood block and a small hammer. Once the part started coming out a couple of inches, I flipped over the ice bin and was able to pull it out the rest of the way, once I had something to grab on to. After the auger assembly was out the cup replacement was easy per posted instructions and the unit snapped back together easily.
Parts Used:
-
David G from Walpole, MA
-
Difficulty Level:A Bit Difficult
-
Total Repair Time:30 - 60 mins
-
Tools:Screw drivers
11 of 15 people
found this instruction helpful.
Was this instruction helpful to you?
Thank you for voting!
Ice would melt intermittently creating an ice wall on the back or side of the freezer.
Replacement of the Main Control board was relatively easy, although some of the connectors were reluctant to separate.
The new control board appears to have solved the problem.
The new control board appears to have solved the problem.
Parts Used:
-
Don from Herndon, VA
-
Difficulty Level:Easy
-
Total Repair Time:15 - 30 mins
-
Tools:Nutdriver
12 of 19 people
found this instruction helpful.
Was this instruction helpful to you?
Thank you for voting!
Icemaker flap not closing, frosting up
Watched video, however could not get outer casing off. Under the panel are three small holes, pushed up with an Allen key, used a small screwdriver to wedge out, came out easily, followed instructions from video on removing and replacing solenoid
Parts Used:
-
Graeme from Sarasota, FL
-
Difficulty Level:Easy
-
Total Repair Time:15 - 30 mins
-
Tools:Screw drivers
9 of 11 people
found this instruction helpful.
Was this instruction helpful to you?
Thank you for voting!
Fresh food section lights were all out, but the bulbs tested good elsewhere.
I popped the switch out using the blade of a small screwdriver and noticed that it connected with two wires via a slide on connector for each one. I noted the info on the old switch to identify which wire went to which terminal. I held each wire with a pair of pliers while I pulled the wire connector off the terminal on the old switch. I connected the two wires to the correct terminals on the new swith, and popped the switch back into the door frame. Easy, easy, easy and saved the $40 service call + parts cost!
Parts Used:
-
EDWARD from INDIAN WELLS, CA
-
Difficulty Level:Really Easy
-
Total Repair Time:Less than 15 mins
-
Tools:Pliers, Screw drivers
8 of 8 people
found this instruction helpful.
Was this instruction helpful to you?
Thank you for voting!