




















GSE20IBTJFBB General Electric Refrigerator - Instructions
Keep searches simple. Use keywords, e.g. "leaking", "pump", "broken" or "fit".
Fridge not cooling, freezer not defrosting
Must have spent 10+ hours solid looking up info on the internet. Our ice maker had broken years ago, the door flap had broken years ago and I thought this was the end of a fridge after just 6 years 8 months.
GE offered a "broken appliance" warranty for $379 for one year, with no guarantee that when a technician came to look at it, the repairs would be covered by the warranty!!! No thank you, you just want me to buy a new fridge. Okay, challenge on, I'll fix it myself.
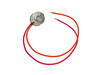
I took everything from the back of the freezer out. Spent an hour defrosting (note: use hair dryer next time). Ruled out a motherboard problem (even though it appears I have the old style motherboard), removed dust build up from fan intake. I could not get the heater to come on, so I cut off the thermostat defroster and connected the wires together. The only way to get the heater on was to set the freezer control to 0 / zero.
So, ordered part from partselect.com and it arrived the next day!!!. Installed and unit appears to be defrosting okay after a week.
So now I'm back to order the ice maker part. The door flap will wait for another time.
Note: I've put in the time for novices and recognizing how the freezer is constructed.
Time includes taking everything out of the freezer section, unscrewing everything, diagnosing problem, fixing the problem, putting everything back. I would say allow 3-4 hours and pat yourself on the back if you do it quicker.
Note#2, if you have a large build up there is a hole in the floor of the freezer section. If the water does not evaporate it will run out of the hole and into your wooden floors! Place towels both inside and outside the unit just in case!
GE offered a "broken appliance" warranty for $379 for one year, with no guarantee that when a technician came to look at it, the repairs would be covered by the warranty!!! No thank you, you just want me to buy a new fridge. Okay, challenge on, I'll fix it myself.
I took everything from the back of the freezer out. Spent an hour defrosting (note: use hair dryer next time). Ruled out a motherboard problem (even though it appears I have the old style motherboard), removed dust build up from fan intake. I could not get the heater to come on, so I cut off the thermostat defroster and connected the wires together. The only way to get the heater on was to set the freezer control to 0 / zero.
So, ordered part from partselect.com and it arrived the next day!!!. Installed and unit appears to be defrosting okay after a week.
So now I'm back to order the ice maker part. The door flap will wait for another time.
Note: I've put in the time for novices and recognizing how the freezer is constructed.
Time includes taking everything out of the freezer section, unscrewing everything, diagnosing problem, fixing the problem, putting everything back. I would say allow 3-4 hours and pat yourself on the back if you do it quicker.
Note#2, if you have a large build up there is a hole in the floor of the freezer section. If the water does not evaporate it will run out of the hole and into your wooden floors! Place towels both inside and outside the unit just in case!
Parts Used:
-
Greg from Allen, TX
-
Difficulty Level:Difficult
-
Total Repair Time:More than 2 hours
-
Tools:Nutdriver, Pliers, Screw drivers
1 person
found this instruction helpful.
Was this instruction helpful to you?
Thank you for voting!
ice on the frezer compartment
turn off the refrigerator,then open the cover and saw lot of ice. then get a hair dryer blower and blow a heat to melt the ice. cut the thermostat defrost.
Parts Used:
-
Rafael from New Haven, CT
-
Difficulty Level:Easy
-
Total Repair Time:1- 2 hours
-
Tools:Pliers, Screw drivers
1 of 2 people
found this instruction helpful.
Was this instruction helpful to you?
Thank you for voting!
Broke the fan blade when replacing the Evaporator motor

-
Rose from Dorr, MI
-
Difficulty Level:Really Easy
-
Total Repair Time:Less than 15 mins
-
Tools:Nutdriver
2 of 5 people
found this instruction helpful.
Was this instruction helpful to you?
Thank you for voting!
Light was flicking

-
Stephanie from KEARNY, NJ
-
Difficulty Level:Really Easy
-
Total Repair Time:Less than 15 mins
-
Tools:Screw drivers
1 of 2 people
found this instruction helpful.
Was this instruction helpful to you?
Thank you for voting!
Freezer working but fridge not cooling.
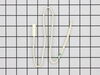
Totally followed the instructions of the video that came with the sensor. Unplugged the the fridge, defrosted the freezer. Cut off the main sensor that usually is the one that goes out. Installed the the new sensor with new wire terminals, crimped them and covered with electrical tape. Fridge works like a charm. Partsselect is excellent. Saved me a few hundred dollars versus having a GE Tech come and do it.
Parts Used:
-
Kent from Bartlesville, OK
-
Difficulty Level:Really Easy
-
Total Repair Time:15 - 30 mins
-
Tools:Socket set
1 of 2 people
found this instruction helpful.
Was this instruction helpful to you?
Thank you for voting!
Rear of freezer all iced up would not defrost
first removed two srews removed rear panel hair dryer to melt ice (took 30 minutes) cut two wires to thermostat spliced onto new part clipped it onto tube -done replace rear panel and 2 screws. very easy job after reading other letters and their experience -saved myself $500.00
Parts Used:
-
Patrick from Punta Gorda, FL
-
Difficulty Level:Really Easy
-
Total Repair Time:15 - 30 mins
-
Tools:Pliers, Screw drivers
1 of 2 people
found this instruction helpful.
Was this instruction helpful to you?
Thank you for voting!
Broken light switch
took a little more effort than the video show to remove old module and replace new. Works fine now.
Parts Used:
-
Ted from SANDWICH, IL
-
Difficulty Level:Easy
-
Total Repair Time:15 - 30 mins
-
Tools:Screw drivers
1 of 2 people
found this instruction helpful.
Was this instruction helpful to you?
Thank you for voting!
whining noise from freezer
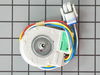
had to remove ice maker and several panels to get to the fan. wires for fan encapsulated so had to cut old and new wires then solder them together while working inside the small freezer area. not too bad all in all took about an hour to get it done. no more wind thru the trees noise and is working fine
Parts Used:
-
Everett from Wylie, TX
-
Difficulty Level:A Bit Difficult
-
Total Repair Time:30 - 60 mins
-
Tools:Nutdriver
1 of 2 people
found this instruction helpful.
Was this instruction helpful to you?
Thank you for voting!
The fan in the freezer was making a high pitched whining noise.
Unplugged the freezer. Then I gained access to the fan: remove the top freezer rack, remove the ice tray, remove the air flow manifold(needed to unscrew some screws), remove the manifold over the fan and cooling element. I unscrewed the fan mounting bracket. The fan motor's wires are plumbed through some plastic that i would have had to remove, so I decided instead to cut the wires and splice in the new fan motor. Then I put everything back together - the new motor works fine and doesn't make the whining noise.
Parts Used:
-
Alan from Redmond, WA
-
Difficulty Level:A Bit Difficult
-
Total Repair Time:30 - 60 mins
-
Tools:Nutdriver, Screw drivers
1 of 2 people
found this instruction helpful.
Was this instruction helpful to you?
Thank you for voting!
Refridgerator warm, some ice buildup apparent in freezer
Find online diagram of freezer section for reference. Disconnect power, remove evap cover plate (214) by removing one of the drawer guide rails.
As evidence of your problem, you might see a giant block of ice built up around the coil. Let this defrost this before continuing.
Find THERMOSTAT DEFROST (24) sensor and clip connecting wires. Match replacement sensor wires by color. Twist and solder wires; or wire-nuts and twisting alone might be okay. If not soldering, seal the wire-nuts connections from moister with a good sizeable piece of duct tape. Make sure your wires are out of the way and not left dangling on the evap heater coil, where they could melt.
Suggest concurrent replacement of evap fan motor if this has not already been done in the past.. This become noisy with age and damage from the ice build up seems to have made mine worse.
As evidence of your problem, you might see a giant block of ice built up around the coil. Let this defrost this before continuing.
Find THERMOSTAT DEFROST (24) sensor and clip connecting wires. Match replacement sensor wires by color. Twist and solder wires; or wire-nuts and twisting alone might be okay. If not soldering, seal the wire-nuts connections from moister with a good sizeable piece of duct tape. Make sure your wires are out of the way and not left dangling on the evap heater coil, where they could melt.
Suggest concurrent replacement of evap fan motor if this has not already been done in the past.. This become noisy with age and damage from the ice build up seems to have made mine worse.
Parts Used:
-
Mahvash from Gold Canyon, AZ
-
Difficulty Level:A Bit Difficult
-
Total Repair Time:30 - 60 mins
-
Tools:Nutdriver, Screw drivers
1 of 2 people
found this instruction helpful.
Was this instruction helpful to you?
Thank you for voting!
Whirling noise coming from freezer section
1) remove the ice bucket. 2) remove light cover and bulb. 3) remove back panel with 2 screws. 4) remove fan shield. 5) unlug 2 elec connections. 6) remove fan housing. 7) extract wiring grommet and use exacto knife to slice thru grommet along the length of it to release wires. don't cut light wires. 8) cut up old fan/light electrical plug to free wire nubs for light. 9) install nubs in new fan plug. 10) remove old fan motor, pull blades. 11) install blades on new fan moter and install fan into housing. 11) reinstall
Parts Used:
-
David from Riverview, FL
-
Difficulty Level:A Bit Difficult
-
Total Repair Time:30 - 60 mins
-
Tools:Nutdriver, Screw drivers
1 of 3 people
found this instruction helpful.
Was this instruction helpful to you?
Thank you for voting!
The door activated light switch was missing.
Pulled the two wires out from the access hole in the lower part of the refrigerator. Put them in the spade connectors on the new switch, and pushed the switch into place.
Parts Used:
-
Don from Eugene, OR
-
Difficulty Level:Really Easy
-
Total Repair Time:Less than 15 mins
1 of 3 people
found this instruction helpful.
Was this instruction helpful to you?
Thank you for voting!
defrost problem
I replaced the thermostat. I simply followed the insructions in the video on your website and it was done in about 5-10 minutes.
Parts Used:
-
Scott from Greenbelt, MD
-
Difficulty Level:Really Easy
-
Total Repair Time:Less than 15 mins
-
Tools:Nutdriver
0 of 1 people
found this instruction helpful.
Was this instruction helpful to you?
Thank you for voting!
The freezer temperature was increasing.
i took out back frame and cleared off the ice on the metal condenser. I cut wires from old thermostat and removed it. Stripped new wires and attached to the wires in the frig. We taped it with electrical tape and put it back and closed it up. it works beautifully! We watched a video on youtube and that helped a great deal!
Parts Used:
-
Susan from Sea Cliff, NY
-
Difficulty Level:Really Easy
-
Total Repair Time:15 - 30 mins
-
Tools:Screw drivers
0 of 1 people
found this instruction helpful.
Was this instruction helpful to you?
Thank you for voting!
warm, refrigerator/freezer,frozen up
verify the heating element was o.k., found the top of the thermostat popped off,it had water in it,probably froze and came apart,cut the wires to the old thermostat and splice the new ones together,put the cover back on and verify operation
Parts Used:
-
richard from cleburne, TX
-
Difficulty Level:Really Easy
-
Total Repair Time:Less than 15 mins
-
Tools:Nutdriver
0 of 1 people
found this instruction helpful.
Was this instruction helpful to you?
Thank you for voting!