




















GSD4325Z00BB General Electric Dishwasher - Instructions
Keep searches simple. Use keywords, e.g. "leaking", "pump", "broken" or "fit".
Motor was jammed, just heard a humm from unit.
First I removed the dishwasher from under the counter. I turned it onto it's side so I had access to the motor and pump underneath. I determined which version of the old pump I had. I removed the old part and easily installed the new motor/pump following the directions. It took a little while for the water to begin flowing when I started it back up. Eventually it did get going.
Parts Used:
-
Brook from Madison, WI
-
Difficulty Level:A Bit Difficult
-
Total Repair Time:30 - 60 mins
-
Tools:Screw drivers, Wrench (Adjustable)
9 of 10 people
found this instruction helpful.
Was this instruction helpful to you?
Thank you for voting!
Dishwasher was leaking between the pump motor and pump assembly
The repair went smoothly. There were actually instructions included with the parts, so that was nice. The only "gotcha" I found was that . . . after you take off the old food-chopper, you have unscrew the old impeller from the motor shaft. This was a bit difficult and you'll want some good pliers to do it. Don't worry about stripping where the food chopper screwed on-to, that part is attached to the impeller and there is a new one on the new impeller. When I re-installed everything onto the dishwasher, it rattled the first couple of times while the wear-ring was finding it's seat. Don't worry, that's normal. It went away by the third wash. I think I still have a small crack in the pump housing, though. The pump housing is two halves of molded plastic fused together along a seam, and I think the seam is starting to leak. It's about one drop every 45 seconds. I'm thinking JB Weld will fix it.
Parts Used:
-
Jesse from Royal Oak, MI
-
Difficulty Level:A Bit Difficult
-
Total Repair Time:30 - 60 mins
-
Tools:Pliers, Screw drivers
10 of 13 people
found this instruction helpful.
Was this instruction helpful to you?
Thank you for voting!
Dishwasher would not Drain
Since the pump and the motor was a single unit, I removed the assembly by disconnecting the electrical plugs and drainage connections. This was a very simple installation. I reversed the above steps, reinstalled the dishwasher and all worked out well.
Parts Used:
-
Alfred from Fernandina Beach, FL
-
Difficulty Level:Really Easy
-
Total Repair Time:15 - 30 mins
-
Tools:Pliers, Screw drivers, Socket set
10 of 13 people
found this instruction helpful.
Was this instruction helpful to you?
Thank you for voting!
The Spray Arm's Tower Was Broken Off
Unscrewed the old spray arm (I needed pliers but you may not need them)and screwed on the new spray arm.
Parts Used:
-
James from Atlanta, GA
-
Difficulty Level:Really Easy
-
Total Repair Time:Less than 15 mins
9 of 11 people
found this instruction helpful.
Was this instruction helpful to you?
Thank you for voting!
Control panel inoperable
I only had to remove the inside door panel then the bad control panel , a total of 10 screws, and then plug in the 3 harnesss wires. FIred it up and worked like a champ!
Parts Used:
-
Jeff from Castle Rock, CO
-
Difficulty Level:Really Easy
-
Total Repair Time:Less than 15 mins
-
Tools:Screw drivers
9 of 12 people
found this instruction helpful.
Was this instruction helpful to you?
Thank you for voting!
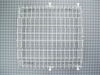
Replaced the upper dishwasher rack due to rusting.
To remove the upper rack, twist the support rail end caps toward the center of the machine and slightly downward. The caps will come off and you can slide the new rack into place. Reverse the process to replace the end caps. One of mine broke and I will need to order replacements.
The original rack is no longer available. The replacement, which is the only one GE offers, has less storage space and is not as sturdy. It bends downward when full. I am very disappointed and recommend not replacing the rack unless you have no other choice.
The original rack is no longer available. The replacement, which is the only one GE offers, has less storage space and is not as sturdy. It bends downward when full. I am very disappointed and recommend not replacing the rack unless you have no other choice.
Parts Used:
-
Jean from Mickleton, NJ
-
Difficulty Level:Easy
-
Total Repair Time:Less than 15 mins
7 of 8 people
found this instruction helpful.
Was this instruction helpful to you?
Thank you for voting!
Uppper Dish Rack with wheels
It was tricky to get the old rack off. Usually you can unclip the clips closest to the front wheels to pull the rack out. However, there is an area behind one of the wheels that you can kind of release and than pull the rack out. You then have to slide out the funnel/fan piece from the middle. That piece slides/ snaps in the middle of the the new rack. Then slide the new rack in place, re attach the release used to slide oldrack out.
That is it !!
That is it !!
Parts Used:
-
Lesley from Laguna Niguel, CA
-
Difficulty Level:Easy
-
Total Repair Time:15 - 30 mins
8 of 11 people
found this instruction helpful.
Was this instruction helpful to you?
Thank you for voting!
Dishwasher would not start
Research the problem on the internet .People suggestion was to replace the sequence switch . If this does not work replace the mother board .The sequence switch was replaced and fixed the problem .
Parts Used:
-
Maurice from Caldwell, NJ
-
Difficulty Level:Easy
-
Total Repair Time:30 - 60 mins
-
Tools:Pliers, Screw drivers
14 of 30 people
found this instruction helpful.
Was this instruction helpful to you?
Thank you for voting!
Dishwasher wouldn't drain
Once the new motor and pump kit arrived. I removed the dishwasher, turned it upside down and replaced the motor and pump with the new one per the directions. Difficulty came in feeding the electrical wire/plug back through the cabinets. Once done, turned on the dishwasher, filled the tub, then manually moved the dial to drian. The water still would not drain from the tub. I searched further for the problem. Here it is; Found the air gap tube was plugged with food. Once I removed, cleaned and reinstalled the air gap, the tub drained fast and everything works great. So, I hope you folks put this up in your troubleshooting section for others to check before buying a pump and motor kit. If you had, I would have been able to check out the air gap, clean it out first before spending $140.00 for a pump and motor kit I didn't need. Anyway, lessons learned..Jeff
Parts Used:
-
Jeffery from Sparks, NV
-
Difficulty Level:Easy
-
Total Repair Time:30 - 60 mins
-
Tools:Nutdriver, Pliers, Screw drivers
6 of 7 people
found this instruction helpful.
Was this instruction helpful to you?
Thank you for voting!
Not Draining, Leaking
Unplugged unit, unscrewed screws on top of dishwasher attached to countertop, undid water supply and drain hose that goes into tee with garbage disposal. Using crescent wrench turned front leveling screws up all the way and slid/rocked dishwasher out from under the counter - I had no problem leaving back leveling screws down. Turned dishwasher over on some towels (it WILL leak some water so spread out some towels!) so it was oriented like the directions that came with pump and motor. The directions were good, although color or a picture might have been more helpful. CHECK the new pump/ motor unit CAREFULLY for any loose debris from packing etc. I had a small piece of plastic that was in the top of the motor that goes in the dishwasher bottom that rattled around after I installed everything and put it back. I was able to get to it from the drain assembly in the tub but it made a heck of a racket at first. All in all, I had a great experience. I'm glad I ordered the pump and motor even though I only thought I needed the drain solenoid because when I took the old unit out, the prop on the old impeller was almost gone. Easy to order, good customer service (I called with a question and talked to a wonderful customer service representative!), good directions and easy to do. I'd say a 4 out of 10 in terms of difficulty. Thanks PartSelect!
Parts Used:
-
Brian M. from Hereford, AZ
-
Difficulty Level:Easy
-
Total Repair Time:1- 2 hours
-
Tools:Pliers, Screw drivers, Socket set, Wrench (Adjustable)
5 of 6 people
found this instruction helpful.
Was this instruction helpful to you?
Thank you for voting!
Motor and pump kit was easy, but the panel was a bit difficult. Lining up pnl to mount and adding the nut plates.
Remove two front mount screws from counter top
Lower dishwasher floor feets
Pulled electric leads cover and disconnect electric leads
Pulled dishwasher out and leaned on it's back
Sorry missed a step turn off breaker to dishwasher
Removed water line and drain hose
Removed motor/pump using only a socket setup and cross tip screw driver
Installed new motor/pump using same tools as removal
Stand dishwasher back up push back into space and reconnect all item mention in removal
Turn back on breaker
Ops check dishwasher
Done.
Lower dishwasher floor feets
Pulled electric leads cover and disconnect electric leads
Pulled dishwasher out and leaned on it's back
Sorry missed a step turn off breaker to dishwasher
Removed water line and drain hose
Removed motor/pump using only a socket setup and cross tip screw driver
Installed new motor/pump using same tools as removal
Stand dishwasher back up push back into space and reconnect all item mention in removal
Turn back on breaker
Ops check dishwasher
Done.
Parts Used:
-
Roderick from SNELLVILLE, GA
-
Difficulty Level:Easy
-
Total Repair Time:1- 2 hours
-
Tools:Pliers, Screw drivers, Socket set
4 of 4 people
found this instruction helpful.
Was this instruction helpful to you?
Thank you for voting!
Motor/Pump Siezed - Only Getting A "Humming" Sound
Only getting "humming" sound from dishwasher. Although water had filled the dishwasher tub, pump/motor would not operate. After some research, figured the motor had siezed and I had to replace the pump/motor assembly as mentioned on this site. The kit came in a couple days and I reserved a Sunday afternoon for the repair which I had never done before. Hardest part of repair was unhooking and removing dishwasher from under counter and then getting it back in proper place. I would suggest providing some instruction within the repair instructions showing how the dishwasher is installed or how to remove it as I had never installed one so I was not quite sure what screws etc I needed to remove on the dishwasher itself to start to remove it? I was able to find the original installation instruction for the dishwasher and found that all you had to do was remove two screws from the inside top of the dishwasher which were securing it to the bottom side of the kitchen counter and then the whole thing just slides out. Once removed, turned dishwasher over to access bottom where pump/motor is located. After determining which diagram to use with the instructions, proceeded to replace the motor/pump assembly. It came out easily after wrestling with some corroded bolts/nuts and the existing pump inlet and outlet hose clamps. Mine were old and worthless and no new ones (3-4") are supplied with the kit. Had to run to hardware store to get new hose clamps for the inlet/outlet of the pump before intalling new one. Suggest new hose clamps be provided with the kit. Only thing that was not too clear in instructions was when reconnecting power wiring harness to motor. By looking closely at the instruction diagram I was able to locate what looked to be the right power extension harness from the bag of parts and attach it to the existing power wire harness and the new motor. Suggest also that you somehow better distinguish or identify the proper way the power wire harness should be fastned to the motor? The existing power wires were both the same color and both the female and male connections for the power at the new motor were identical leaving you to guess which wire goes to which connection. After re-installing dishwasher, put about a gallon of water in bottom of unit prior to starting and then put it through a few cycles. It has been working just like new. Suggest having a helper when removing and re-installing dishwasher from under kitchen counter to assist with the power cord, water line, drain line, and help to turn the dishwasher upside down and right side up again.
Parts Used:
-
Scott from Oklahoma City, OK
-
Difficulty Level:A Bit Difficult
-
Total Repair Time:More than 2 hours
-
Tools:Pliers, Screw drivers, Socket set, Wrench set
5 of 7 people
found this instruction helpful.
Was this instruction helpful to you?
Thank you for voting!
control switch assembly burned out.some grease was found inside.
First I turned power to dishwasher off at fuse box.then,removed inside panel inside dishwasher about six screws.examined the control switch assembly and removed two screws that hold it into place.carefully removed two wire housings.Then located the part no.and model no.on the control panel.ordered new part online.The new control panel assembly arrived the next day.Installed it right away.Our dishwasher works as good as new. Thanks
Parts Used:
-
Timothy from Abingdon, MD
-
Difficulty Level:Easy
-
Total Repair Time:15 - 30 mins
-
Tools:Screw drivers
4 of 4 people
found this instruction helpful.
Was this instruction helpful to you?
Thank you for voting!
Leaking water pump
Disconnect water line and screws (2) holding dishwasher under cabinet, and clamp for wastewater line. Pulled dishwasher out, turned on its side, and removed pump. Disassembled pump per instructions (great instructions) and installed new parts. Reversed to reassemble and except for a loose clamp that leaked (I tightened) it went well. Just under 1 hour.
Parts Used:
-
John from Palatine, IL
-
Difficulty Level:Easy
-
Total Repair Time:30 - 60 mins
-
Tools:Nutdriver, Screw drivers, Wrench (Adjustable)
7 of 13 people
found this instruction helpful.
Was this instruction helpful to you?
Thank you for voting!
Touchpad was completely unresponsive
I had already removed the screws that hold the inner door piece in place when diagnosing the problem. I snapped the new controller in place, put the 3 or so screws back in that hold it to the door, and replugged the wire harness connections from the power and the Sequencer. I put the inner piece of the door in place and replaced those 5 or so screws and restored power from the breaker box. The dishwasher gave a solid beep while the clean light flashed continuously. No other buttons were responsive and pressing the reset button caused a beep but nothing else. I began to research and diagnose that problem which was leading me to the Sequencer when I realized there was a "rewiring" plug on the controller I replaced that was not on the new controller. The controller which is made by Torisan is a generic part used by many manufacturers. The "rewiring" plug which goes into slot CN5 on the controller circuit card, which has wires that comes out of it and go back into other slots in the plug, is used to get the get the correct "pinout" sequence for GE's use of this generic component. Although I could find no information on this, the continuous beep was telling me there was a wiring problem. I removed the plug from the old controller, put it in CN5 of the new controller and the dishwasher works like a charm.
Parts Used:
-
Daniel from Ashburn, VA
-
Difficulty Level:Easy
-
Total Repair Time:15 - 30 mins
-
Tools:Nutdriver
4 of 5 people
found this instruction helpful.
Was this instruction helpful to you?
Thank you for voting!