




















GS2727GEHB Maytag Refrigerator - Instructions
Keep searches simple. Use keywords, e.g. "leaking", "pump", "broken" or "fit".
Broken refrigerator compartment light switch.
The best part of the repair was how easy it was to find and order the part. Instead of searching the parts houses around town I just went to the PartSelect web site, quickly found and ordered the part in about five minutes, received the part the next day at my home and was ready to make the repair. Wow! What a pleasure for something to work the way it was meant to. Removed old switch located by prying out with sharp knife or screwdriver. Don't worry about breaking it or cracking plastic. Disconnect(unplug) wires from back of switch. Replace (plug-in) wires on back of new switch. Insert in location of old switch. Finisheed.
Parts Used:

-
Jack from Topsail Beach, NC
-
Difficulty Level:Really Easy
-
Total Repair Time:Less than 15 mins
-
Tools:Screw drivers
1 of 3 people
found this instruction helpful.
Was this instruction helpful to you?
Thank you for voting!
icemaker
-
Harold from Lindenhurst, IL
-
Difficulty Level:Really Easy
-
Total Repair Time:30 - 60 mins
-
Tools:Nutdriver, Pliers, Screw drivers
1 of 3 people
found this instruction helpful.
Was this instruction helpful to you?
Thank you for voting!
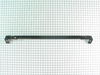
Kickplate was broken where hinge covers attach
Repair requires the removal of the bottom hinges on the doors. No problem for the refrigerator side, but the freezer side has wiring in the freezer door for the water/ice dispenser, so have some wood blocks handy to prop it up. Biggest challenge is that in the center of the kickplate there is a mounting screw (Torx head) that is behind the kickplate and runs vertically. I removed the old kickplate without removing this screw, just broke the kickplate off. The screw is very difficult to access with any tool. Removal wasn't too terrible because the old kickplate was gone; but insertion with the new kickplate in place was a challenge. I used a Torx socket, but because there isn't enough clearance for the ratchet, I held the socket into place by wedging a large flat blade screwdriver between the bottom of the socket and the floor. I was just able to get my index finger under the new kickplate to slowly turn the socket to fasten the screw. Unfortunately I didn't feel as though I could skip the screw - without it the kickplate sags in the center.
Parts Used:
-
Todd from York, PA
-
Difficulty Level:A Bit Difficult
-
Total Repair Time:1- 2 hours
-
Tools:Nutdriver, Pliers, Screw drivers, Socket set
0 of 1 people
found this instruction helpful.
Was this instruction helpful to you?
Thank you for voting!
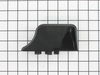
Cover was not installed properly at factory and the molded clips were broken off.
Since the old one kept falling off the disassembly was very easy. I lined up the five prongs on the new cover with the holes on the unit and snapped it into place. Job done,
Parts Used:
-
William from Lake Lure, NC
-
Difficulty Level:Really Easy
-
Total Repair Time:Less than 15 mins
0 of 1 people
found this instruction helpful.
Was this instruction helpful to you?
Thank you for voting!
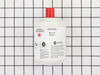
annual replacement
have always done it myself, but Maytag store closed, so I didn't know where to purchase filter
I received it from Parts Select, in 2 days and if I remember right, price was cheaper than I paid last year, at store.
I received it from Parts Select, in 2 days and if I remember right, price was cheaper than I paid last year, at store.
Parts Used:
-
Marilyn from Rancho Mirage, CA
-
Difficulty Level:Really Easy
-
Total Repair Time:Less than 15 mins
1 of 4 people
found this instruction helpful.
Was this instruction helpful to you?
Thank you for voting!
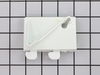
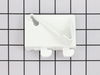
The brackets holding the door baskets in our refrigerator broke.
I simply removed the old brackets and replaced with the new ones. Can't get any easier than that!
Parts Used:
-
James from Sacramento, CA
-
Difficulty Level:Really Easy
-
Total Repair Time:Less than 15 mins
0 of 1 people
found this instruction helpful.
Was this instruction helpful to you?
Thank you for voting!
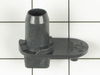
Fresh food door would swing open too far
Removed the food out of the fresh food door. Removed the top hinge cover, removed the 3 nut screws on top. Lifted the door off of the bottom pin. Set the door to one side. Removed the lower hinge pin with a screw driver and replaced with new product. Lifted door back onto lower hinge pin, secured the top pin hinge with the 3 nut screws, replaced the top hinge cover and placed food back into the door. Done in less than 15 minutes.
Parts Used:
-
Ron from Arlington, TX
-
Difficulty Level:Really Easy
-
Total Repair Time:Less than 15 mins
-
Tools:Nutdriver, Screw drivers
0 of 1 people
found this instruction helpful.
Was this instruction helpful to you?
Thank you for voting!
water filter expired
My husband did the replacement of the filter, so it was really easy for me. Easy for him too! The best part was this company had the best price, and the part was here in no time!
Parts Used:
-
Virginia from Belfast, ME
-
Difficulty Level:Really Easy
-
Total Repair Time:Less than 15 mins
0 of 1 people
found this instruction helpful.
Was this instruction helpful to you?
Thank you for voting!
Light switch broken
I used a knife blade to slip under the edge of old switch to pray it out of the hole it was inserted into, switched the wires and replaced the new switch into the same hole. It took about five minutes!
Parts Used:
-
Keith from Racine, WI
-
Difficulty Level:Really Easy
-
Total Repair Time:Less than 15 mins
0 of 1 people
found this instruction helpful.
Was this instruction helpful to you?
Thank you for voting!
broken basket hing
replaced the broken basket stop with new one. took a whole minute to do so!!!!!
Parts Used:
-
Bruno from Daly City, CA
-
Difficulty Level:Really Easy
-
Total Repair Time:Less than 15 mins
0 of 1 people
found this instruction helpful.
Was this instruction helpful to you?
Thank you for voting!
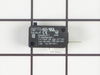
ice dispenser switch burnt up
it was a cake walk,removed a few screws unpluged assembly installed new switch didnt get shocked, nothing started on fire, ice came out like it should afterwards
Parts Used:
-
Allan from Ingleside, IL
-
Difficulty Level:Easy
-
Total Repair Time:15 - 30 mins
-
Tools:Pliers, Screw drivers
0 of 1 people
found this instruction helpful.
Was this instruction helpful to you?
Thank you for voting!
experienced a failed reostat
Obtained the part from part select in record time. Exact part arrived next day and changed out the faulty part within an hour. great service and have already booked-marked the website should future appliance parts be needed. Fair price too!
Parts Used:
-
Robert from Pipersville, PA
-
Difficulty Level:A Bit Difficult
-
Total Repair Time:30 - 60 mins
-
Tools:Nutdriver, Screw drivers
0 of 1 people
found this instruction helpful.
Was this instruction helpful to you?
Thank you for voting!
Broken ice maker arm mount
Pried out ice blade bar and removed broken water fill cup and replaced with new one.The whole repair costs $9.52 So I saved $ 190 over the cost of Appliance man visit!
It would have been $150& $50 for visit to replace ice maker unit.
It would have been $150& $50 for visit to replace ice maker unit.
Parts Used:

-
Daniel from Orleans, MA
-
Difficulty Level:Really Easy
-
Total Repair Time:15 - 30 mins
-
Tools:Screw drivers
0 of 1 people
found this instruction helpful.
Was this instruction helpful to you?
Thank you for voting!
Drive ring was cracked (power failure & froze-up when power came on)
I read what other people had done so I tried the easiest solution--Forced, without breaking, the plastic & fit the ring right where it needed to be.
Parts Used:

-
Joseph from Colonial Heights, VA
-
Difficulty Level:Easy
-
Total Repair Time:15 - 30 mins
0 of 1 people
found this instruction helpful.
Was this instruction helpful to you?
Thank you for voting!
Frost in bottom freezer, freezer 8%, ice maker works
replaced electric control board, defrost for six hours. next day (24 hours) same problem, dusterhoff2928@charter.net
Parts Used:
-
Richard from Smyrna, GA
-
Difficulty Level:Easy
-
Total Repair Time:15 - 30 mins
0 of 1 people
found this instruction helpful.
Was this instruction helpful to you?
Thank you for voting!